Quickstart for Ascend on Fabric (experimental)
Using Fabric as an Instance Store and Data Plane in Ascend is experimental. While Microsoft Fabric is Generally Available (GA), it lacks many key features that may make the experience suboptimal.
Introduction
In this quickstart guide you will learn how to use Ascend with Microsoft Fabric. You will be guided through the process of:
- Connecting Ascend to Fabric
- Creating a Fabric workspace
- Setting up your Instance Vault
- Setting up your Instance Store
- Setting up your Environment Vault(s)
- Creating an Ascend Project using Fabric as the Data Plane
- Setting up a Repository
- Creating your developer Workspace
- Setting up your Profile and Connection to use Fabric
- Building & running your first Flow
This quickstart grants elevated permissions for the sake of simplicity. We recommend isolating your Ascend Instance and each Environment's resources in separate Azure resource groups, subscriptions, or tenants based on your security requirements.
Prerequisites
To complete this quickstart you need:
- An Ascend Instance
- An Azure account
- The ability to create Azure resources (may require elevated permissions for some steps)
- A terminal with the Azure CLI installed
Create Azure resources
In Azure you need to create:
- an Azure Resource Group
- an Azure Storage Account resource
- (optionally) a Fabric Capacity resource
- an Azure Service Principal/App Registration
You can use existing Azure resources if you have them. This section will walk through setup from an empty Azure account.
-
Make sure you are logged into Azure with the Azure CLI:
az login -
Set the following variables:
warningRESOURCE_GROUP,STORAGE_ACCOUNT_NAME, andSERVICE_PRINCIPAL_NAMEmust be globally unique.# The name of your Azure resource group
RESOURCE_GROUP=<your-resource-group-name>
# The location to create Azure resources in
# use `az account list-locations` for all options
LOCATION="eastus"
# The name of your Azure Storage Account and Container
# IMPORTANT: storage accounts must be unique and only contain lowercase letters and numbers
# https://learn.microsoft.com/azure/storage/common/storage-account-overview#storage-account-name
STORAGE_ACCOUNT_NAME=<yourstorageaccountname>
STORAGE_CONTAINER_NAME="ascend-staging"
# The name of your Azure Service Principal
SERVICE_PRINCIPAL_NAME=<your-service-principal-name> -
Run the following commands:
# Create your resource group
az group create \
    --name $RESOURCE_GROUP \
    --location $LOCATION

# create the storage account
az storage account create \
    --name $STORAGE_ACCOUNT_NAME \
    --resource-group $RESOURCE_GROUP \
    --location $LOCATION \
    --sku Standard_LRS \
    --kind StorageV2 \
    --enable-hierarchical-namespace true

# create the storage container
az storage container create \
    --name $STORAGE_CONTAINER_NAME \
    --account-name $STORAGE_ACCOUNT_NAME

# create the service principal
SP_OBJECT=$(az ad sp create-for-rbac \
    --name $SERVICE_PRINCIPAL_NAME \
    --role "Owner" \
    --scopes $(az group show --name $RESOURCE_GROUP --query id --output tsv))

# give the service principal Blob Data Contributor access to the storage account
az role assignment create \
    --role "Storage Blob Data Contributor" \
    --assignee $(az ad sp list --display-name $SERVICE_PRINCIPAL_NAME --query "[0].appId" --output tsv) \
    --scope $(az storage account show --name $STORAGE_ACCOUNT_NAME --resource-group $RESOURCE_GROUP --query id --output tsv)
Create Microsoft Fabric resources
-
(Optional) Navigate into the Resource Group in the Azure portal and create a Fabric Capacity resource to use across your Fabric workspaces. Alternatively, you can skip this step and use a trial license.
-
Navigate to the Fabric GUI and create a new workspace (or use an existing one).
-
For License Mode: if you have a Fabric Capacity resource from above, select Fabric Capacity. If not, select Trial. If you're unable to set the license to Trial, select Premium per-user and your license will automatically be converted to Trial later.
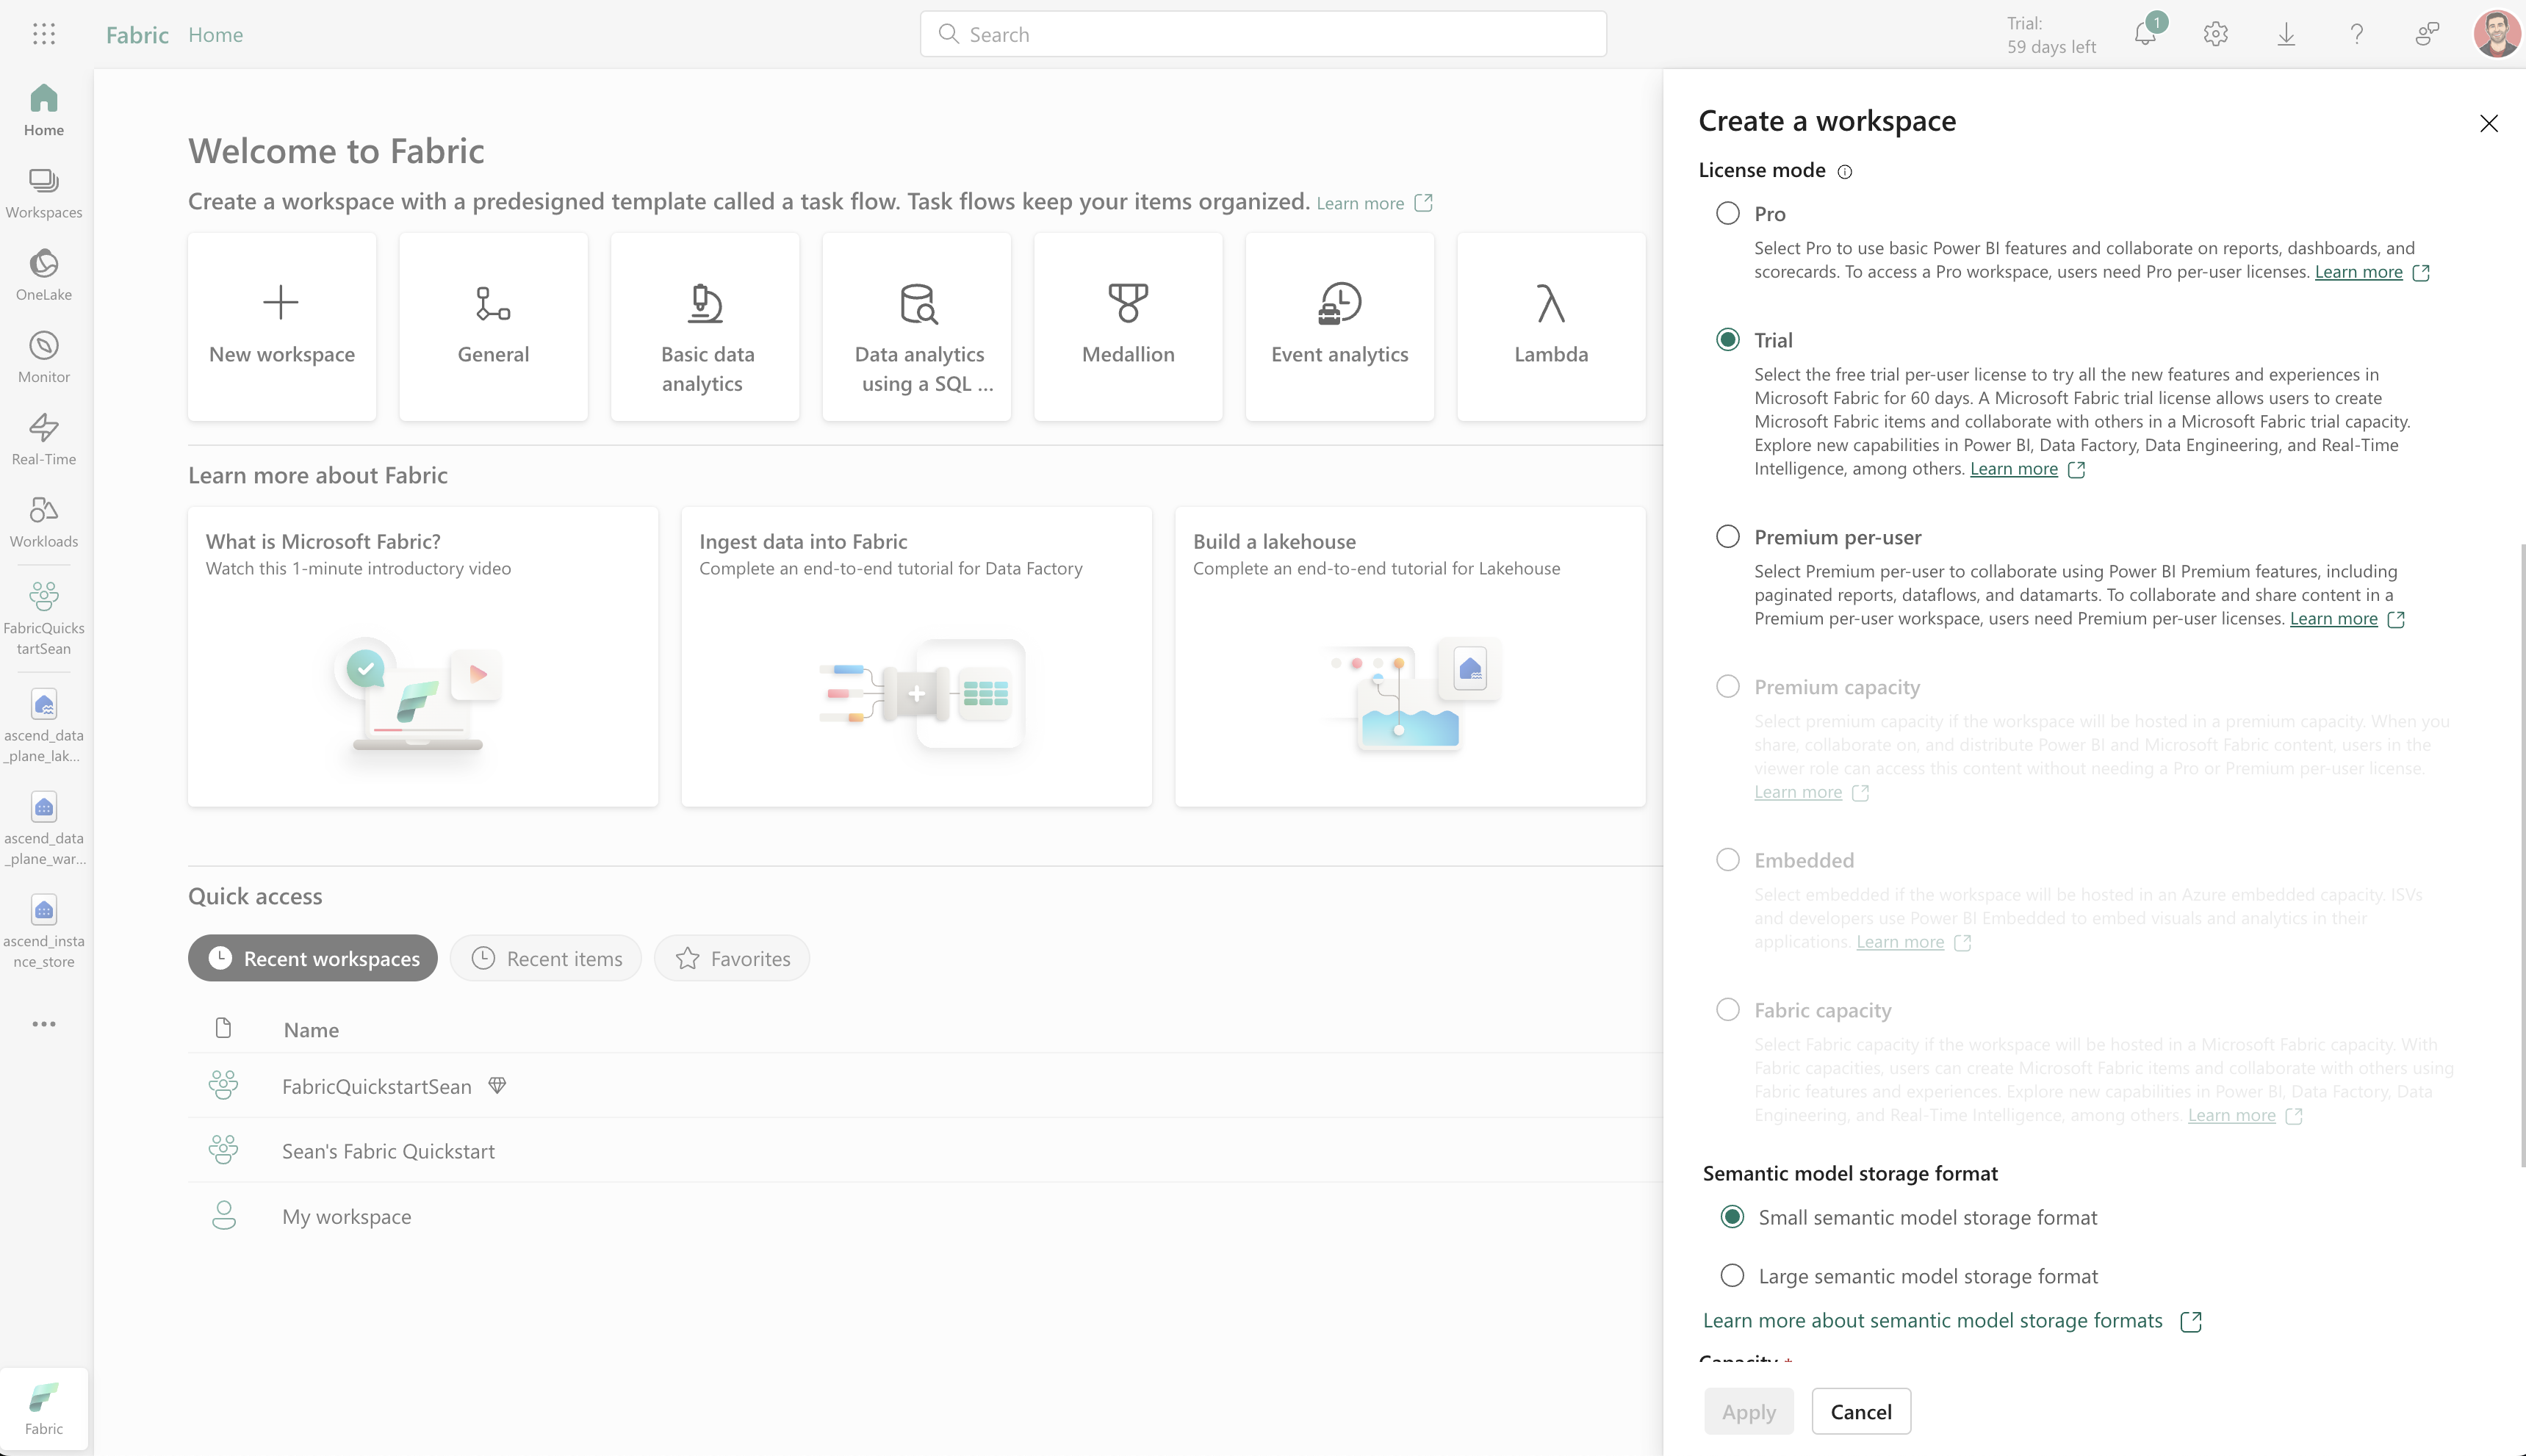
-
-
(Optional) Set the Fabric Workspace to use a Azure Fabric Capacity resource (instead of a trial license).
-
Navigate to the workspace settings from the workspace's page:
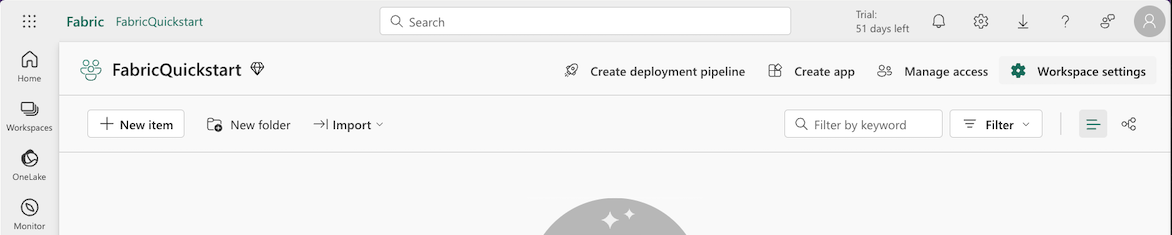
-
Navigate to License info and edit it, setting it to the Azure Fabric Capacity resource you created above:
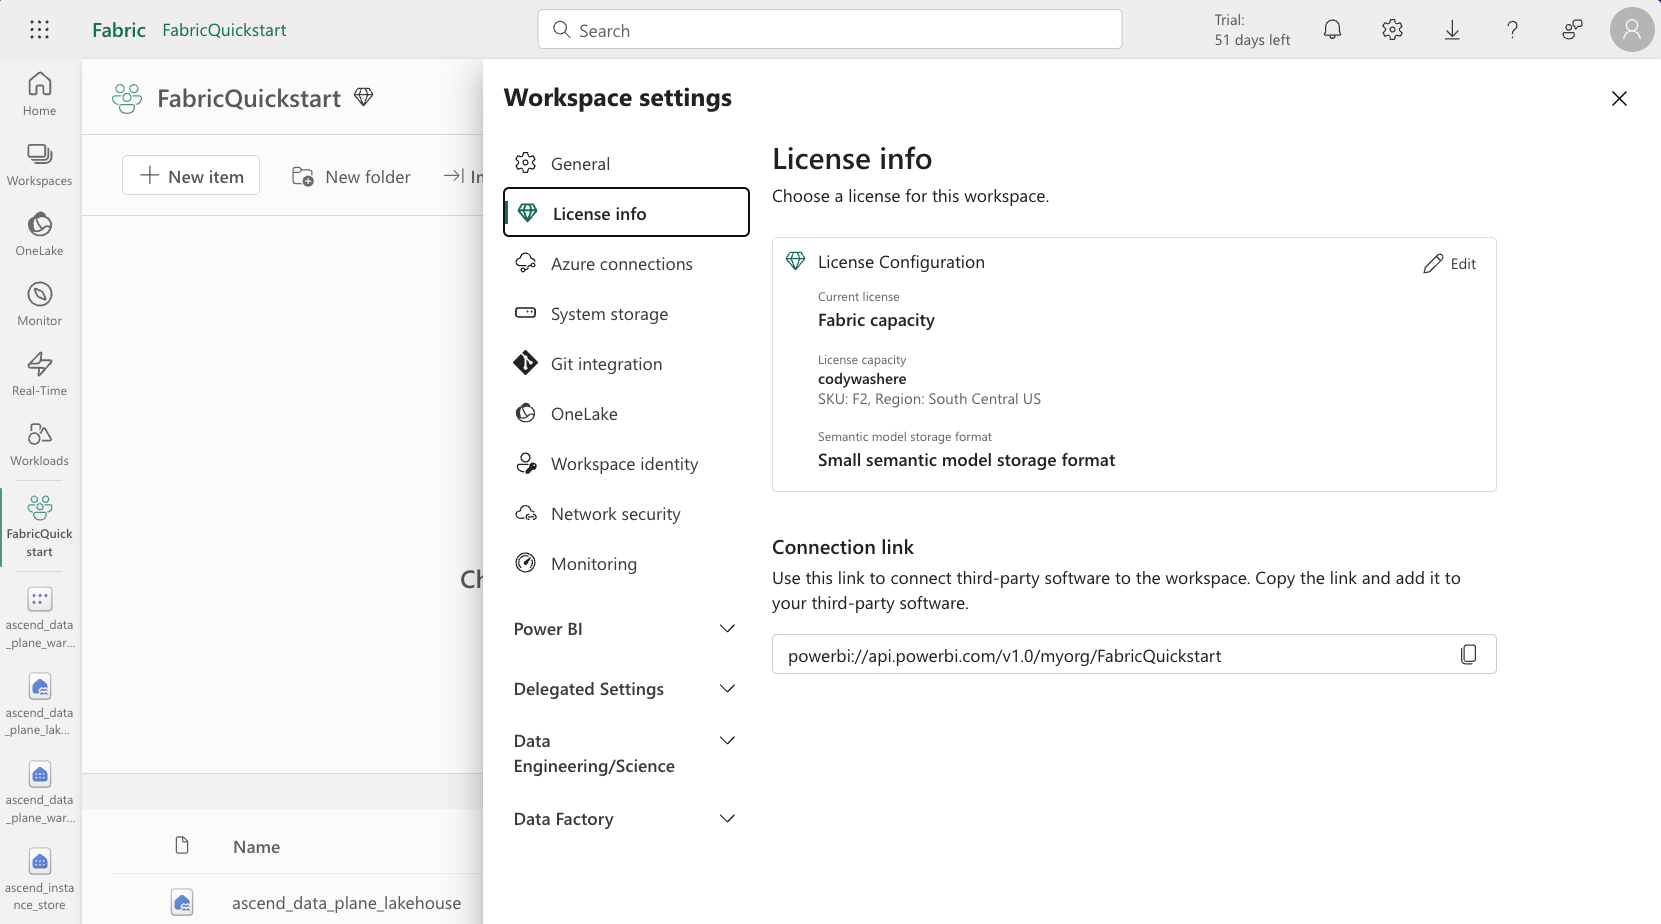
-
-
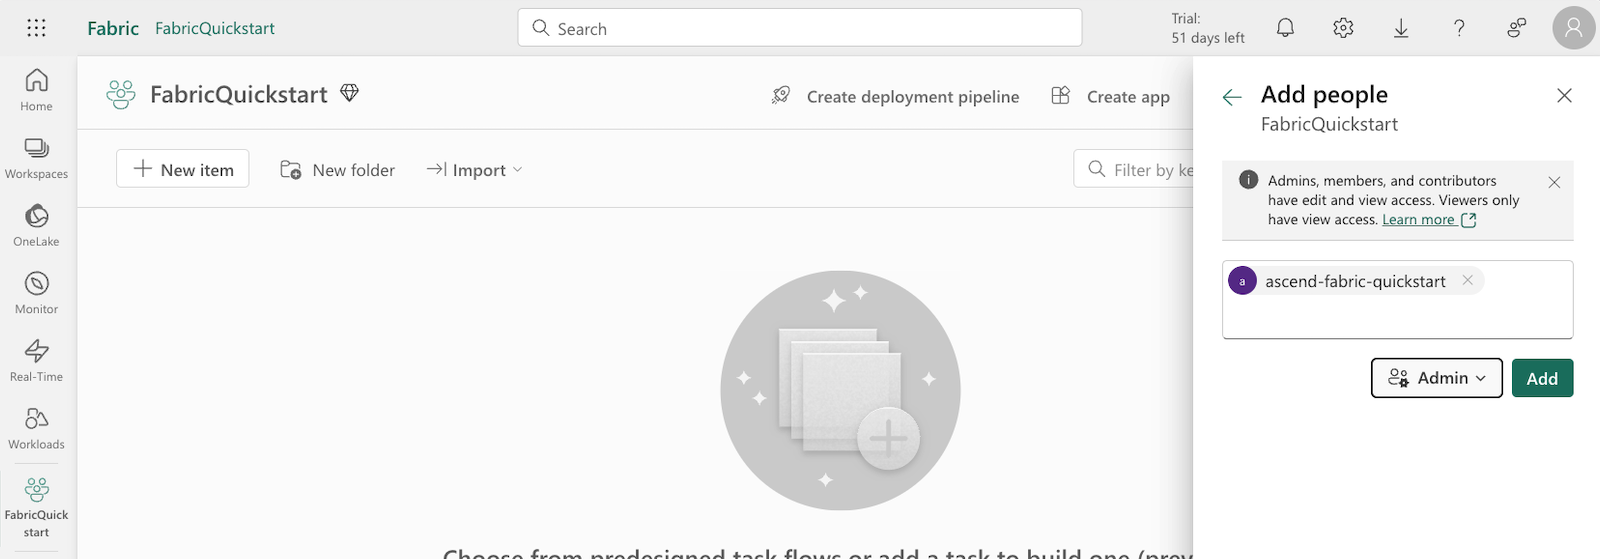
Add the Service Principal/App Registration as a user with the Admin role:
importantYou may need to enable Service Principals in the Fabric admin portal. Navigate to the Fabric settings toward the top right of the screen and click Admin portal under Governance and insights.
-
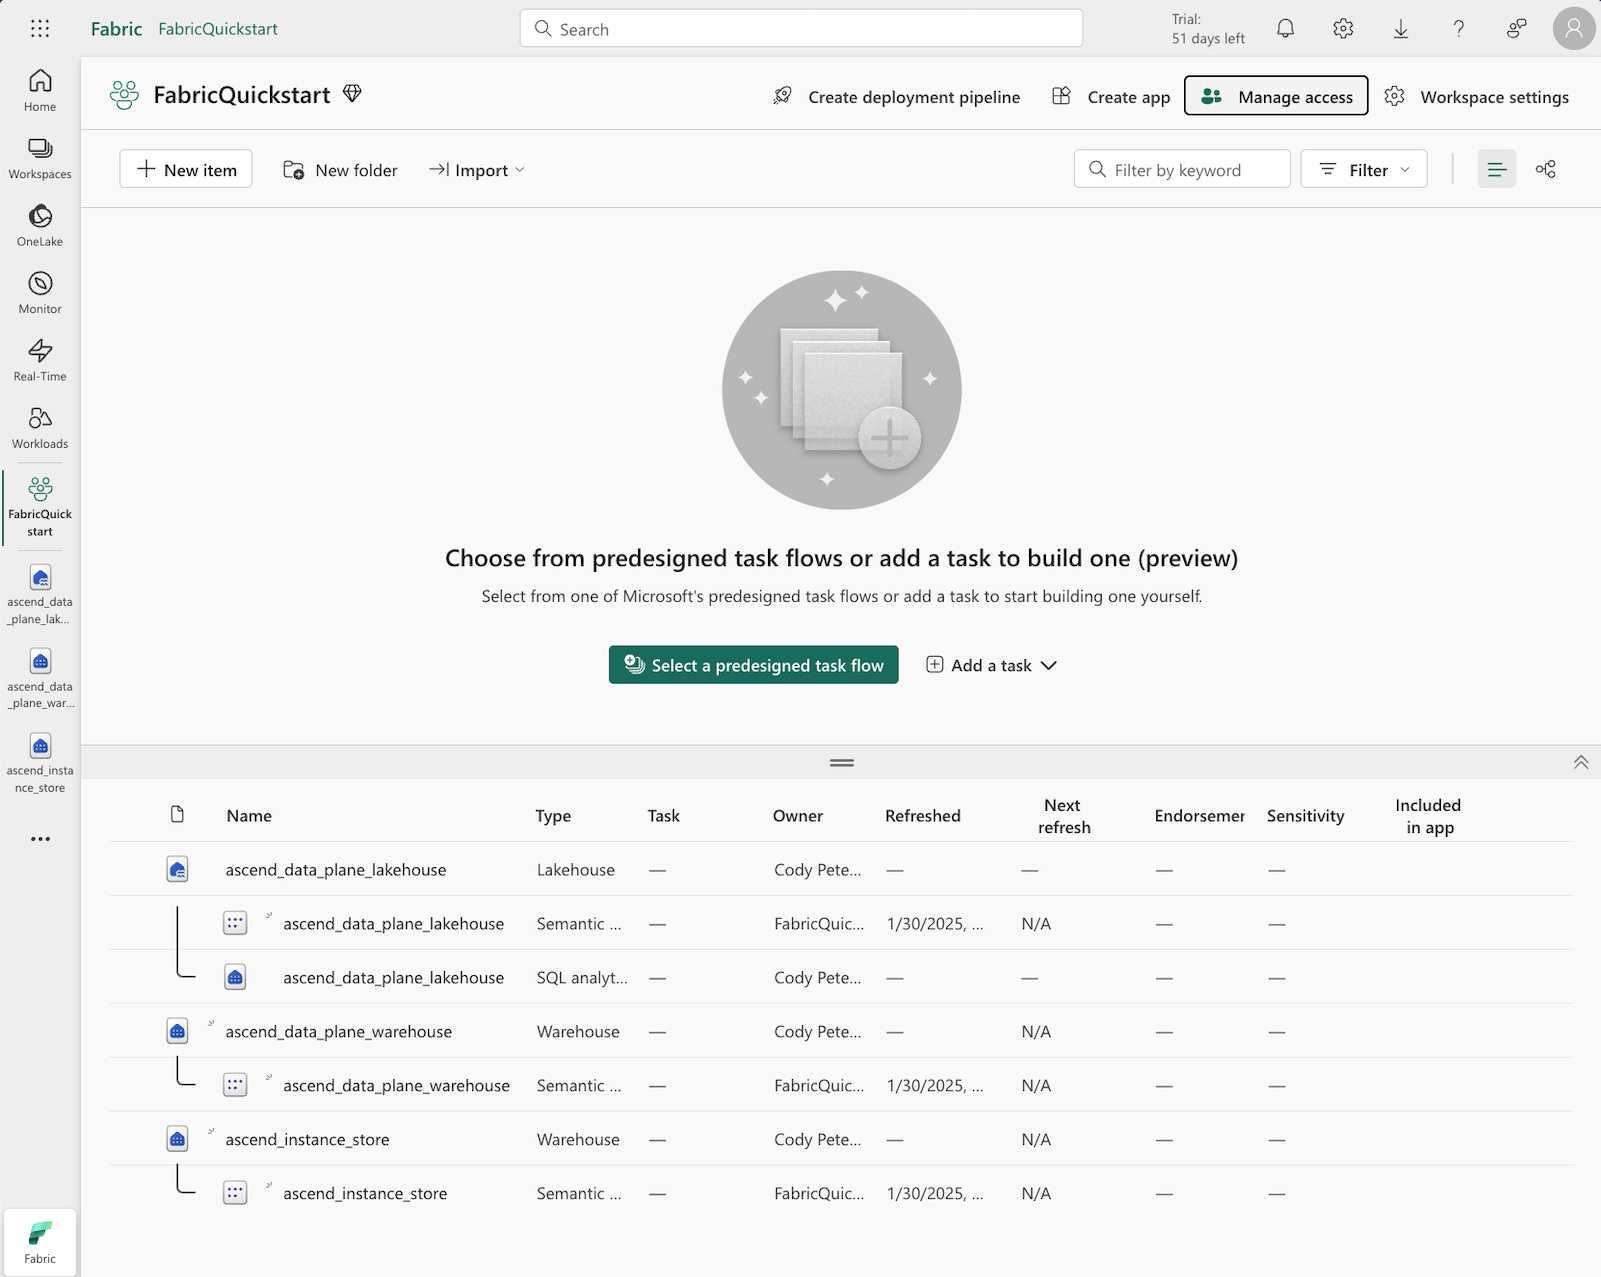
Create the following resources in the workspace:
tipWhile possible to use a single warehouse for the Instance Store and Data Plane, it's best practice to separate these for security reasons and Fabric does not incur cost based on the number warehouses.
- one warehouse to serve as the Ascend Instance Store named
ascend_instance_store - one warehouse to serve as the Ascend Data Plane for SQL operations named
ascend_data_plane_warehouse - one lakehouse (with lakehouse schemas enabled) to serve as the Ascend Data Plane for PySpark operations named
ascend_data_plane_lakehouse
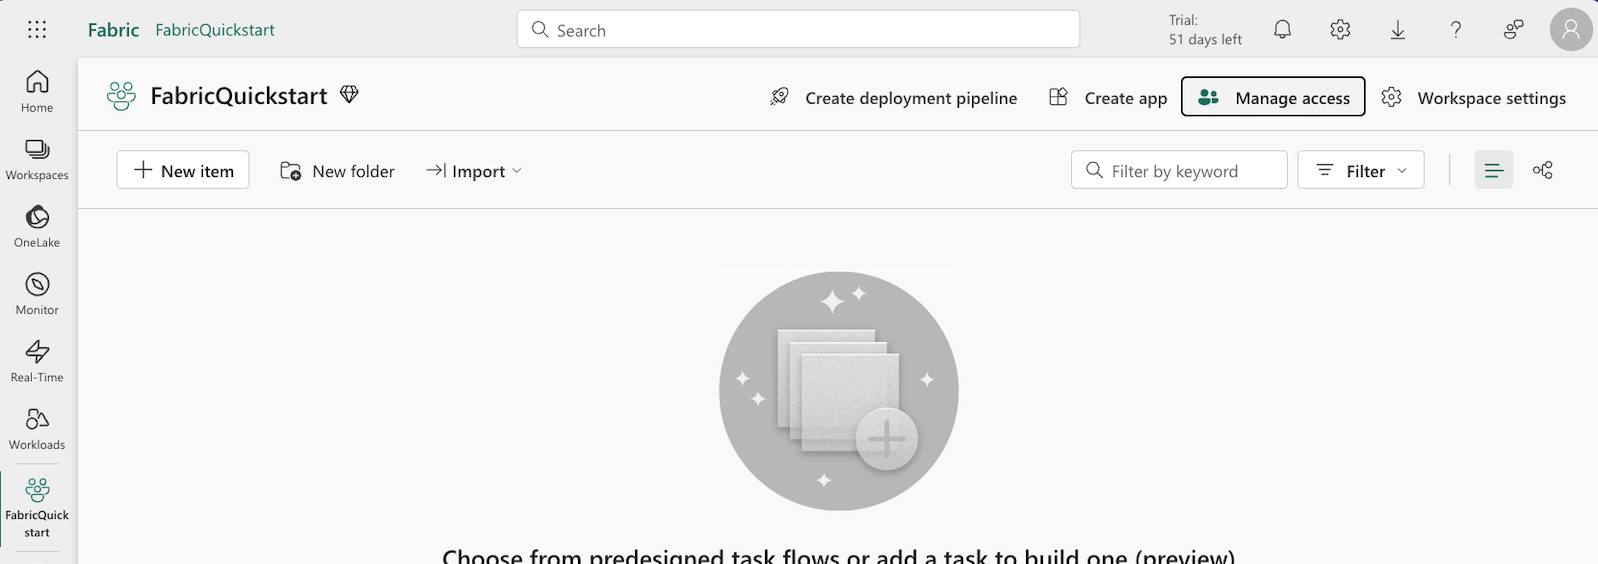
To achieve this, click New item toward the top left in the workspace page and choose Warehouse and Lakehouse respectively.
importantLakehouse schemas must be enabled for the lakehouse. Check the box when creating the lakehouse.
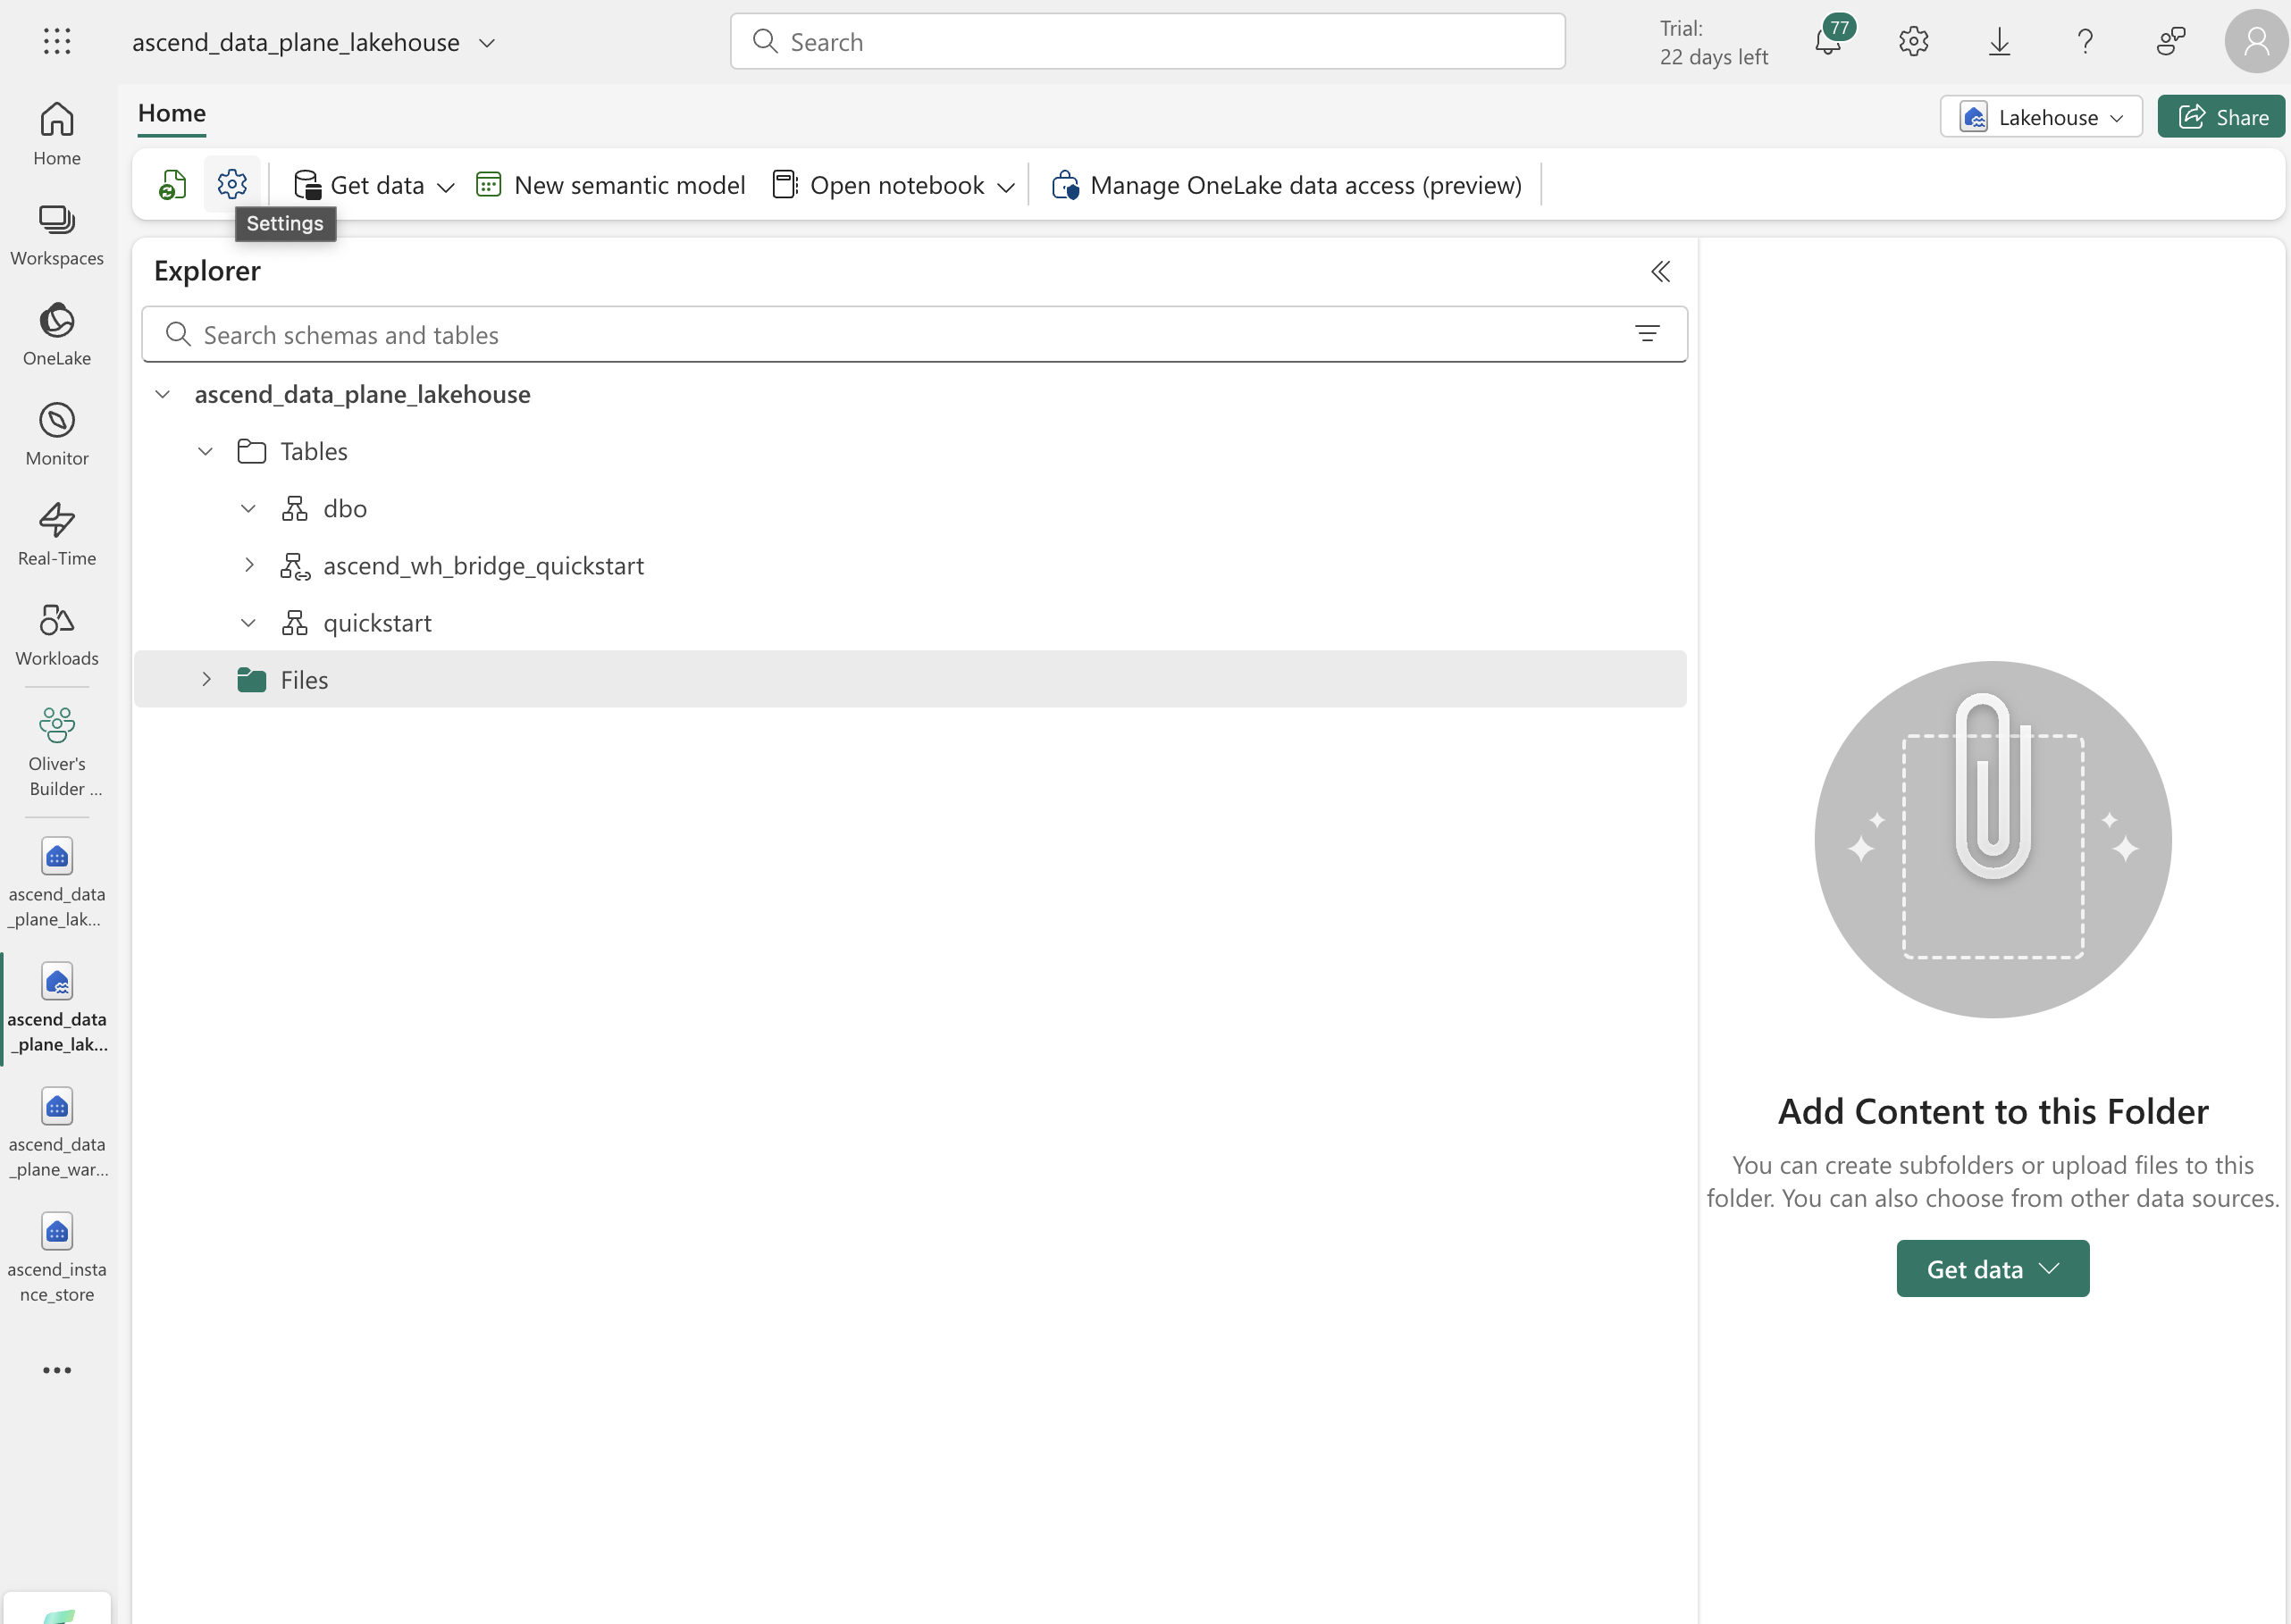
You should then see the two warehouses and one lakehouse in your workspace:
- one warehouse to serve as the Ascend Instance Store named
Setup for using PySpark on Fabric
To use PySpark on Fabric you need to set up a few more things in Azure and Fabric.
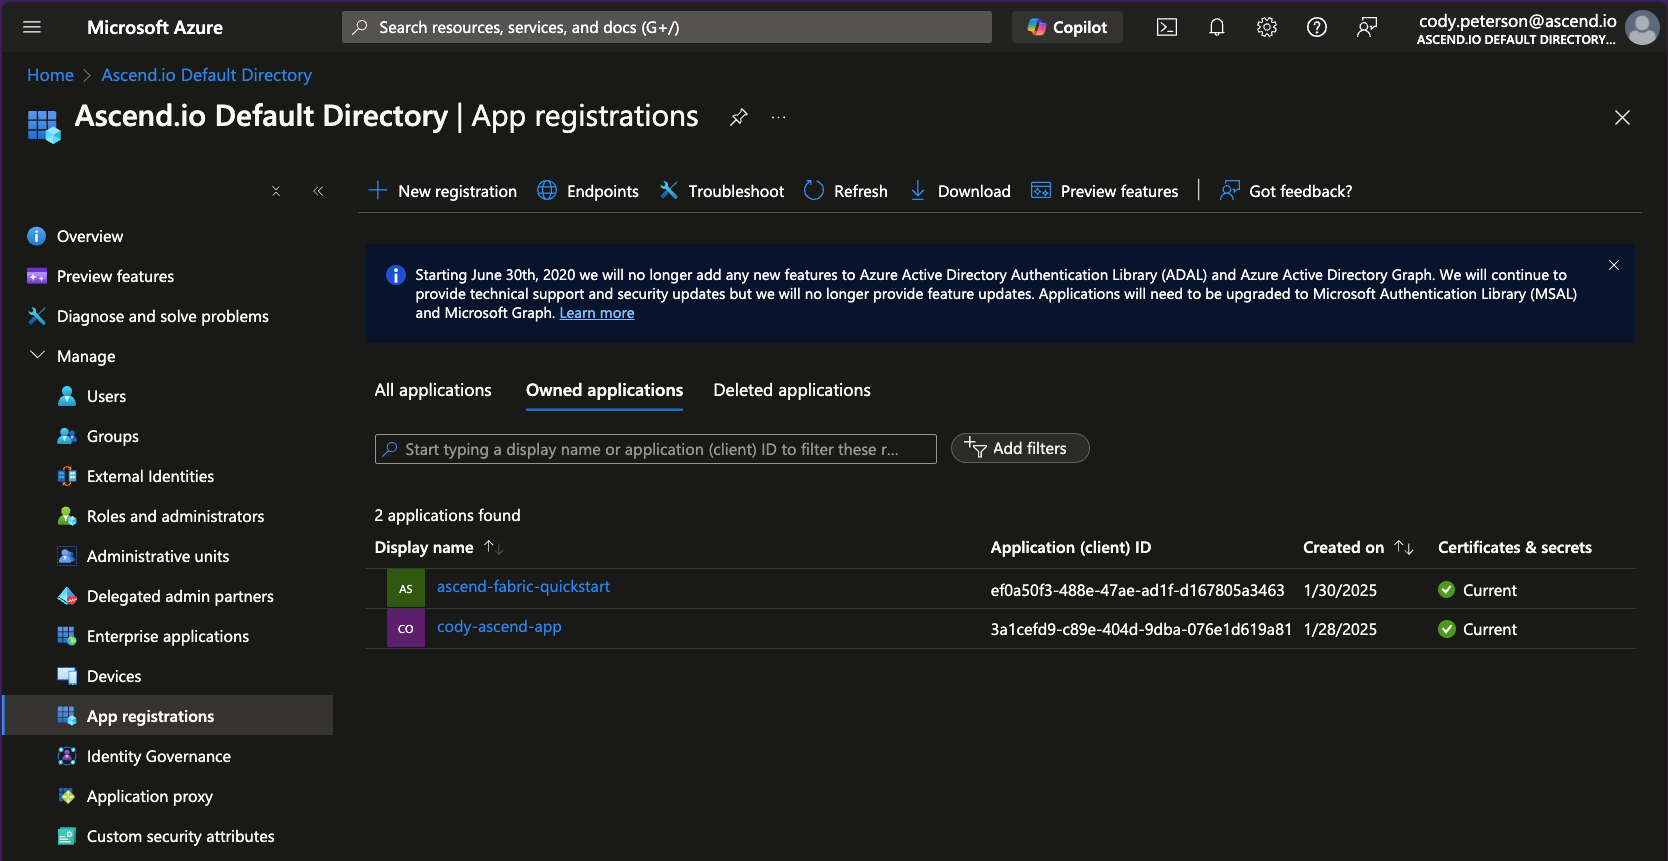
-
In the Azure portal, navigate to Microsoft Entra Id > Manage > App registrations. Find the application (Service Principal) you created above and click into it.
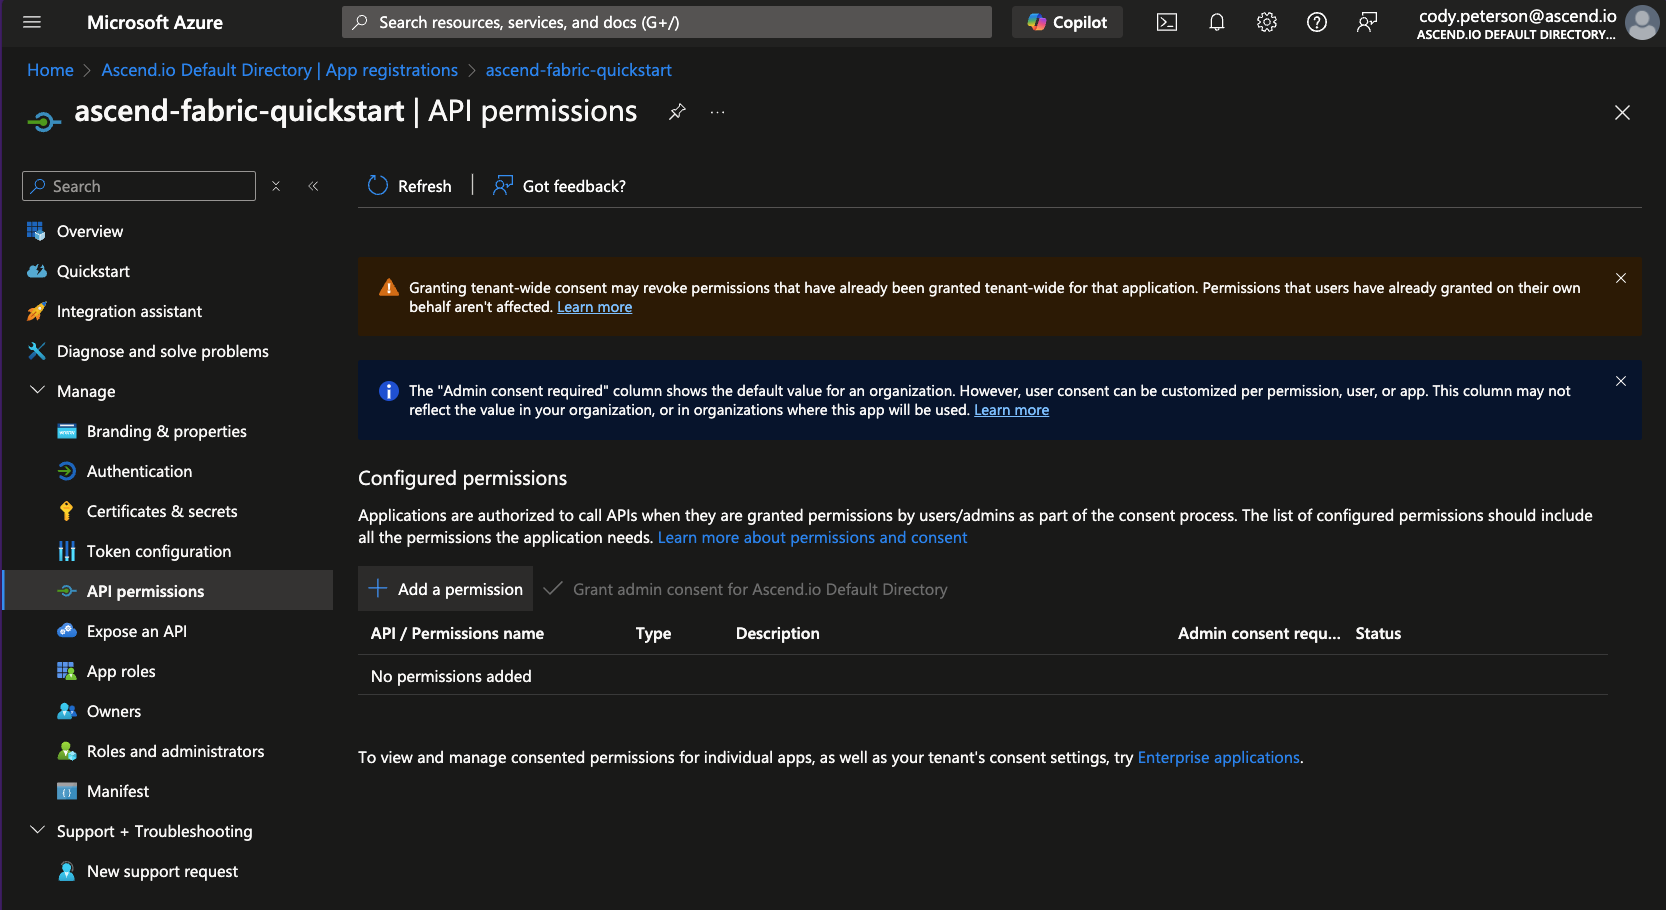
-
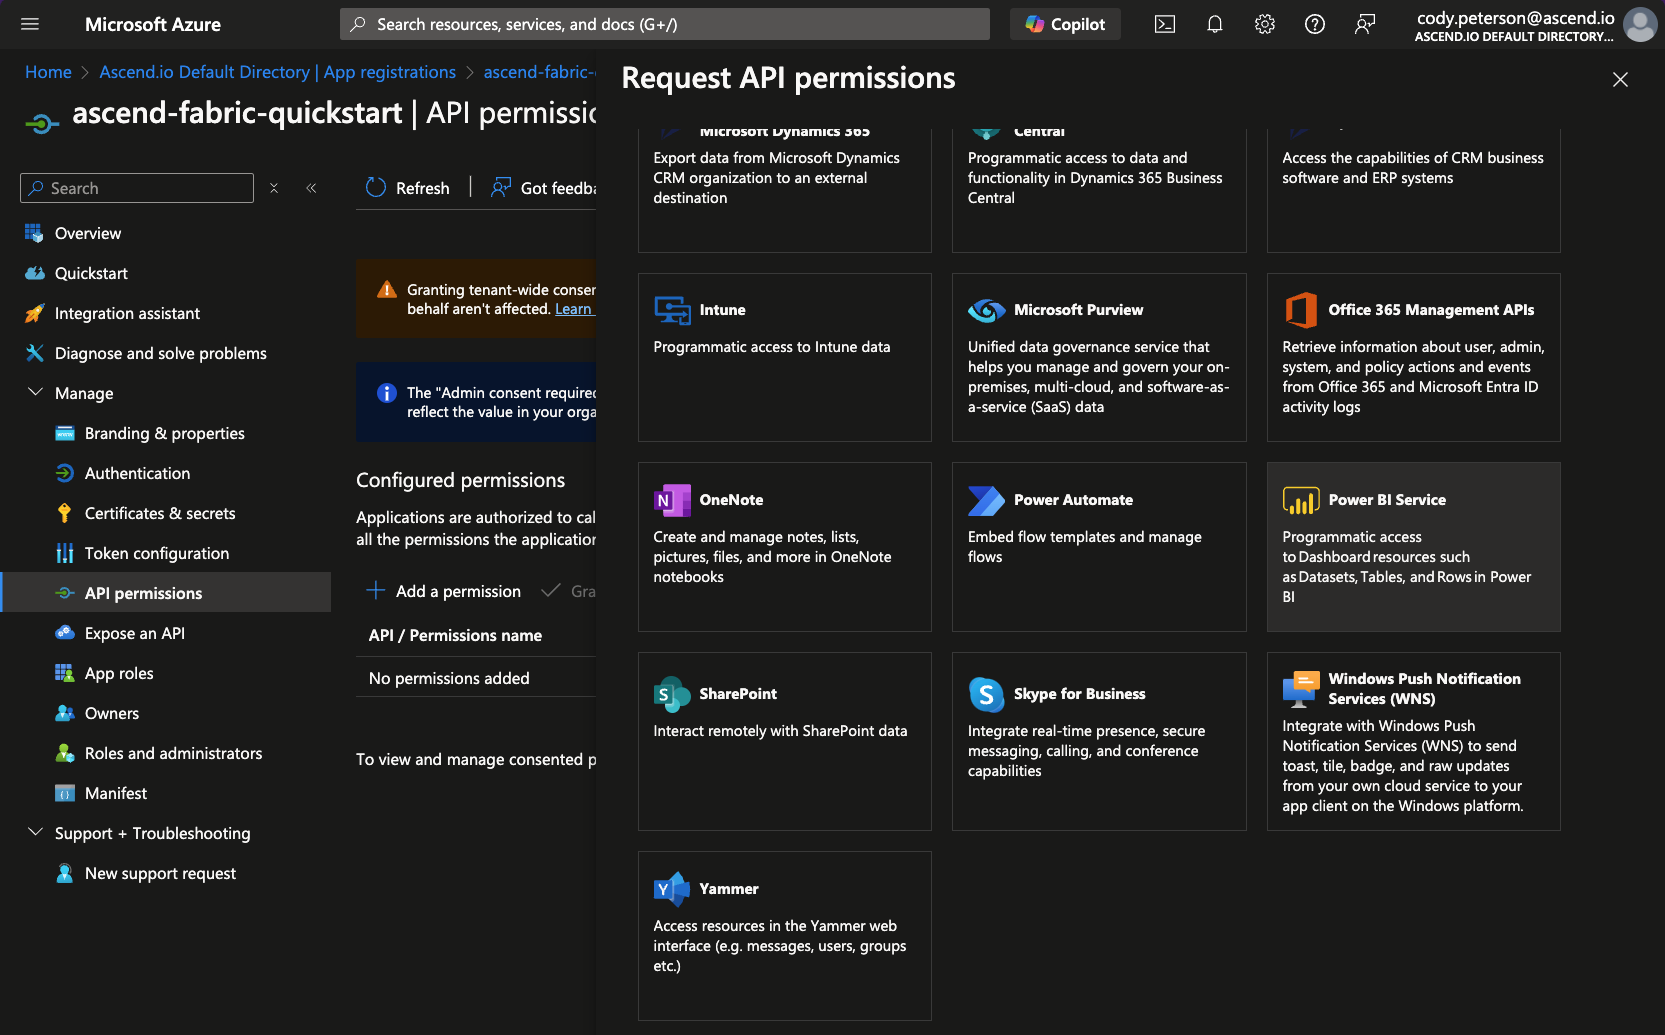
From the application's page, navigate to API permissions and click to Add a permission:
-
And scroll and click on Power BI Service and click it:
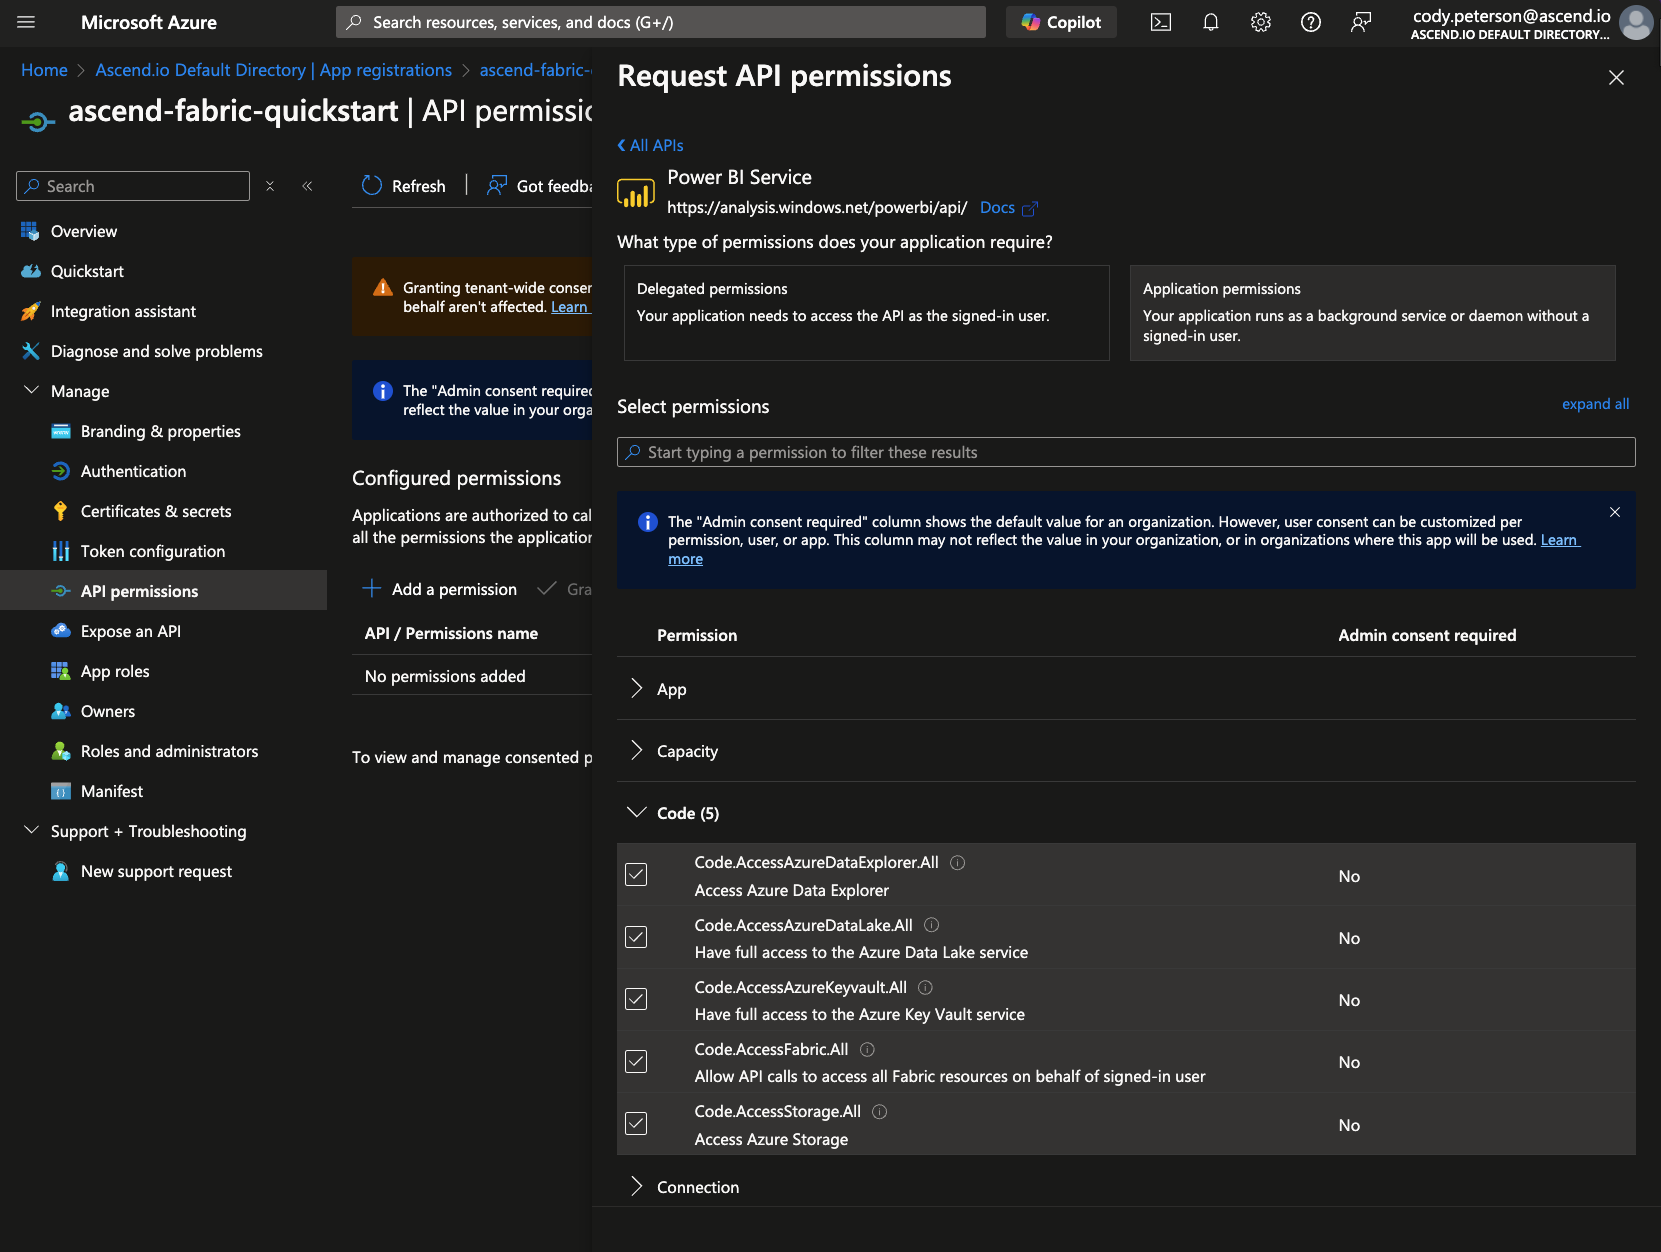
-
And select Delegated permissions:

-
Then enable each of:
Code.AccessAzureDataExplorer.All
Code.AccessAzureDataLake.All
Code.AccessAzureKeyvault.All
Code.AccessFabric.All
Code.AccessStorage.All
Item.ReadWrite.All
Lakehouse.Execute.All
Lakehouse.Read.All
Workspace.ReadWrite.All
in the corresponding subsections (Code, Item, Lakehouse, Workspace).
 tip
tipWondering why you're enabling Fabric permissions under the Power BI Service? Us too! Fabric is built by the Power BI team on top of existing Power BI infrastructure, so it seems like permissions still flow through Power BI.
We will update Ascend and our documentation to simplify the setup process as Fabric matures.
-
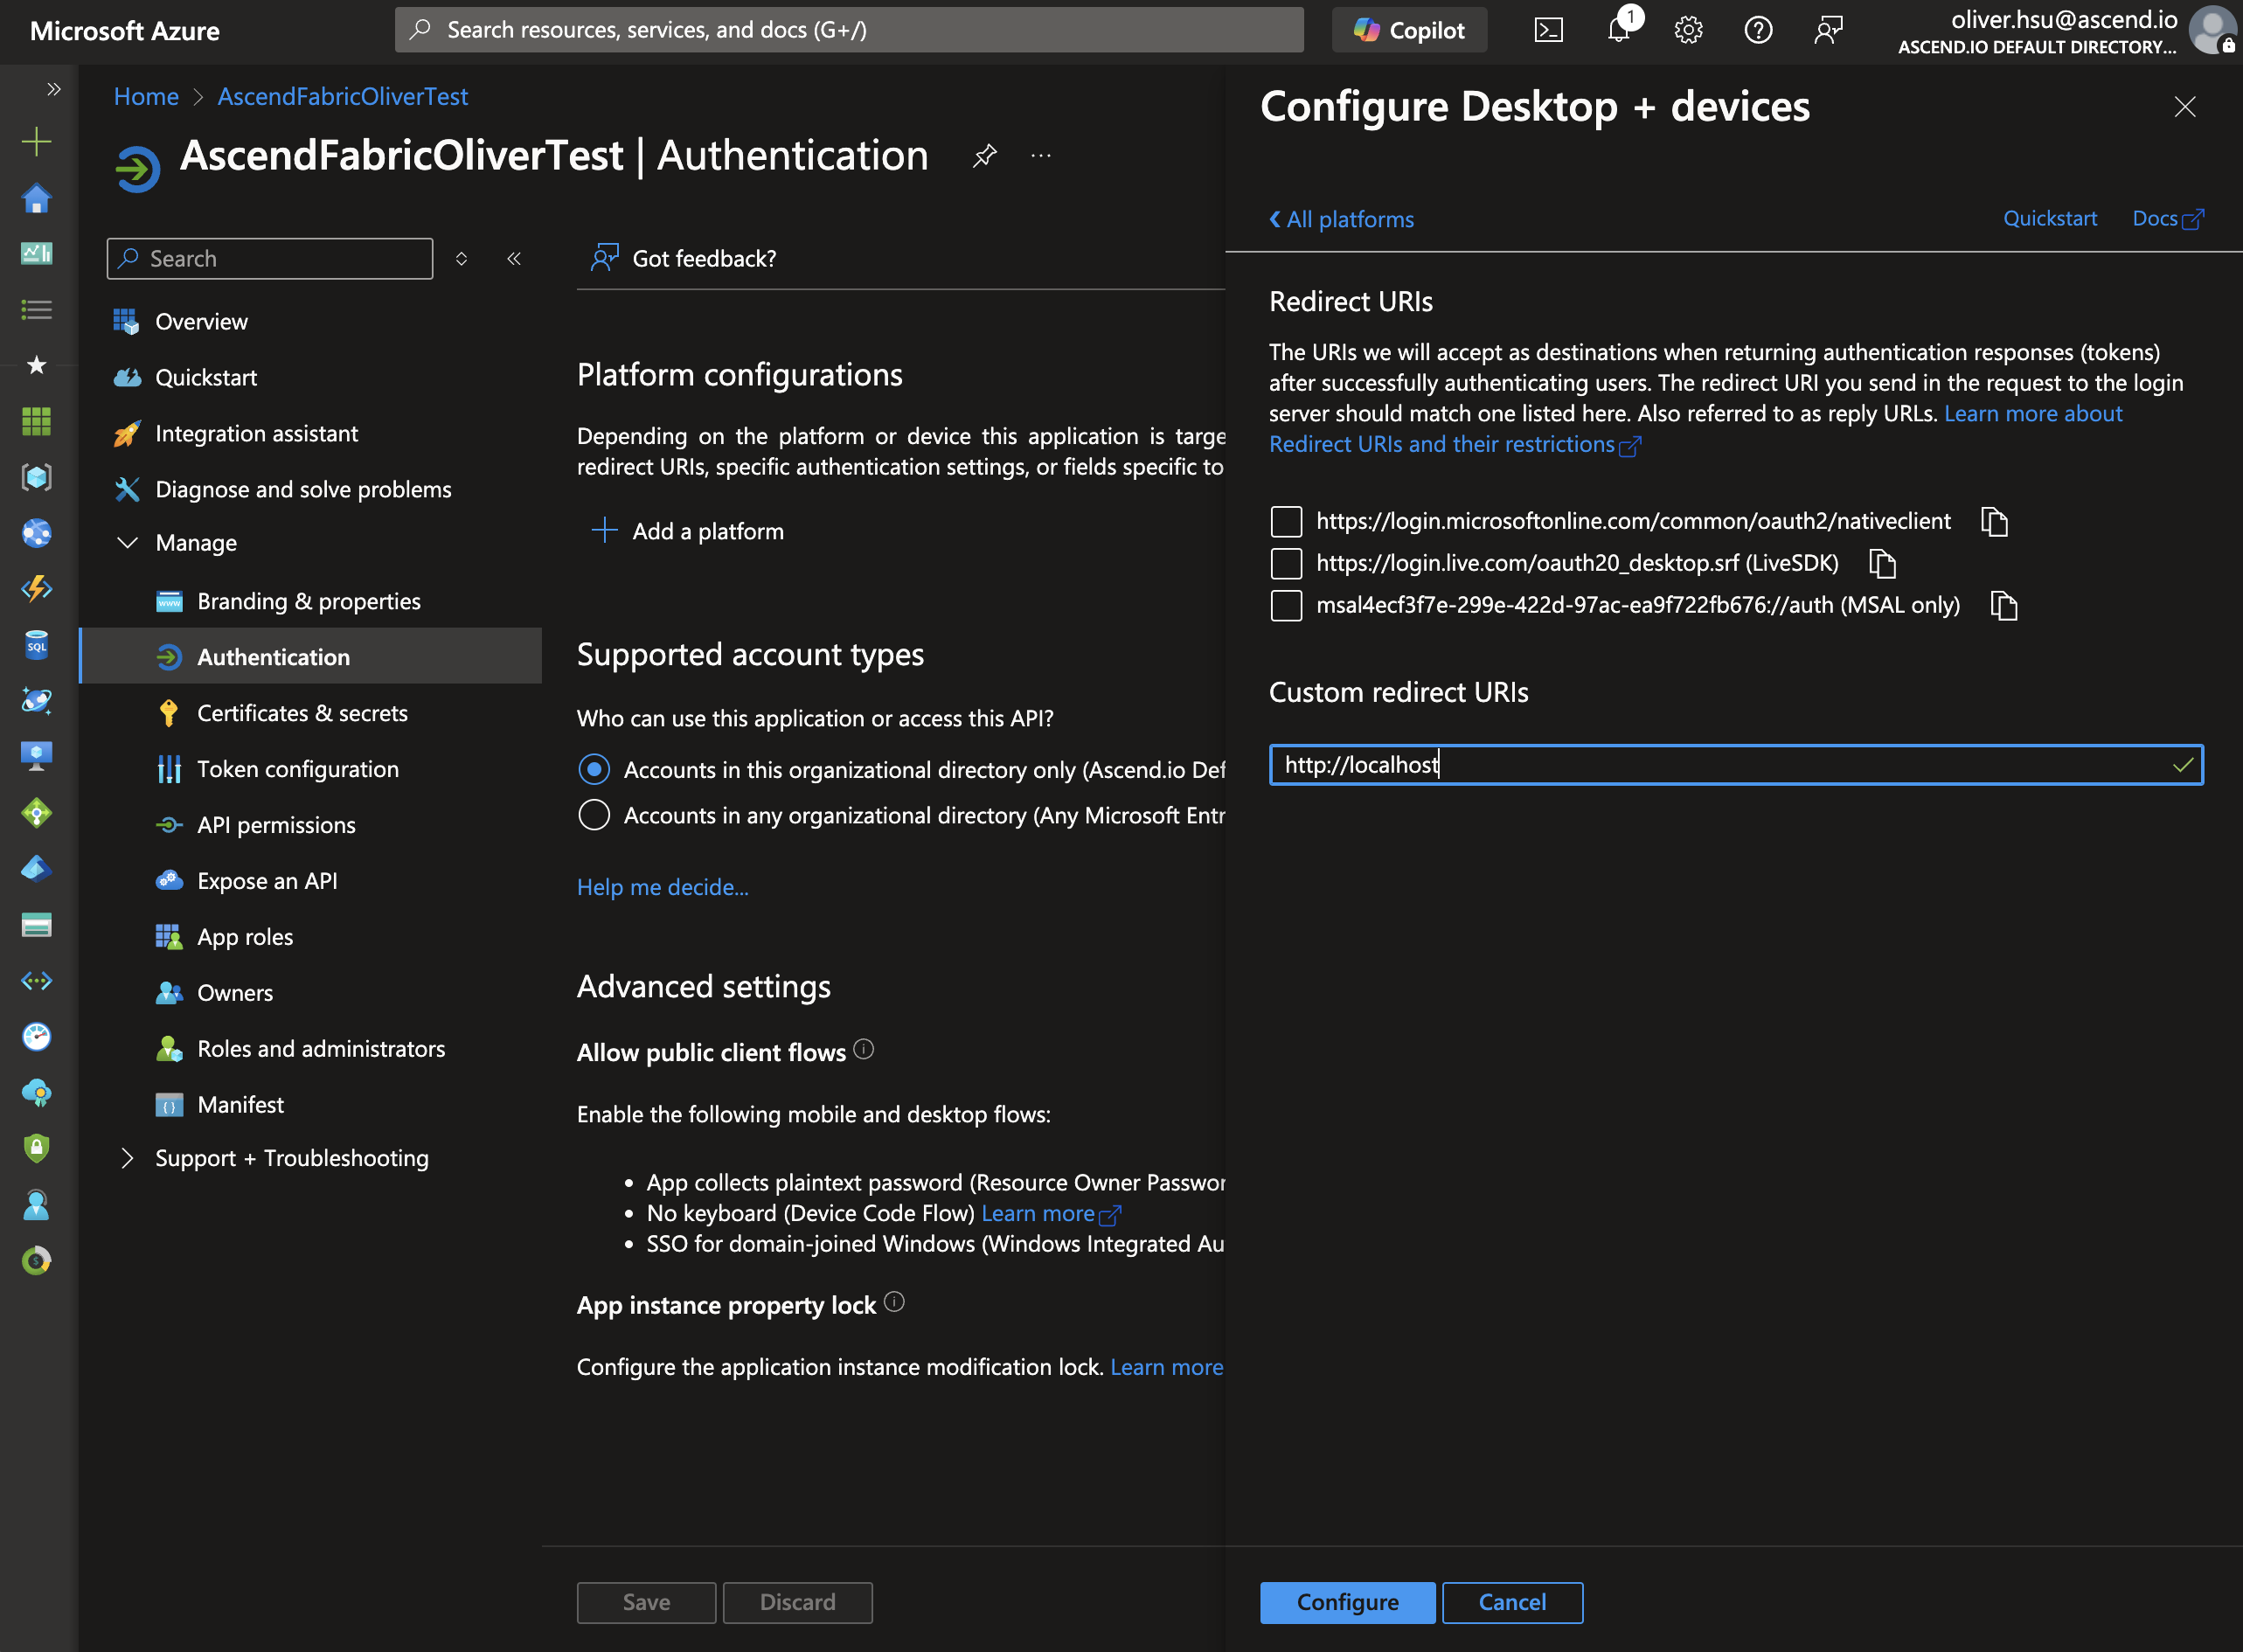
Next we need to configure authentication. Click on Authentication in the Manage section of the navigation menu, then click on Add a platform.
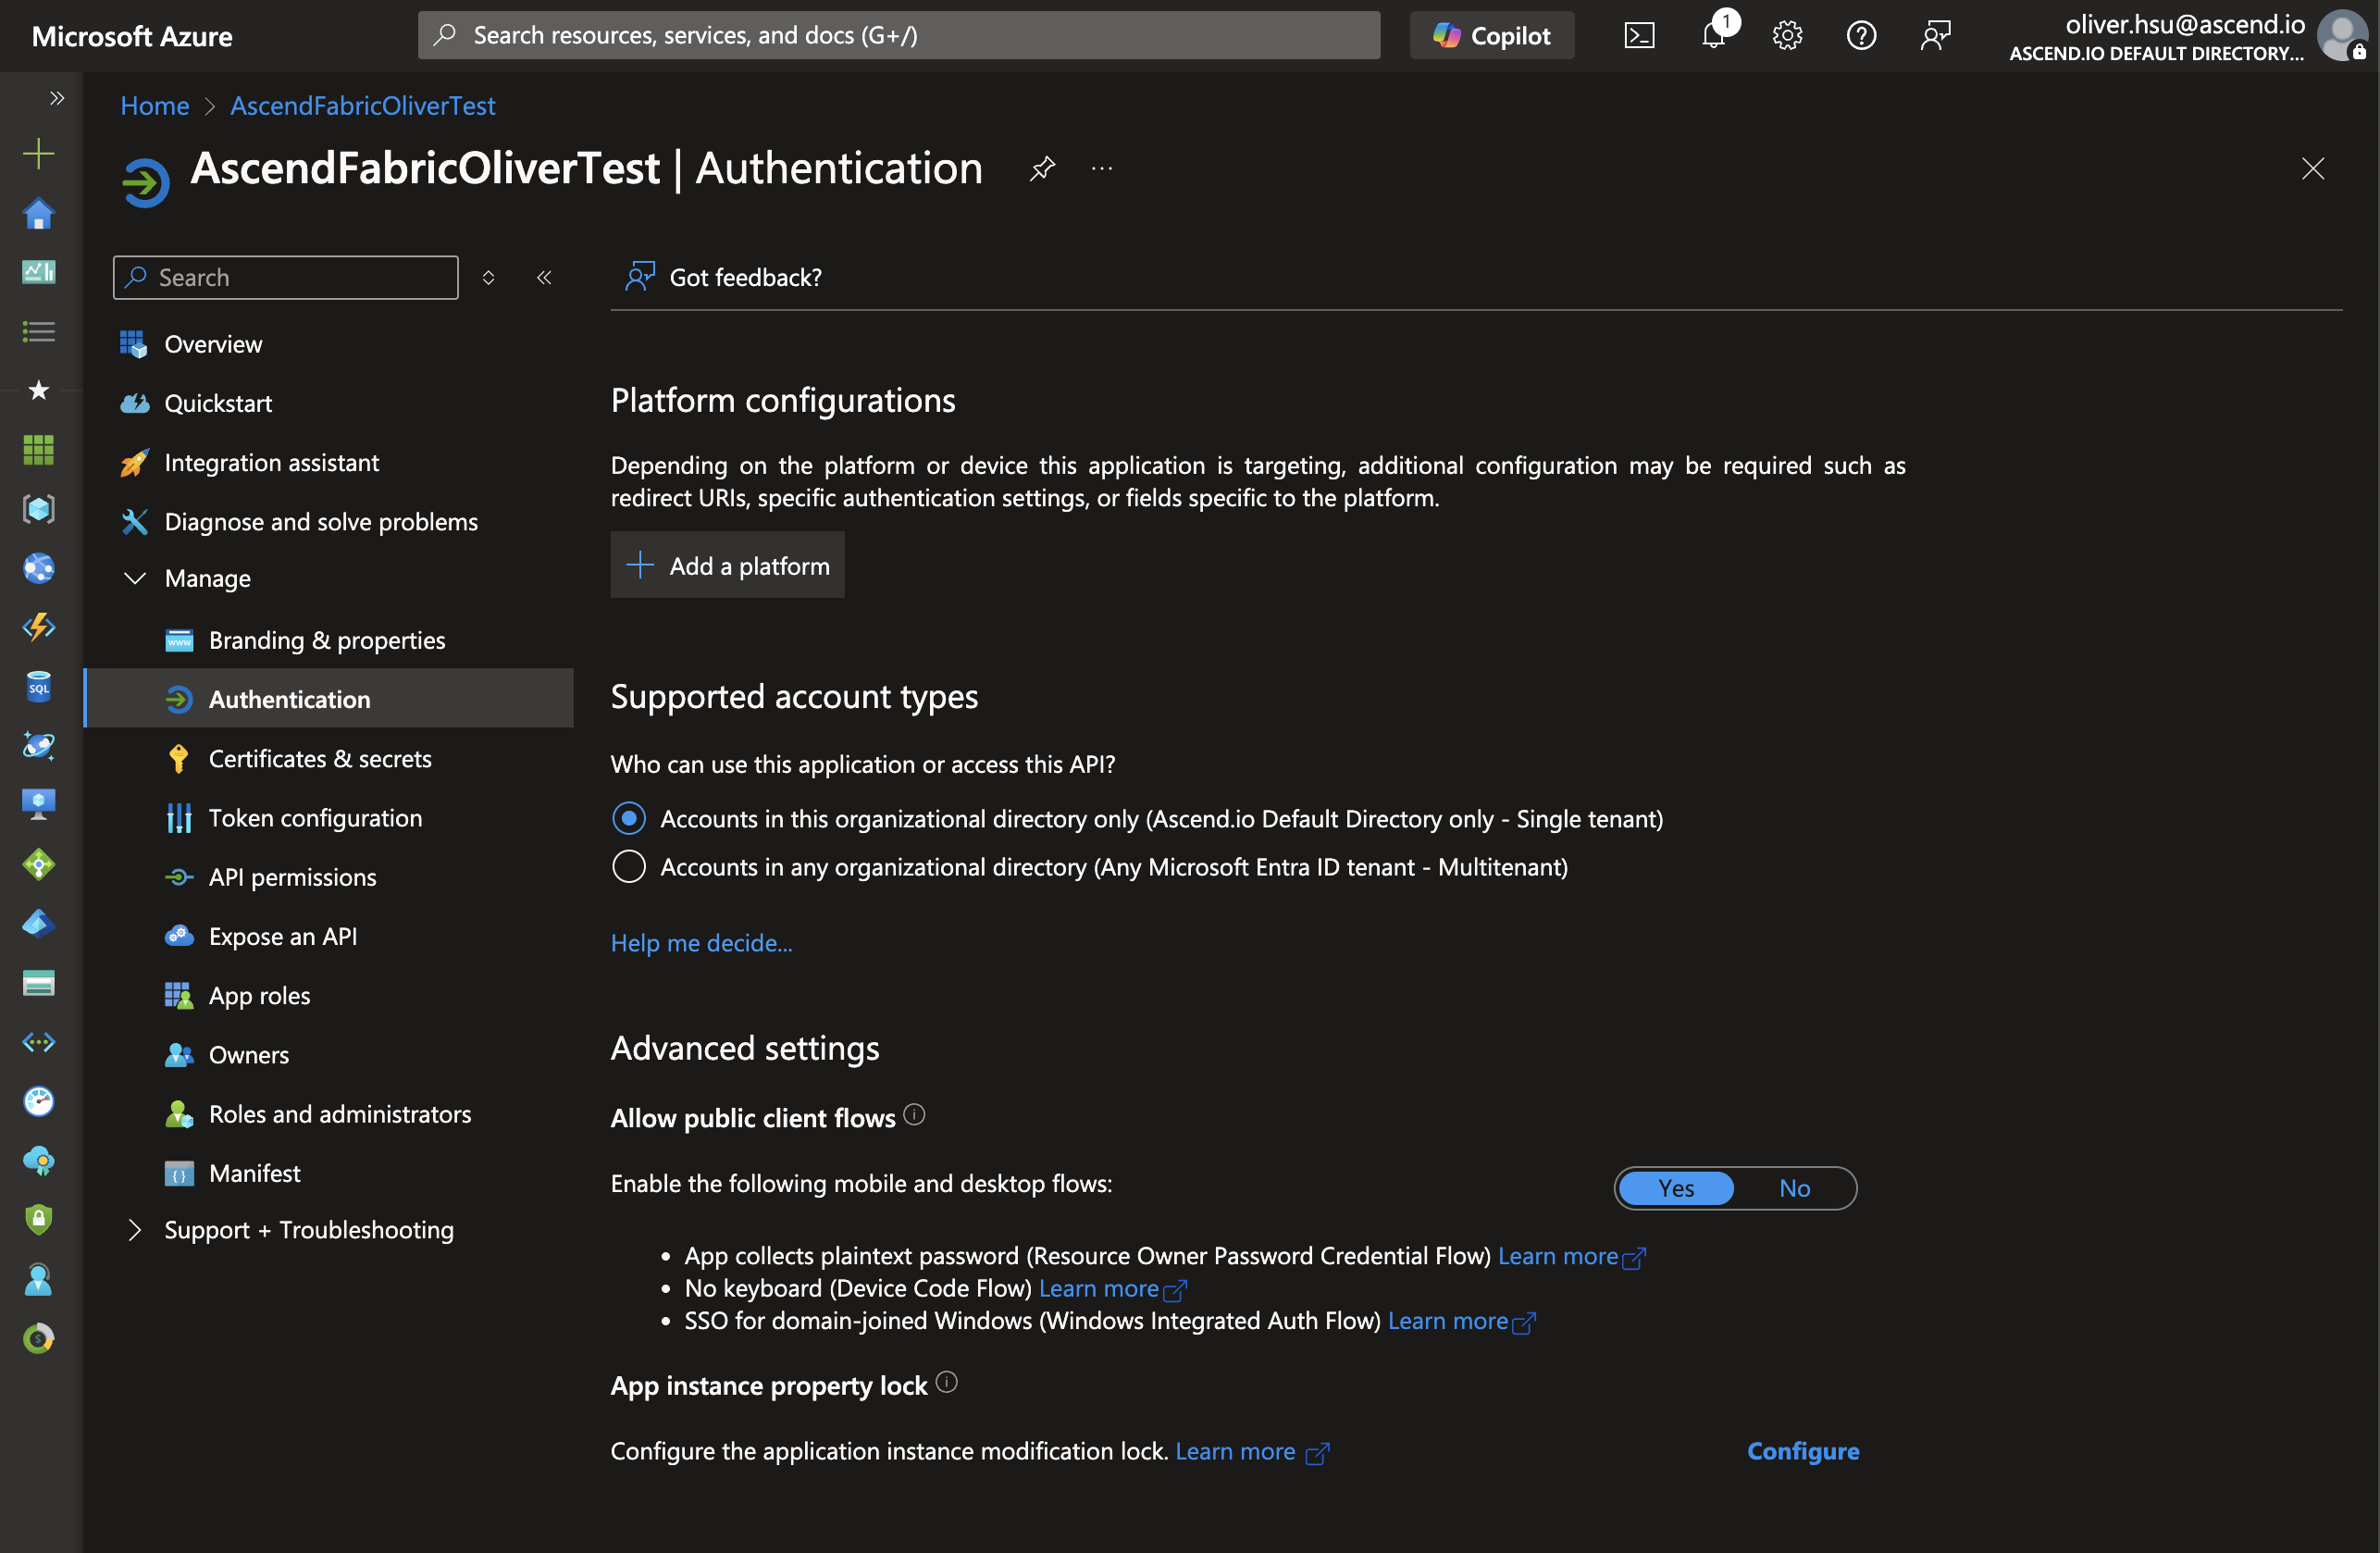
- Click on Mobile and desktop applications.
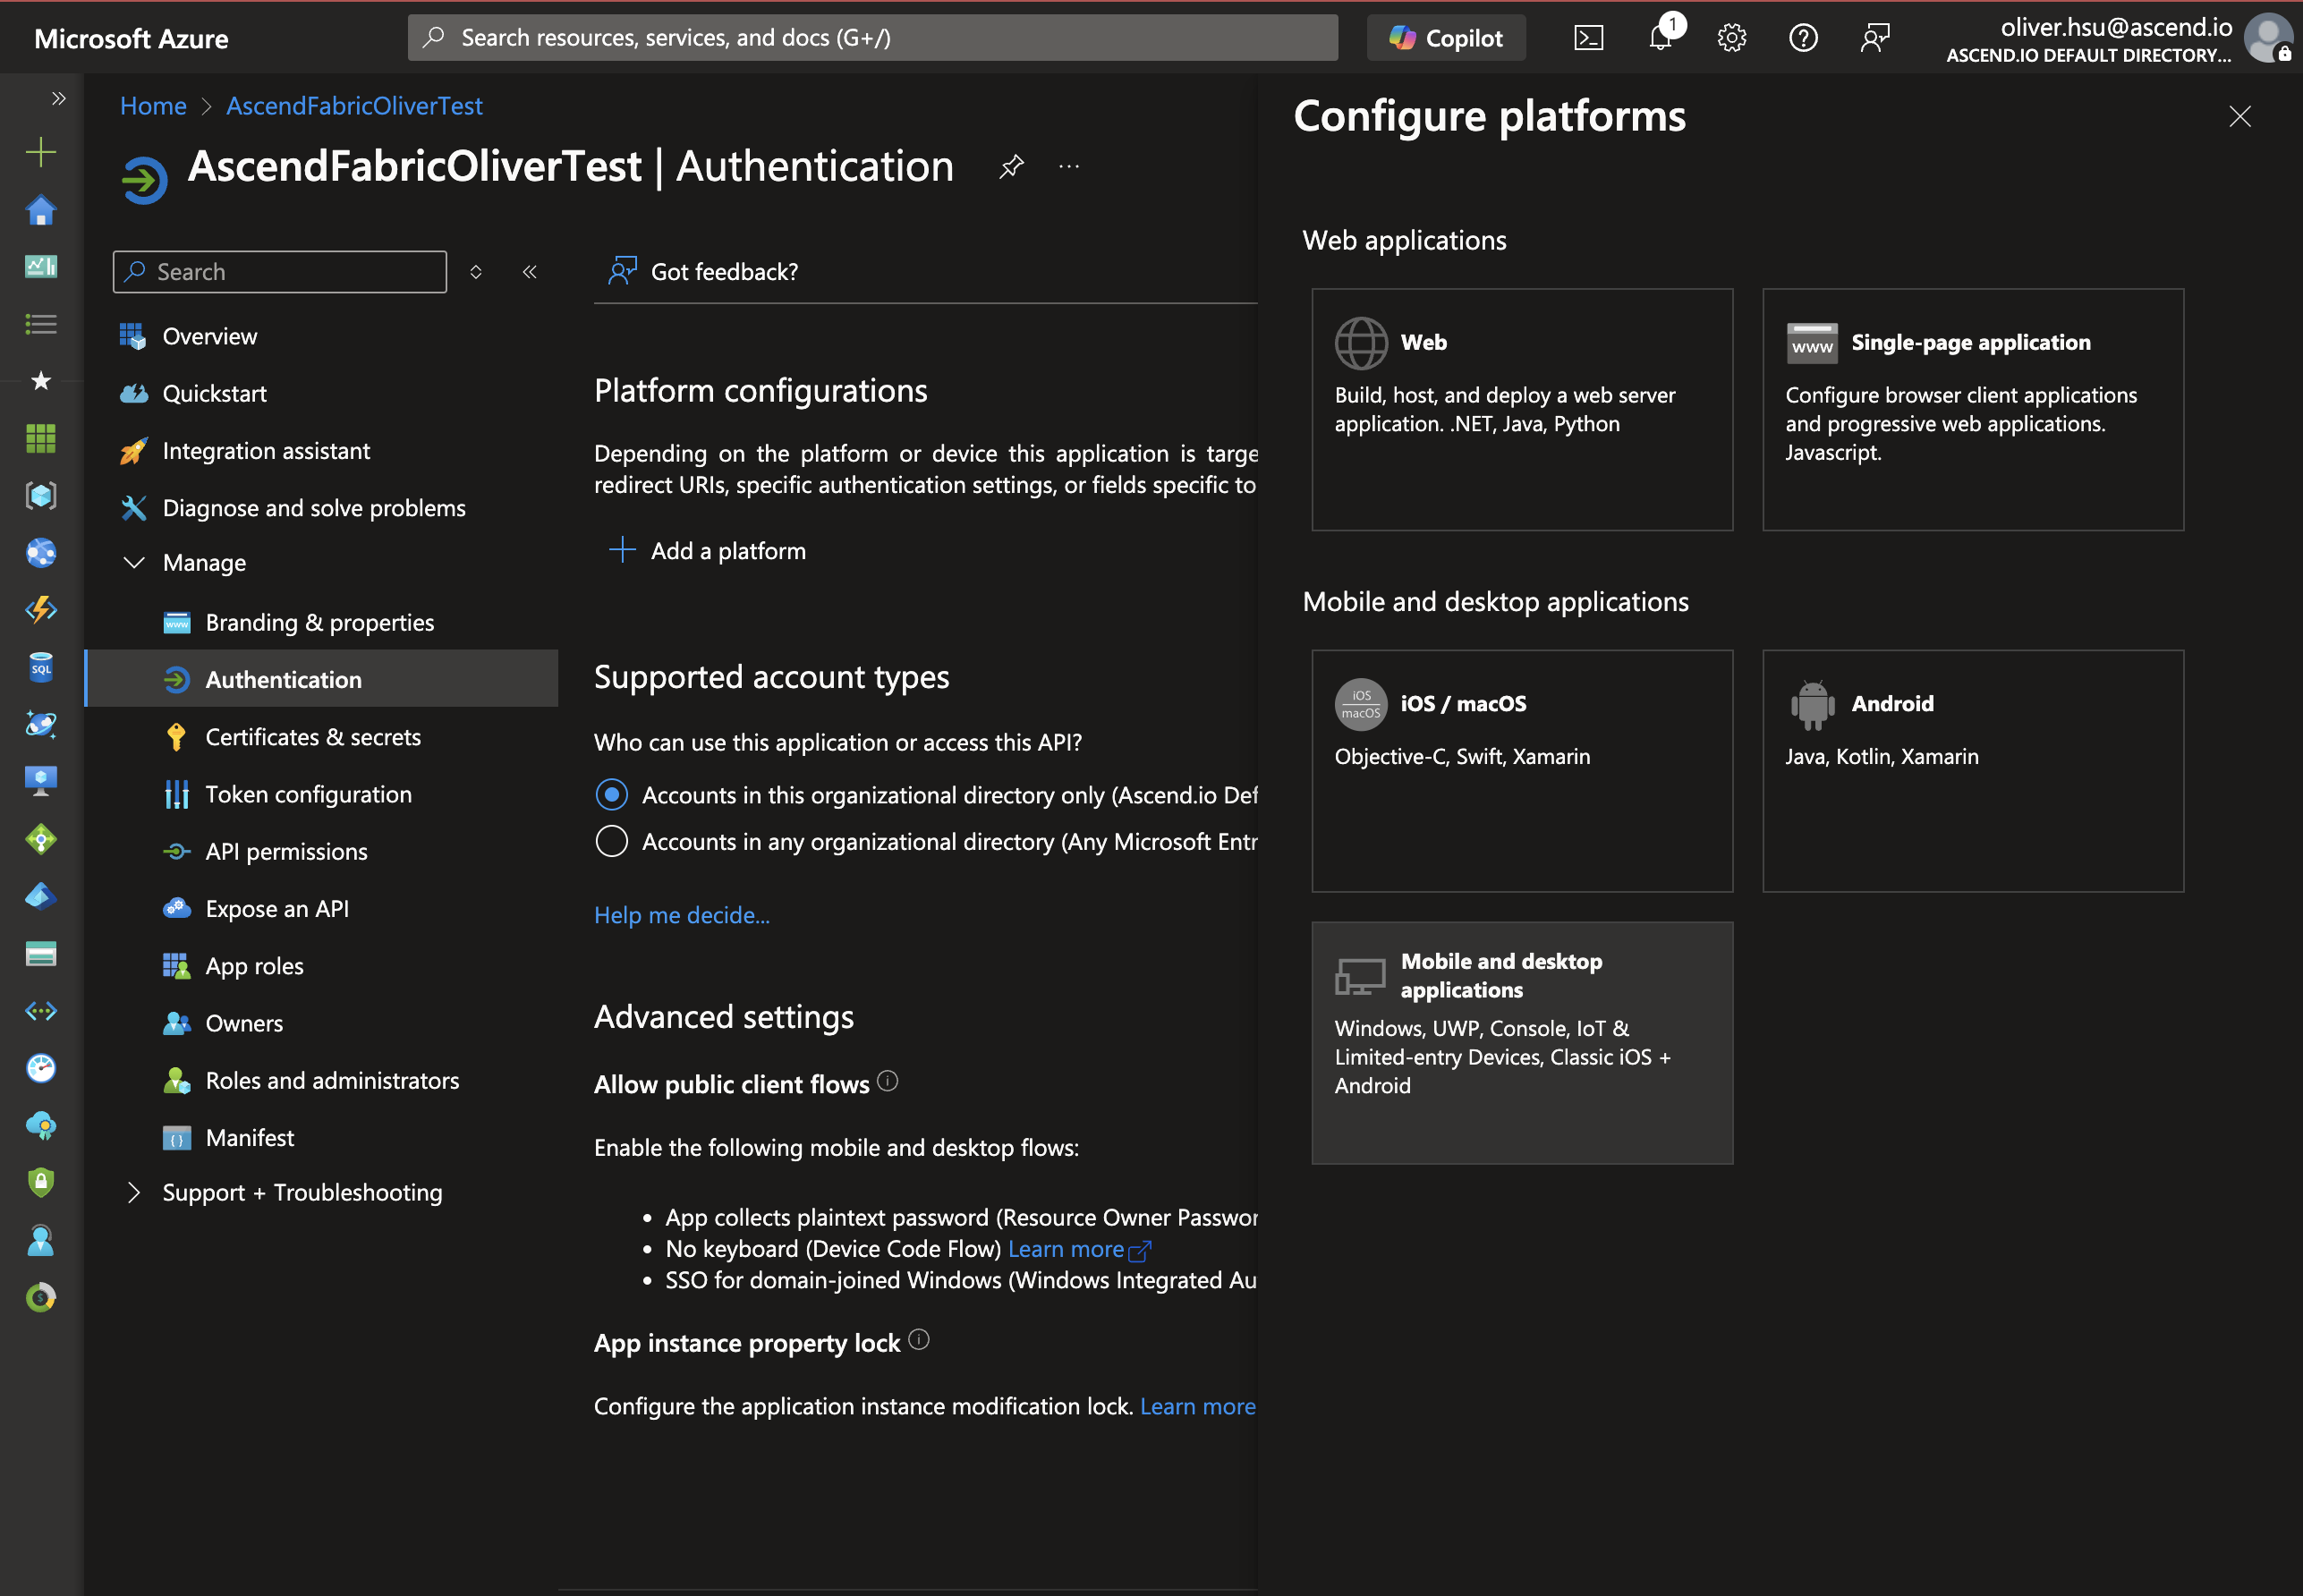
- In the Redirect URI field, enter
http://localhost. Click Configure.
-
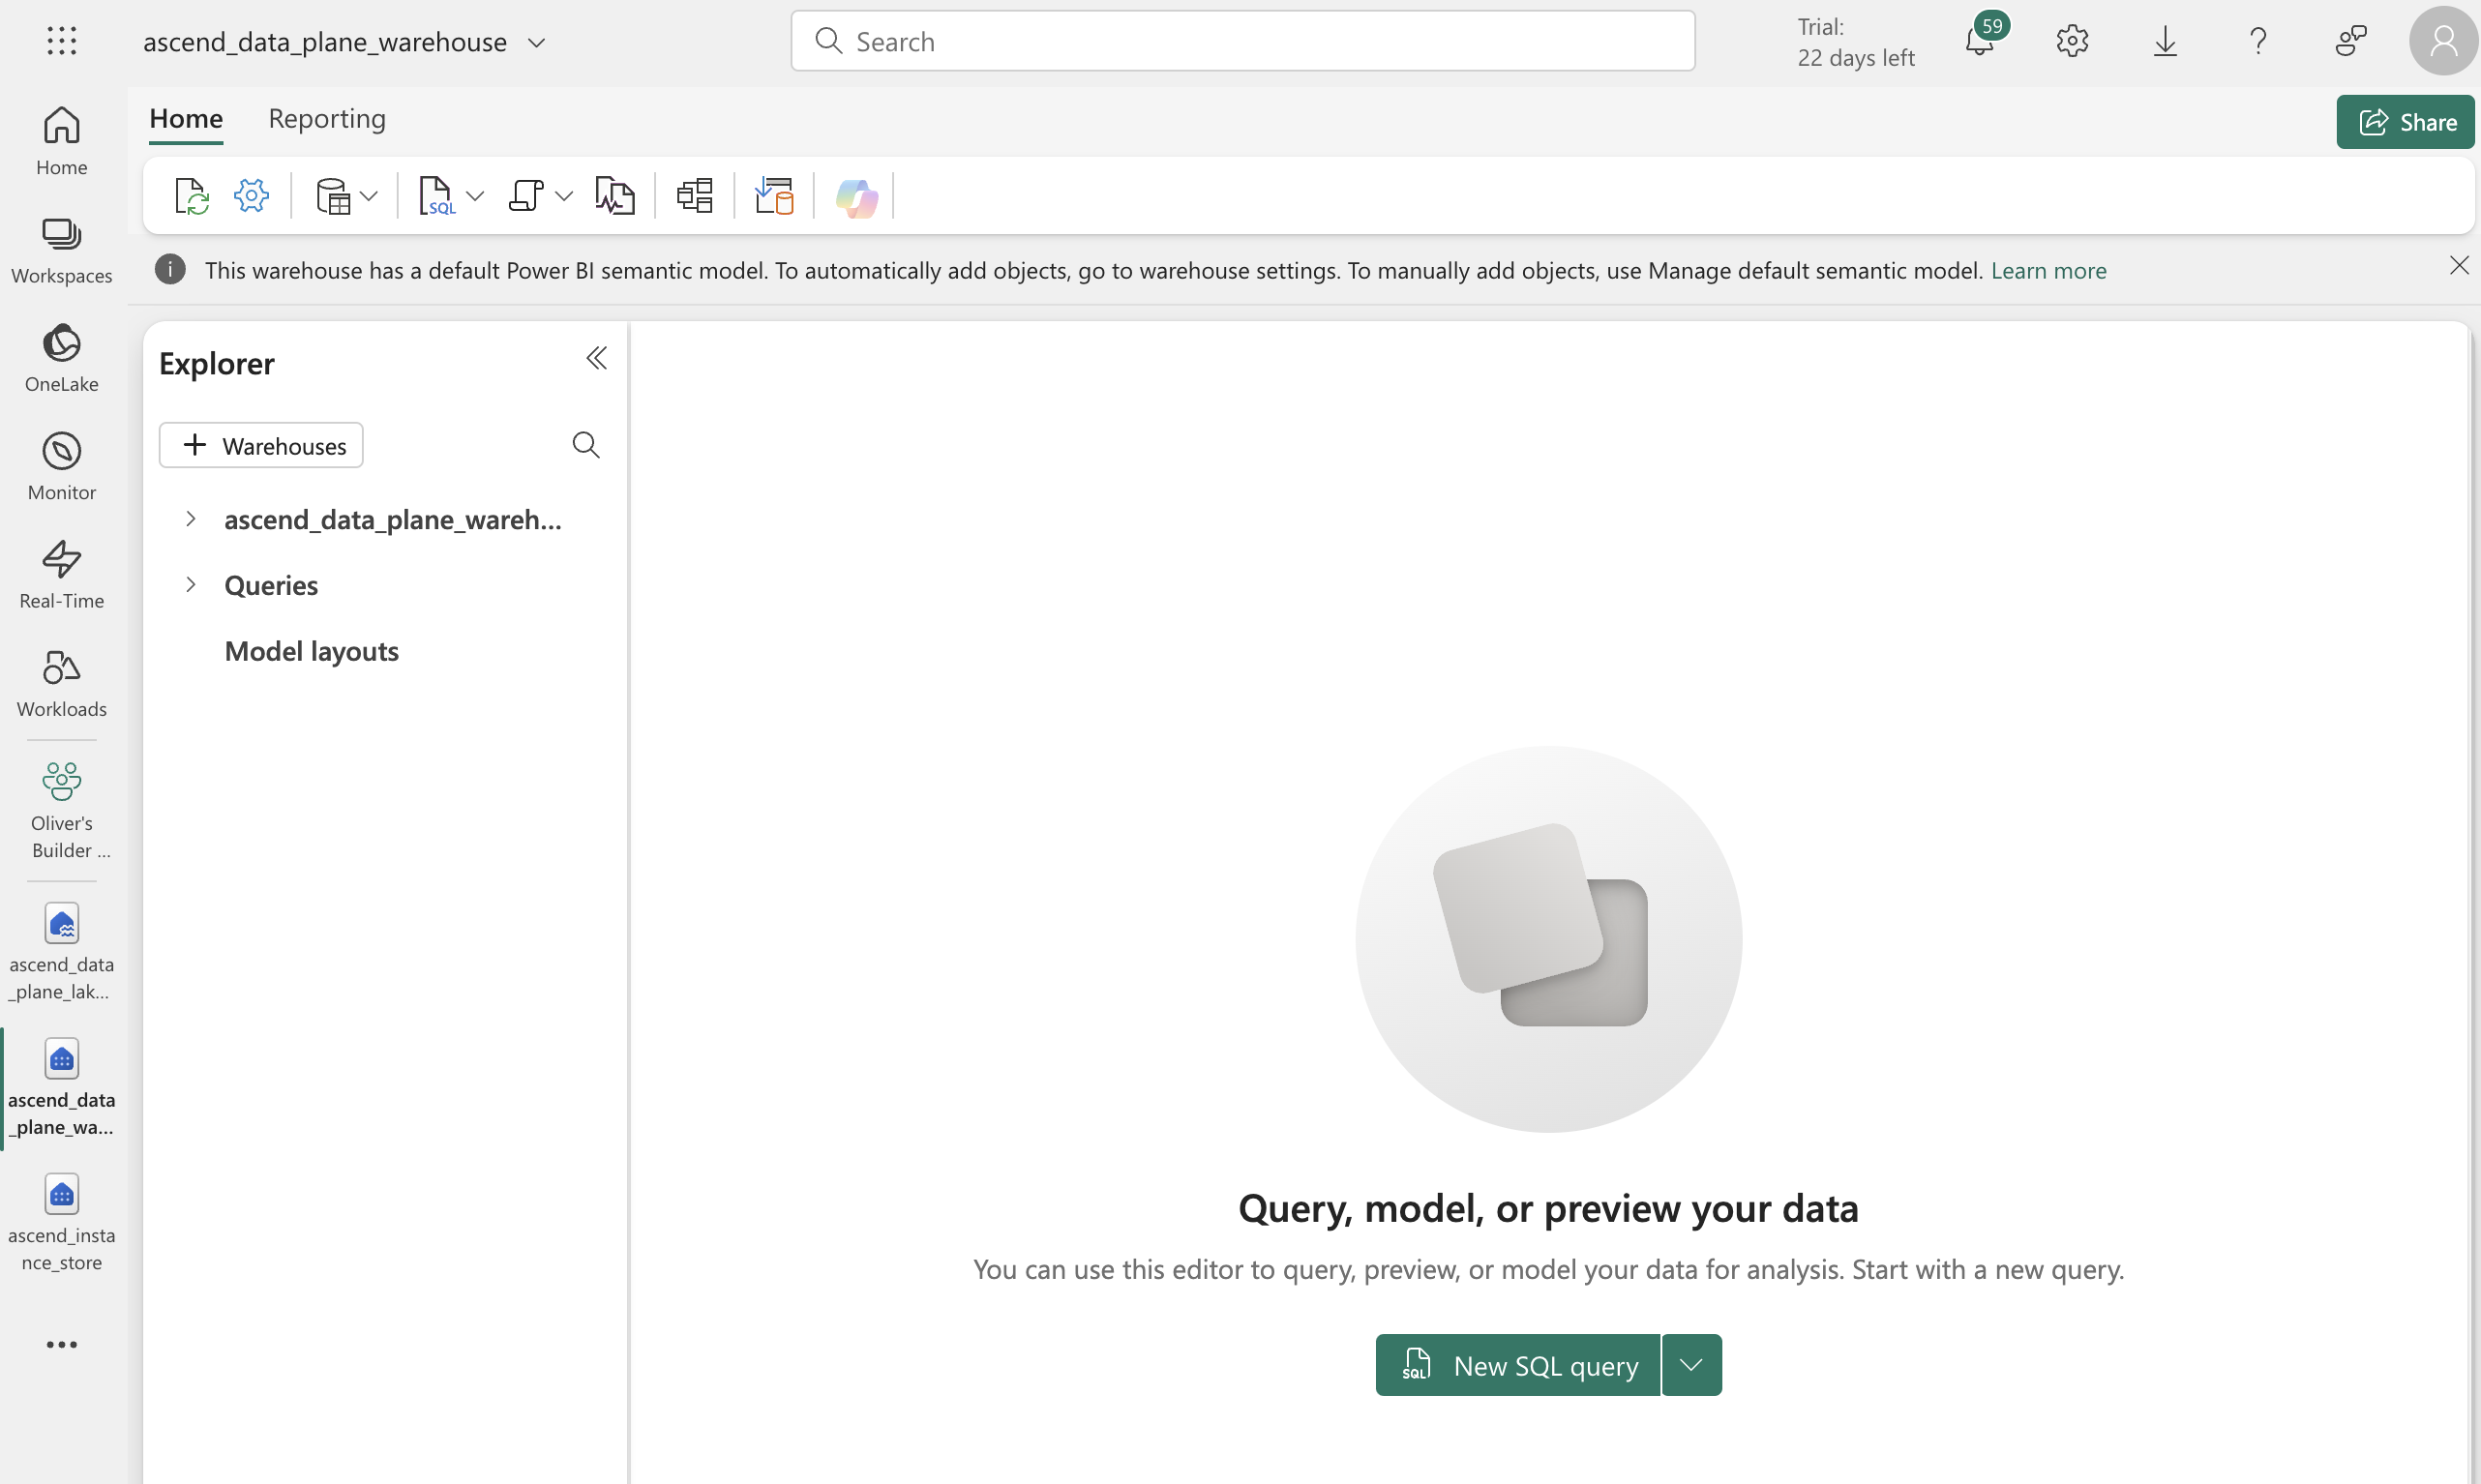
Now you need to create schemas in both the warehouse and lakehouse and create a link between the lakehouse and warehouse. Start by navigating to your Data Plane warehouse in the Fabric UI and adding a link to the lakehouse:
Click the + Warehouses button toward the top left of the Explorer bar on the warehouse page.
Select the
ascend_data_plane_lakehouselakehouse you created above.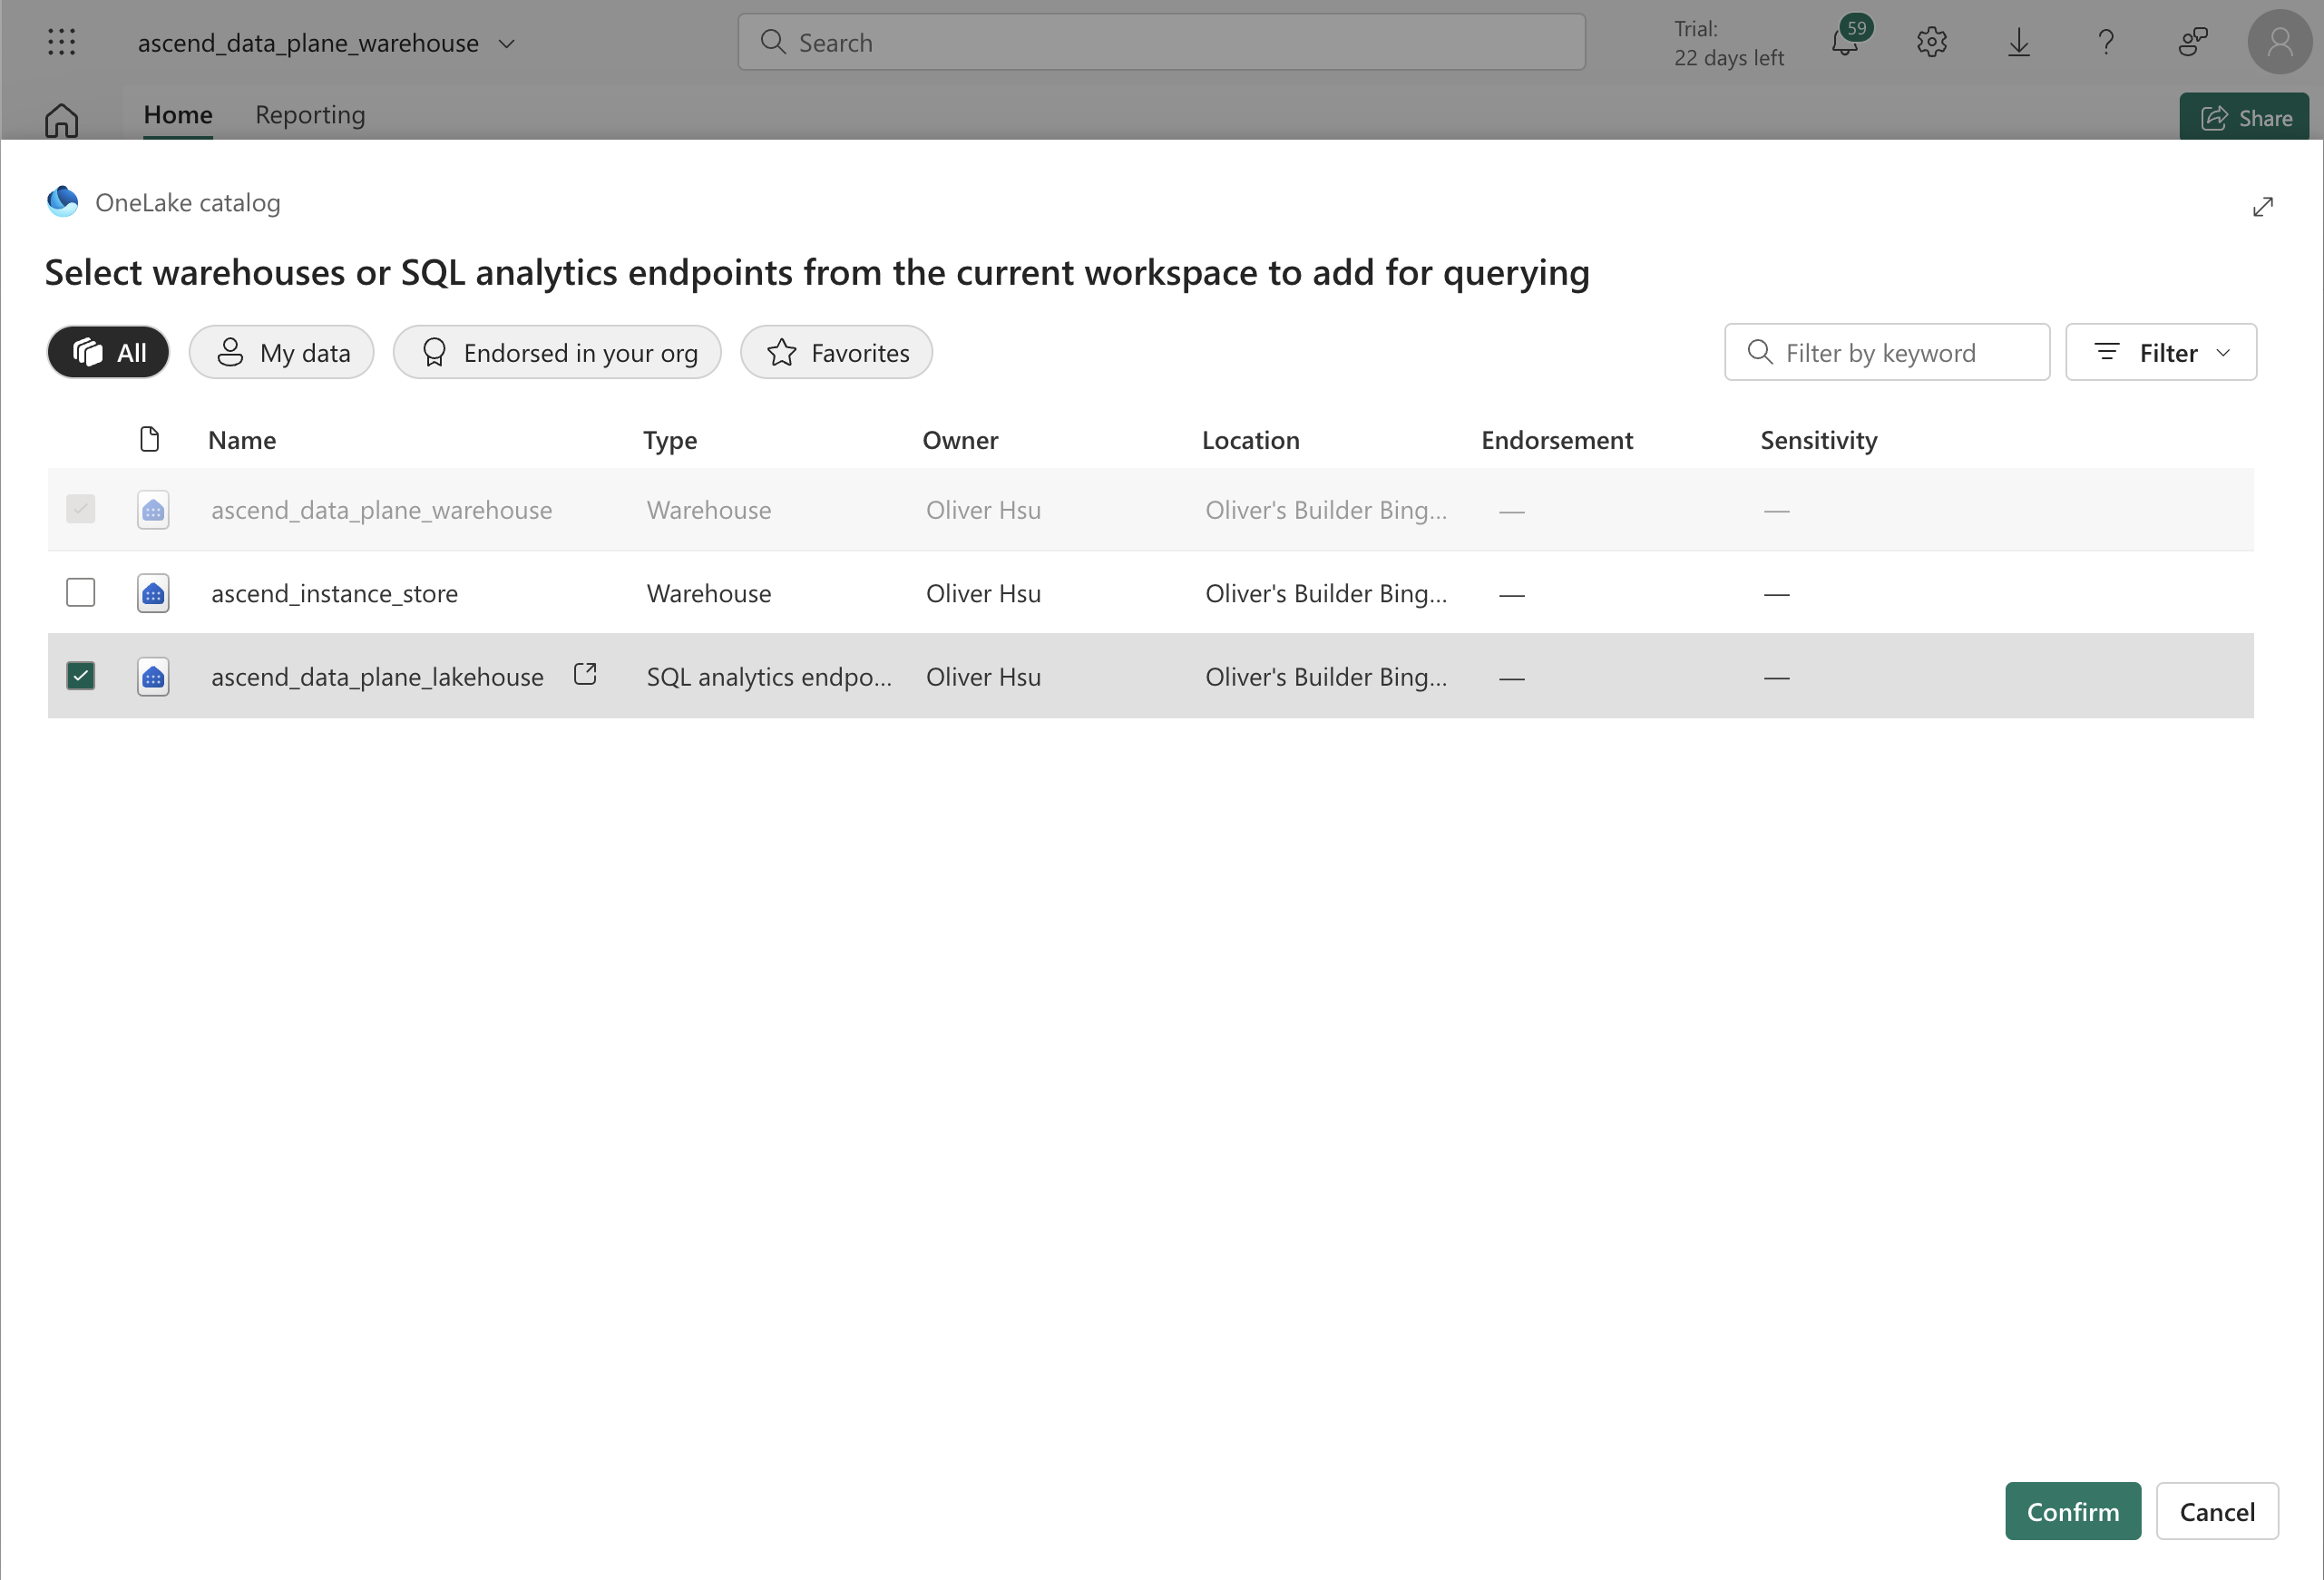
Click Confirm.
Next, add a new schema to the warehouse:
tipYou will use this schema name later to set up a Connection for the Data Plane.
Clicking New schema will bring up a SQL query editor as shown in the screenshot below. Edit the name of the schema and run the SQL. We recommend using
[quickstart]for the purposes of this quickstart, though you can use any name you like.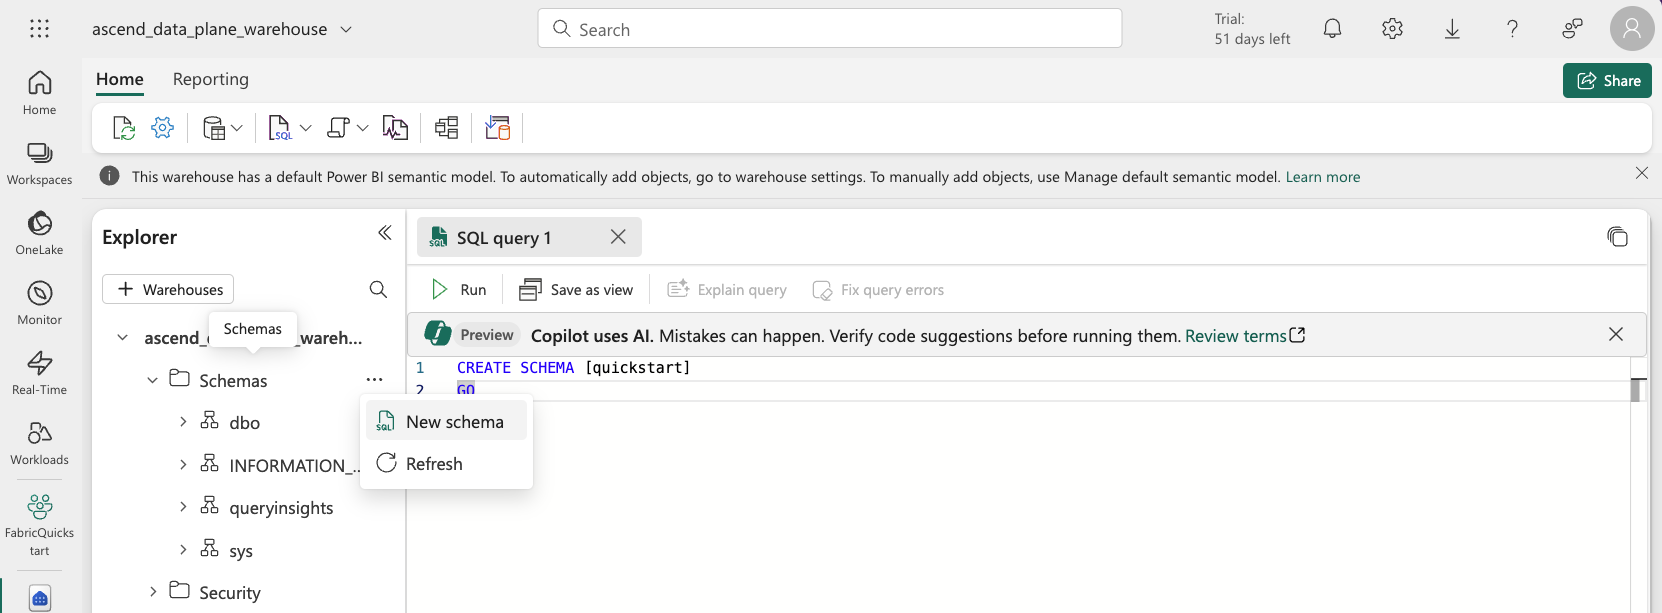
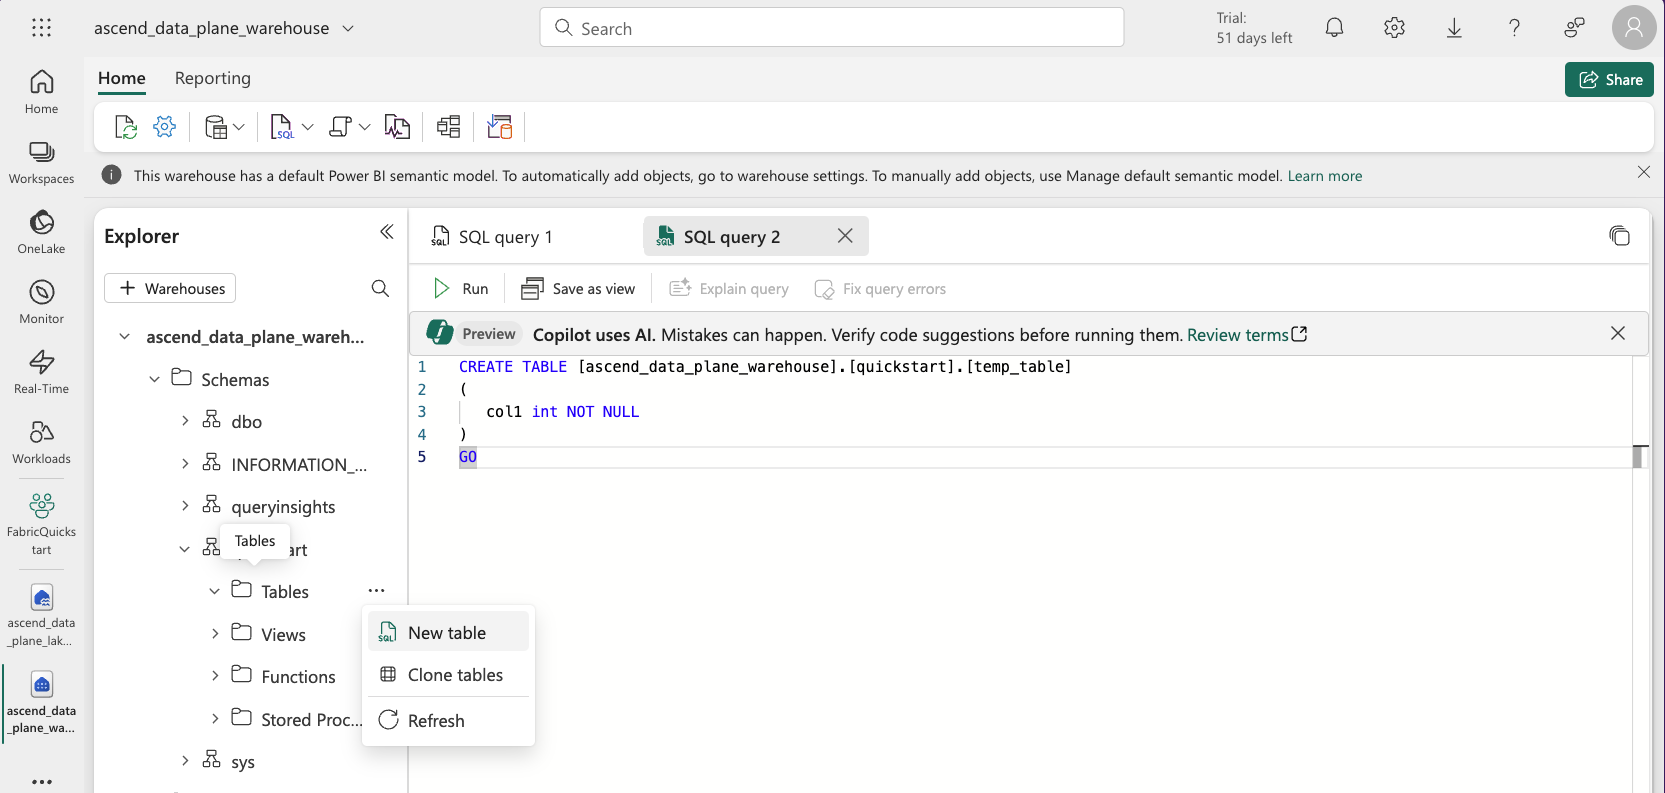
Then, navigate into the schema and tables. Right click and Create new table, which will open a SQL query editor like above. Create an empty temporary table (run the SQL):
tipThis is done so you can link the schema in the next step. It won't work with an empty schema and there won't be tables in the schema until you run your first Flow later.
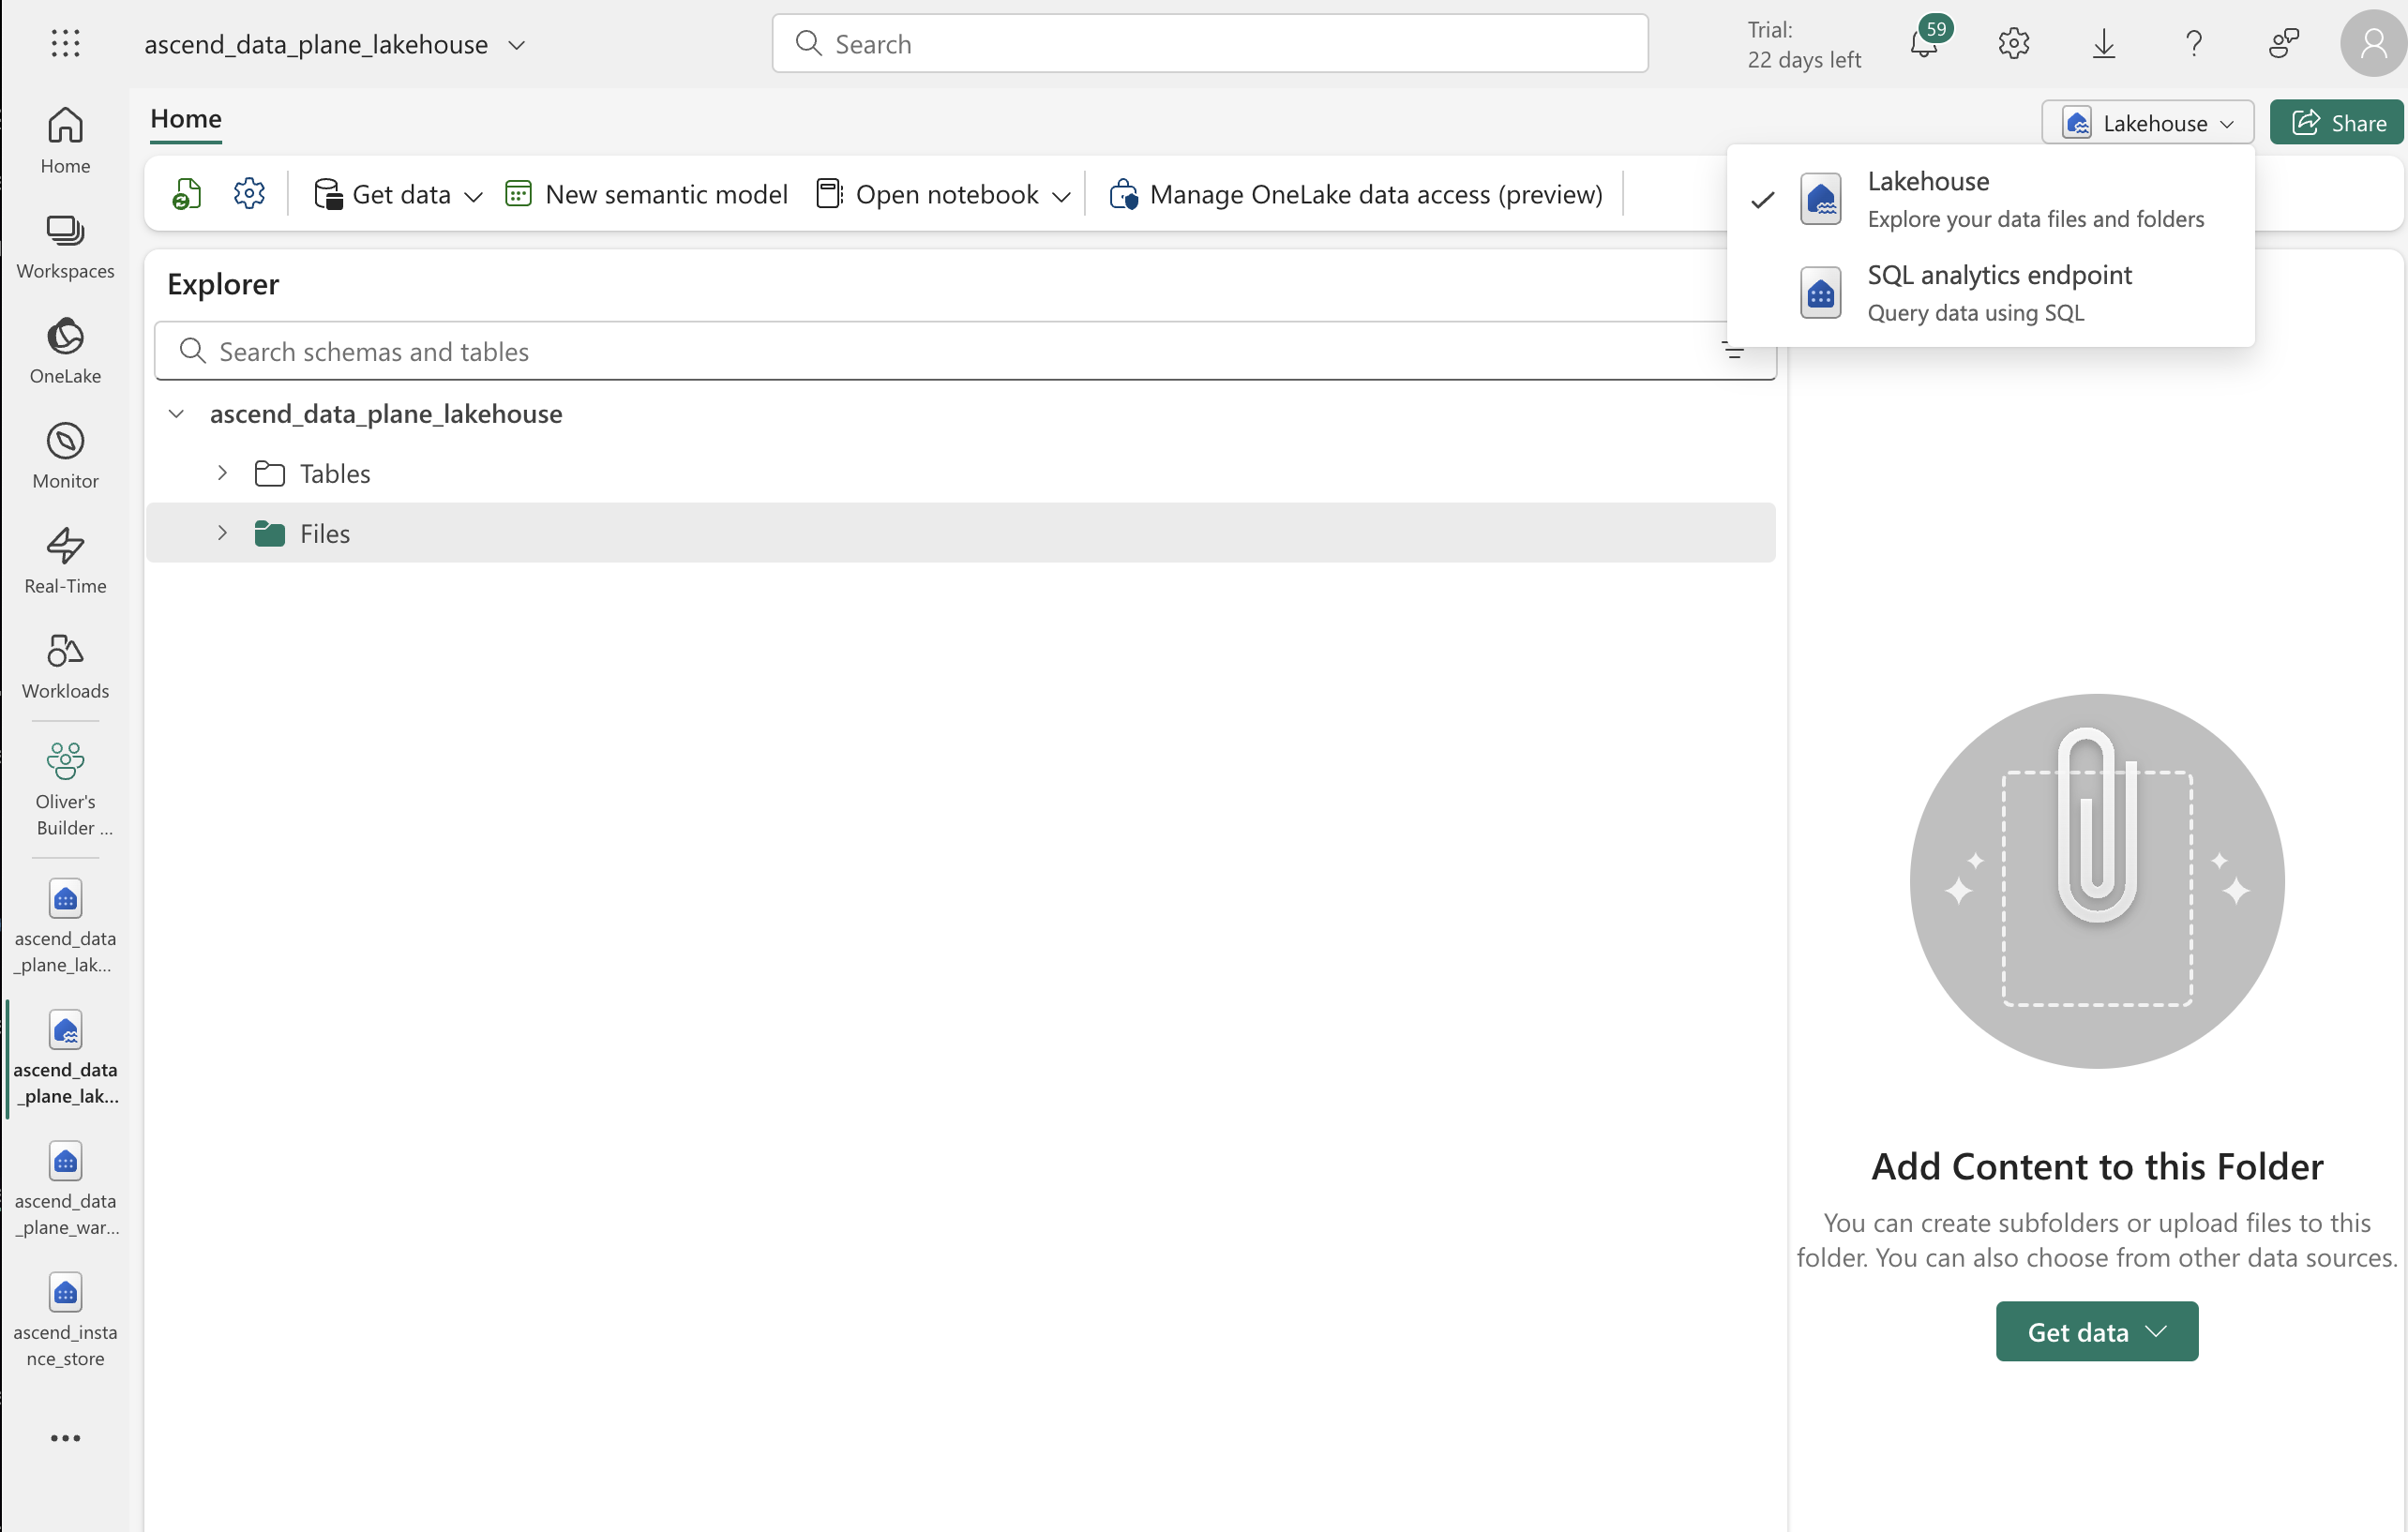
Navigate to your Data Plane lakehouse in the Fabric UI. Make sure you are in the "Lakehouse" mode; if you are in the "SQL analytics endpoint" mode, simply click on the button and select "Lakehouse" from the dropdown.
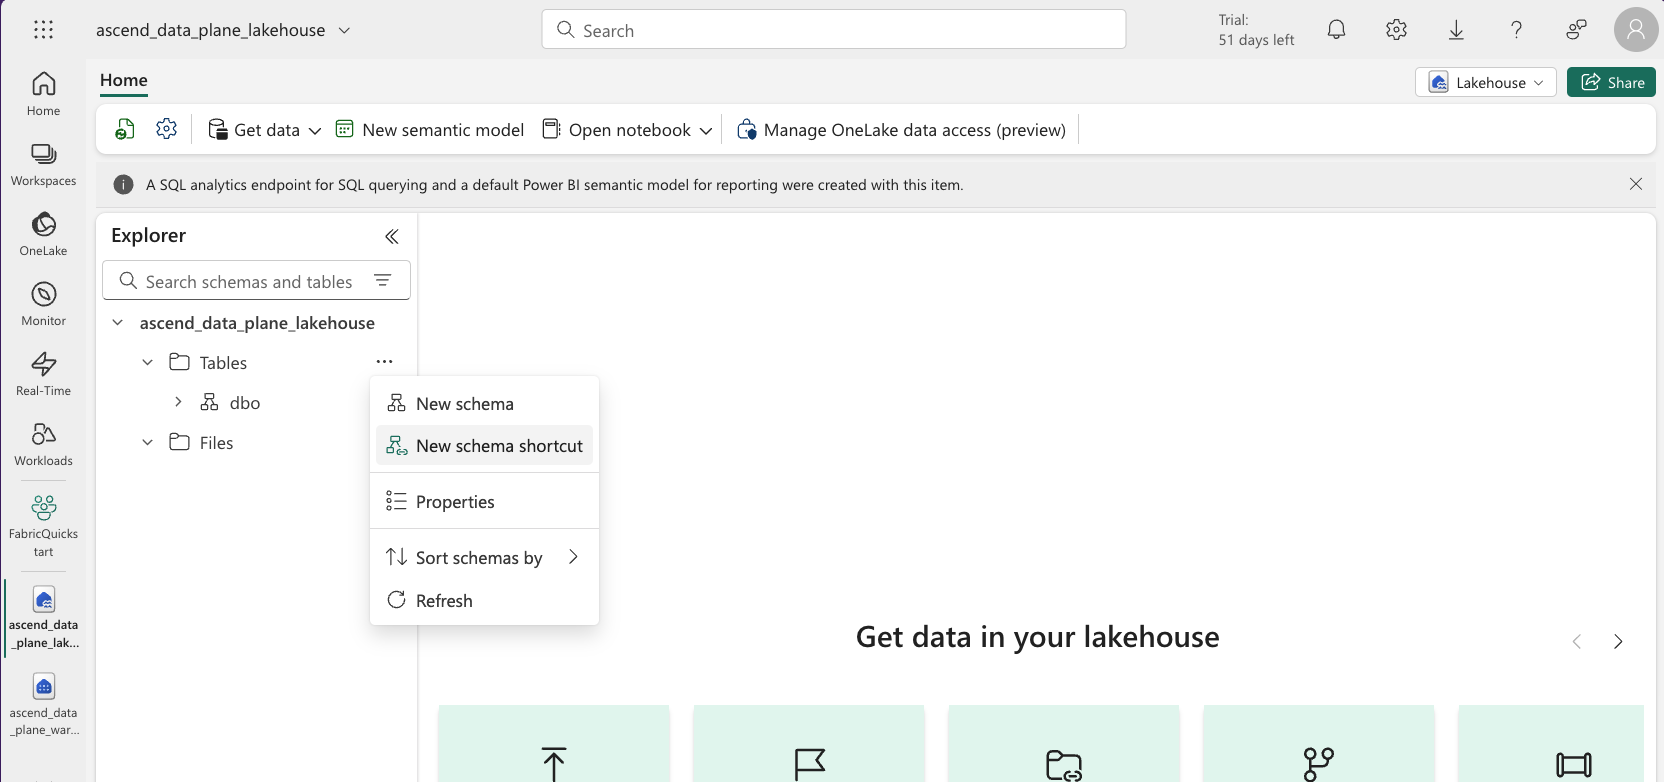
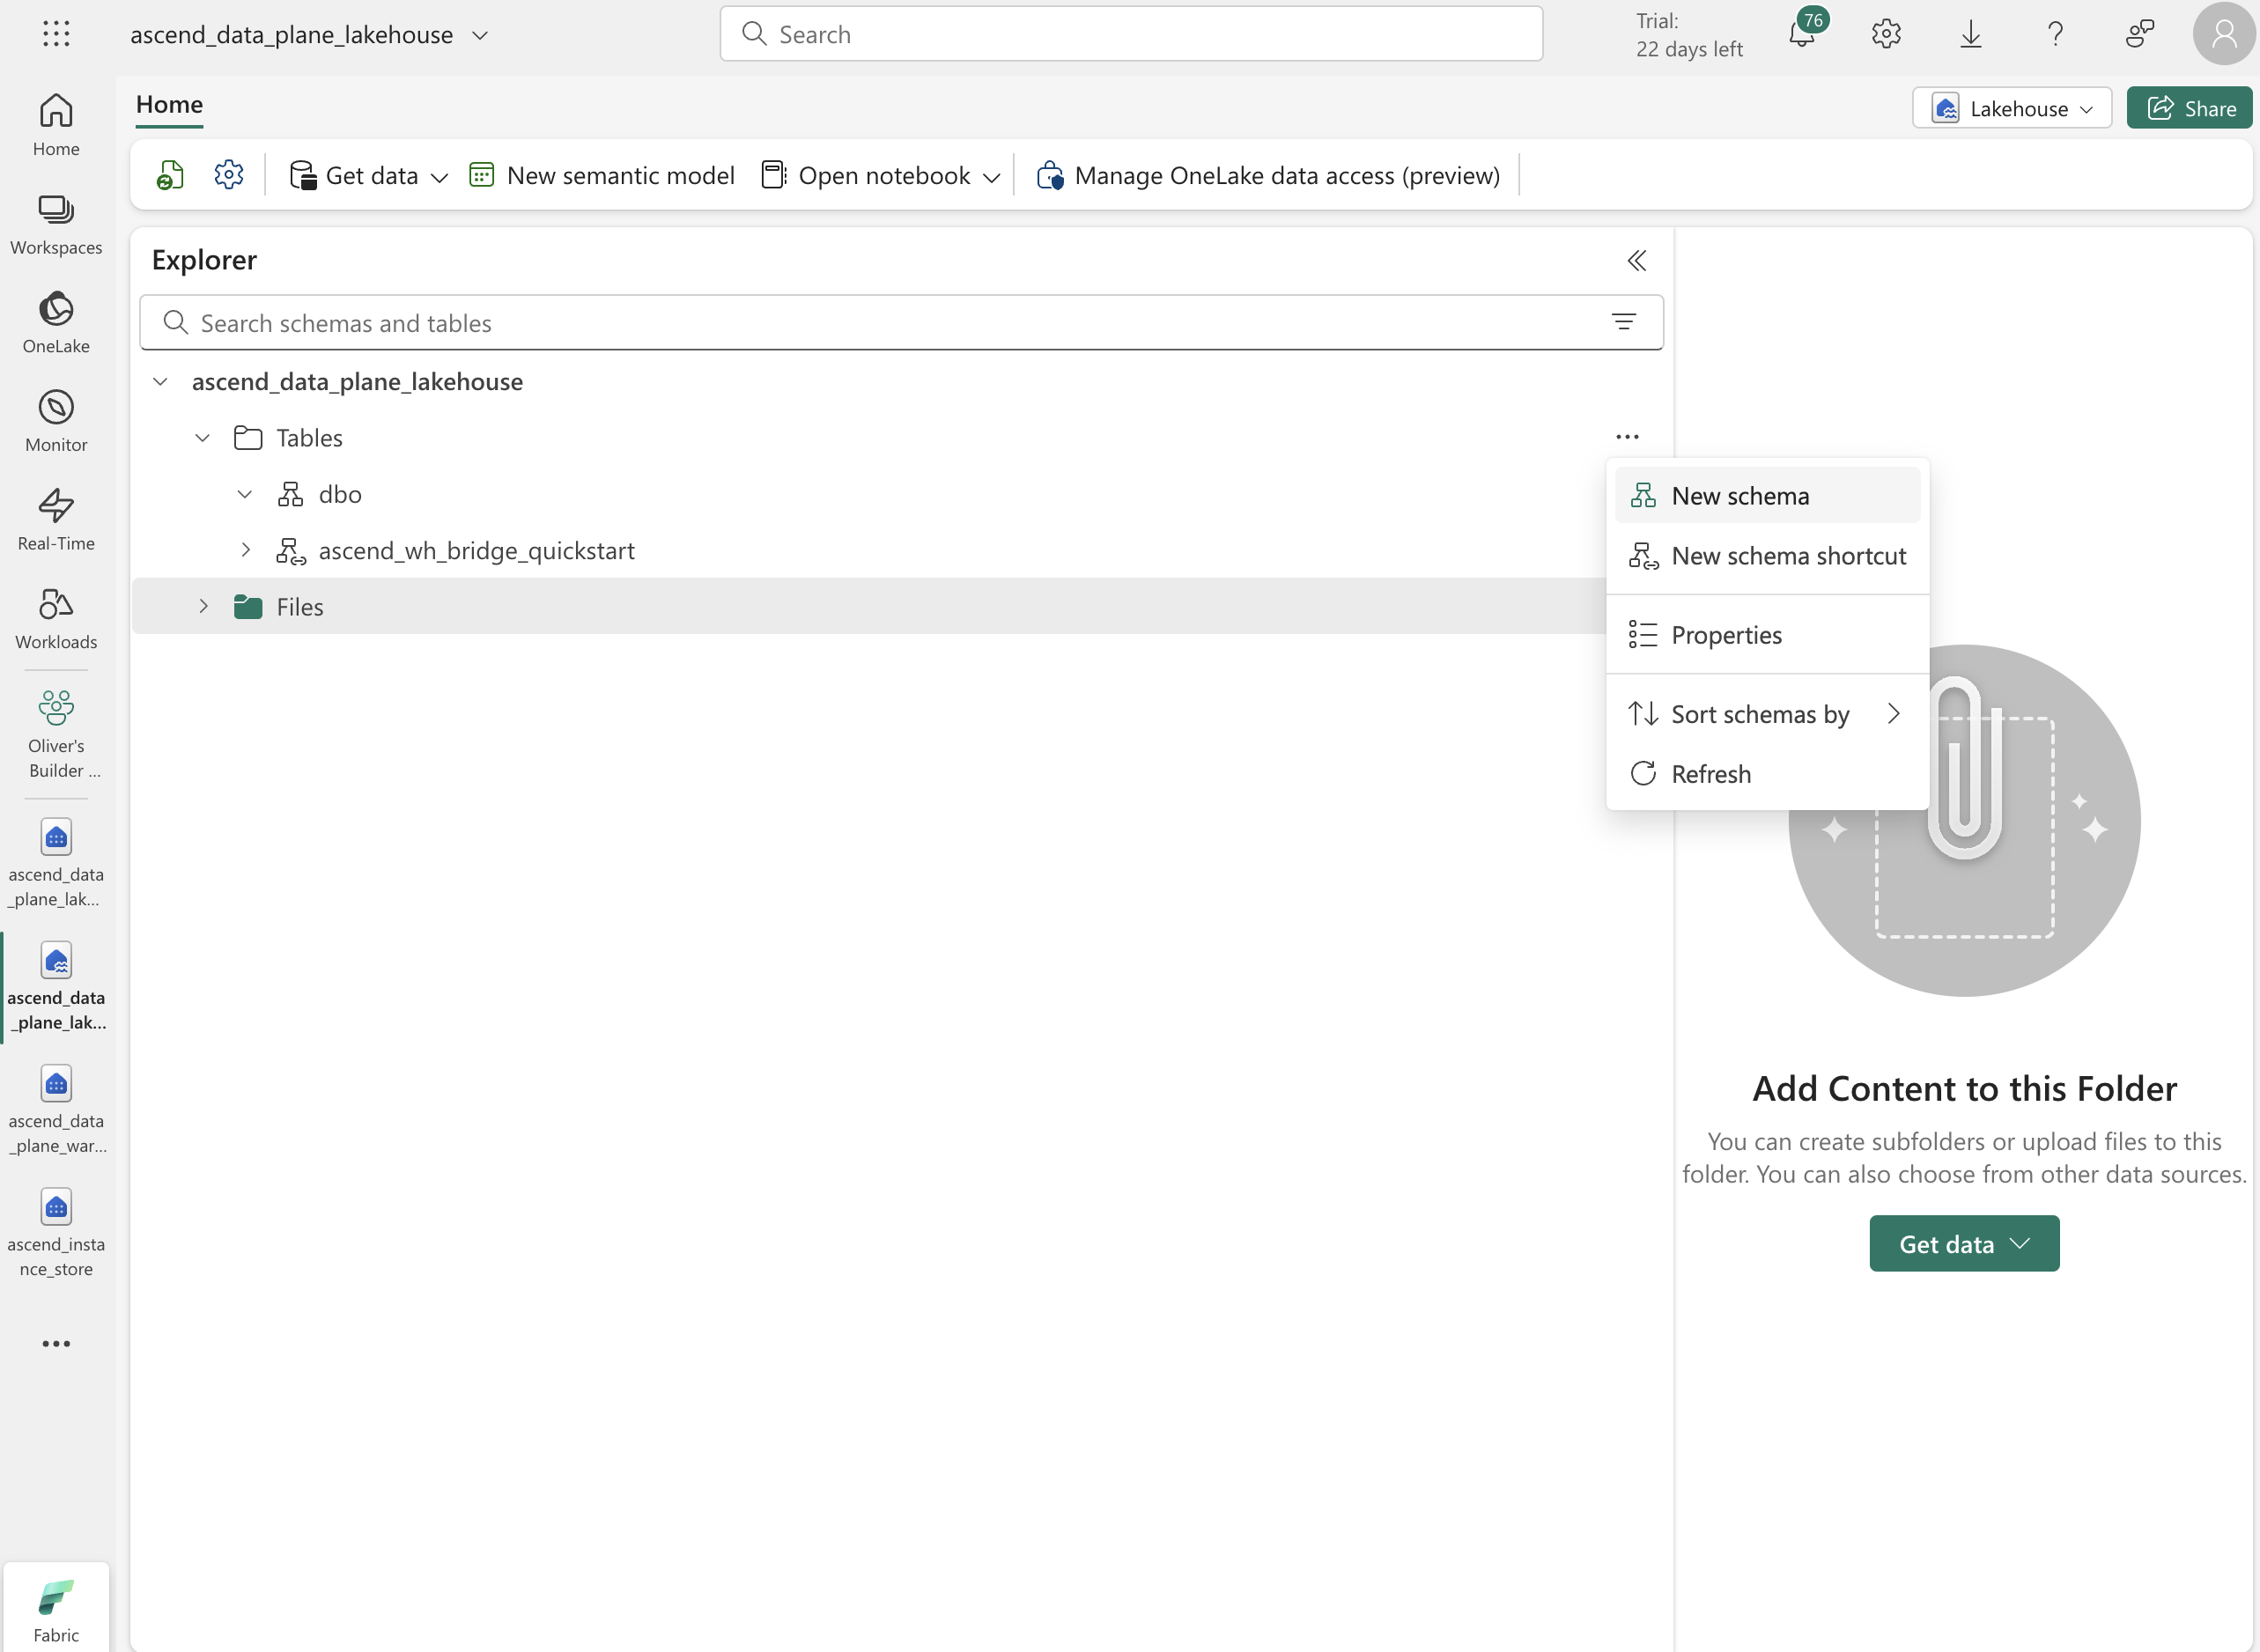
Create a schema shortcut by clicking the context menu icon of the "Tables" item in the left pane and selecting New schema shortcut:
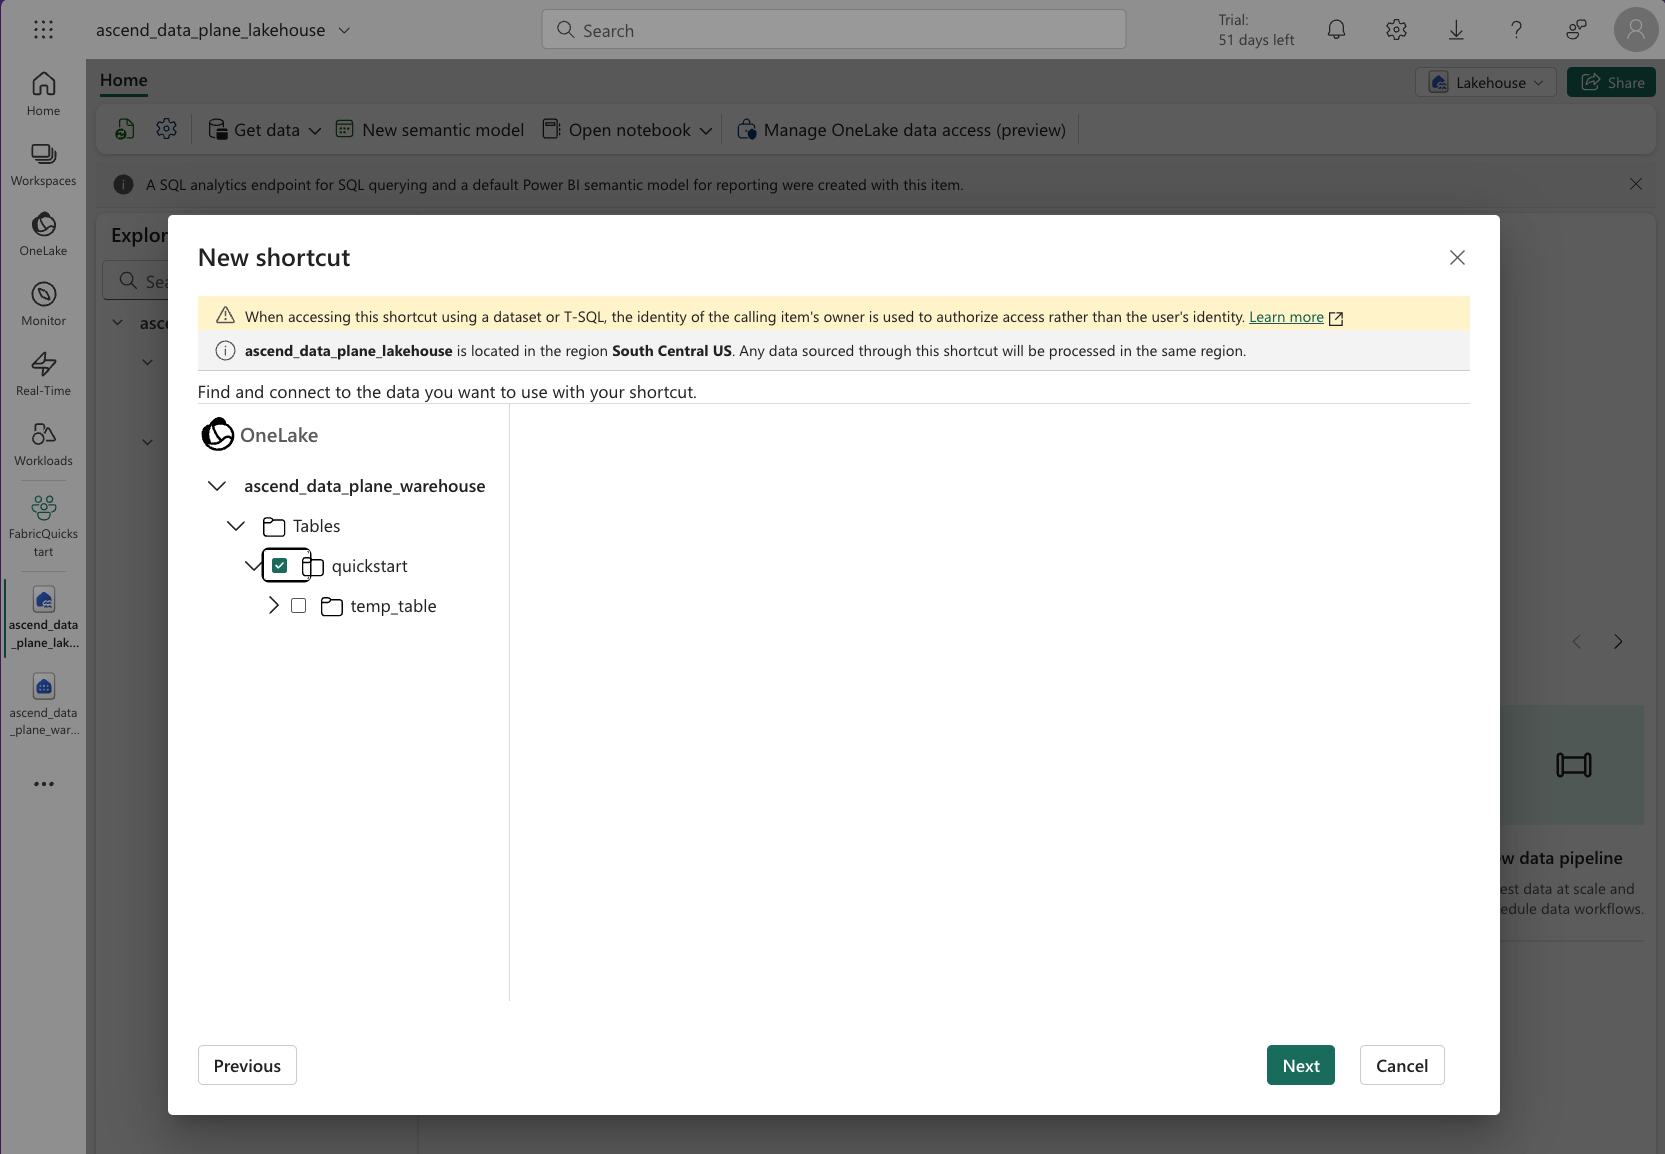
Choose Microsoft OneLake under Internal sources, select the Data Plane warehouse, then select the schema from above:
Hit Next. Under Actions, click the pencil icon, then change the name of the shortcut to
ascend_wh_bridge_<your-warehouse-schema-name>. If you followed our recommendation above of naming the warehouse schemaquickstart, then the name of the shortcut should beascend_wh_bridge_quickstart.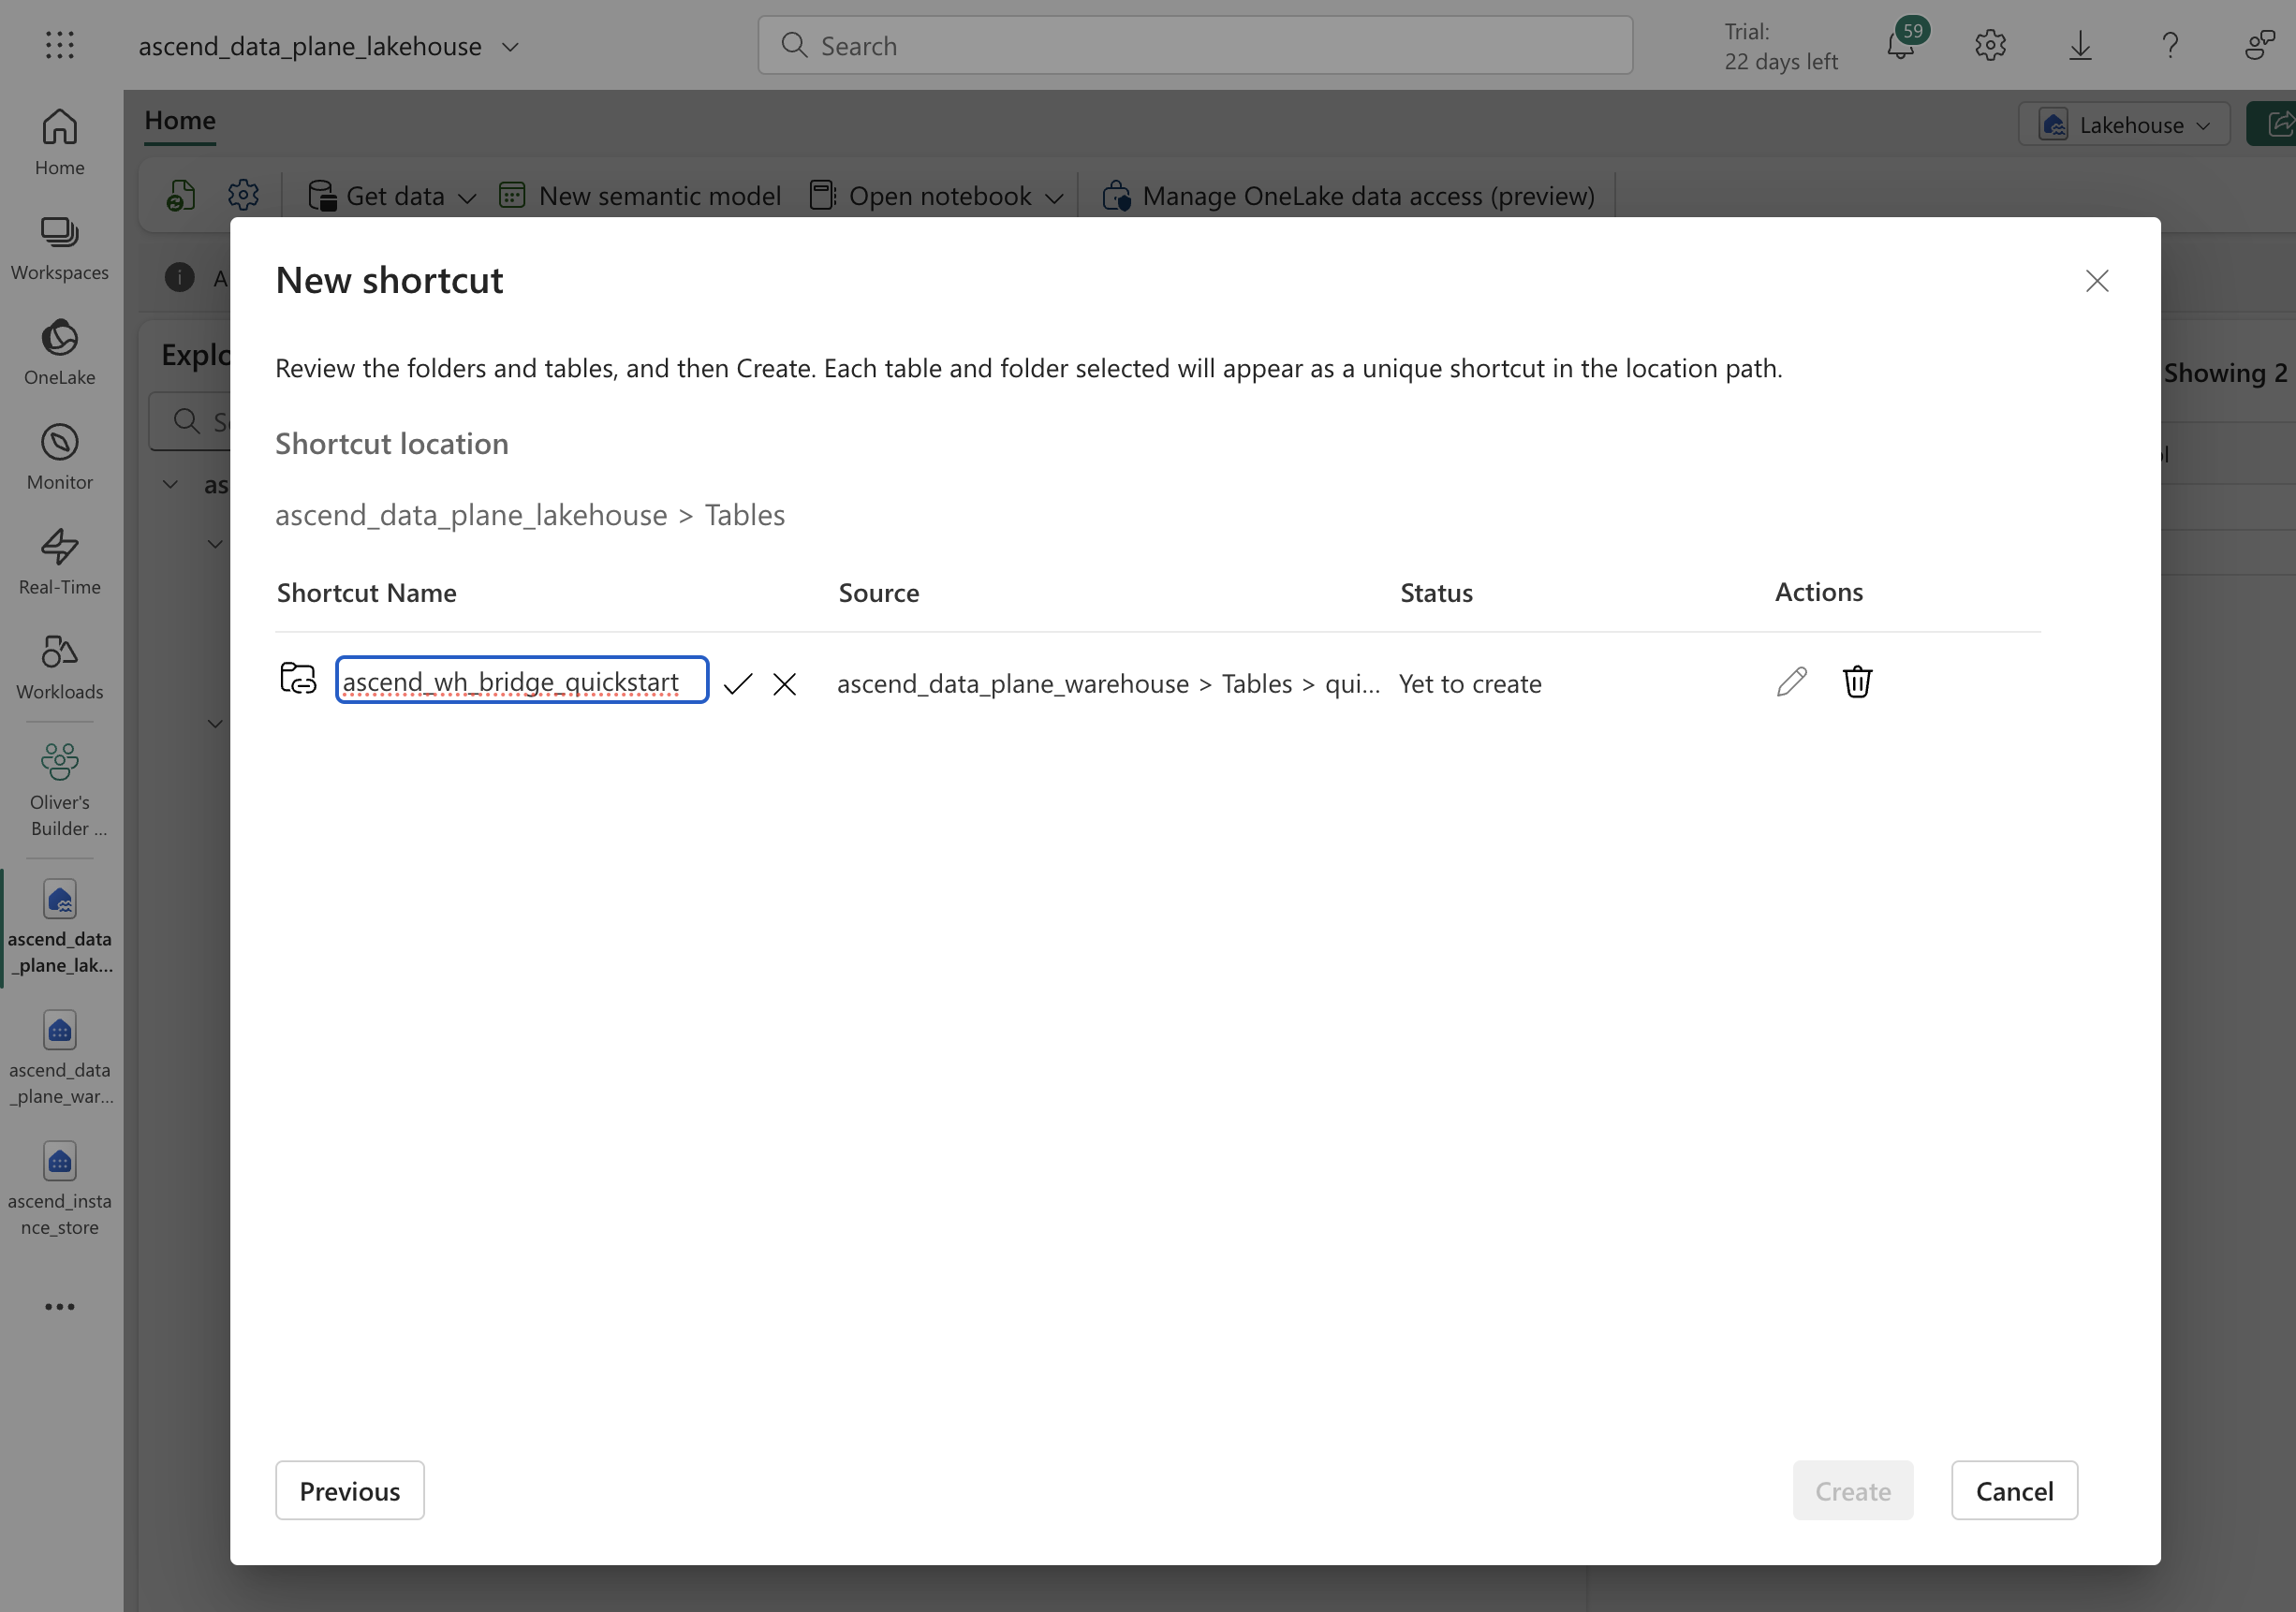
Click the checkmark icon to confirm the name change, then click Create to create the shortcut.
Lastly, create a schema in the lakehouse by clicking the context menu icon of the "Tables" item in the left pane and selecting New Schema.
We recommend using
quickstartfor the purposes of this quickstart, but you can use any name you like. Click Create to create the schema.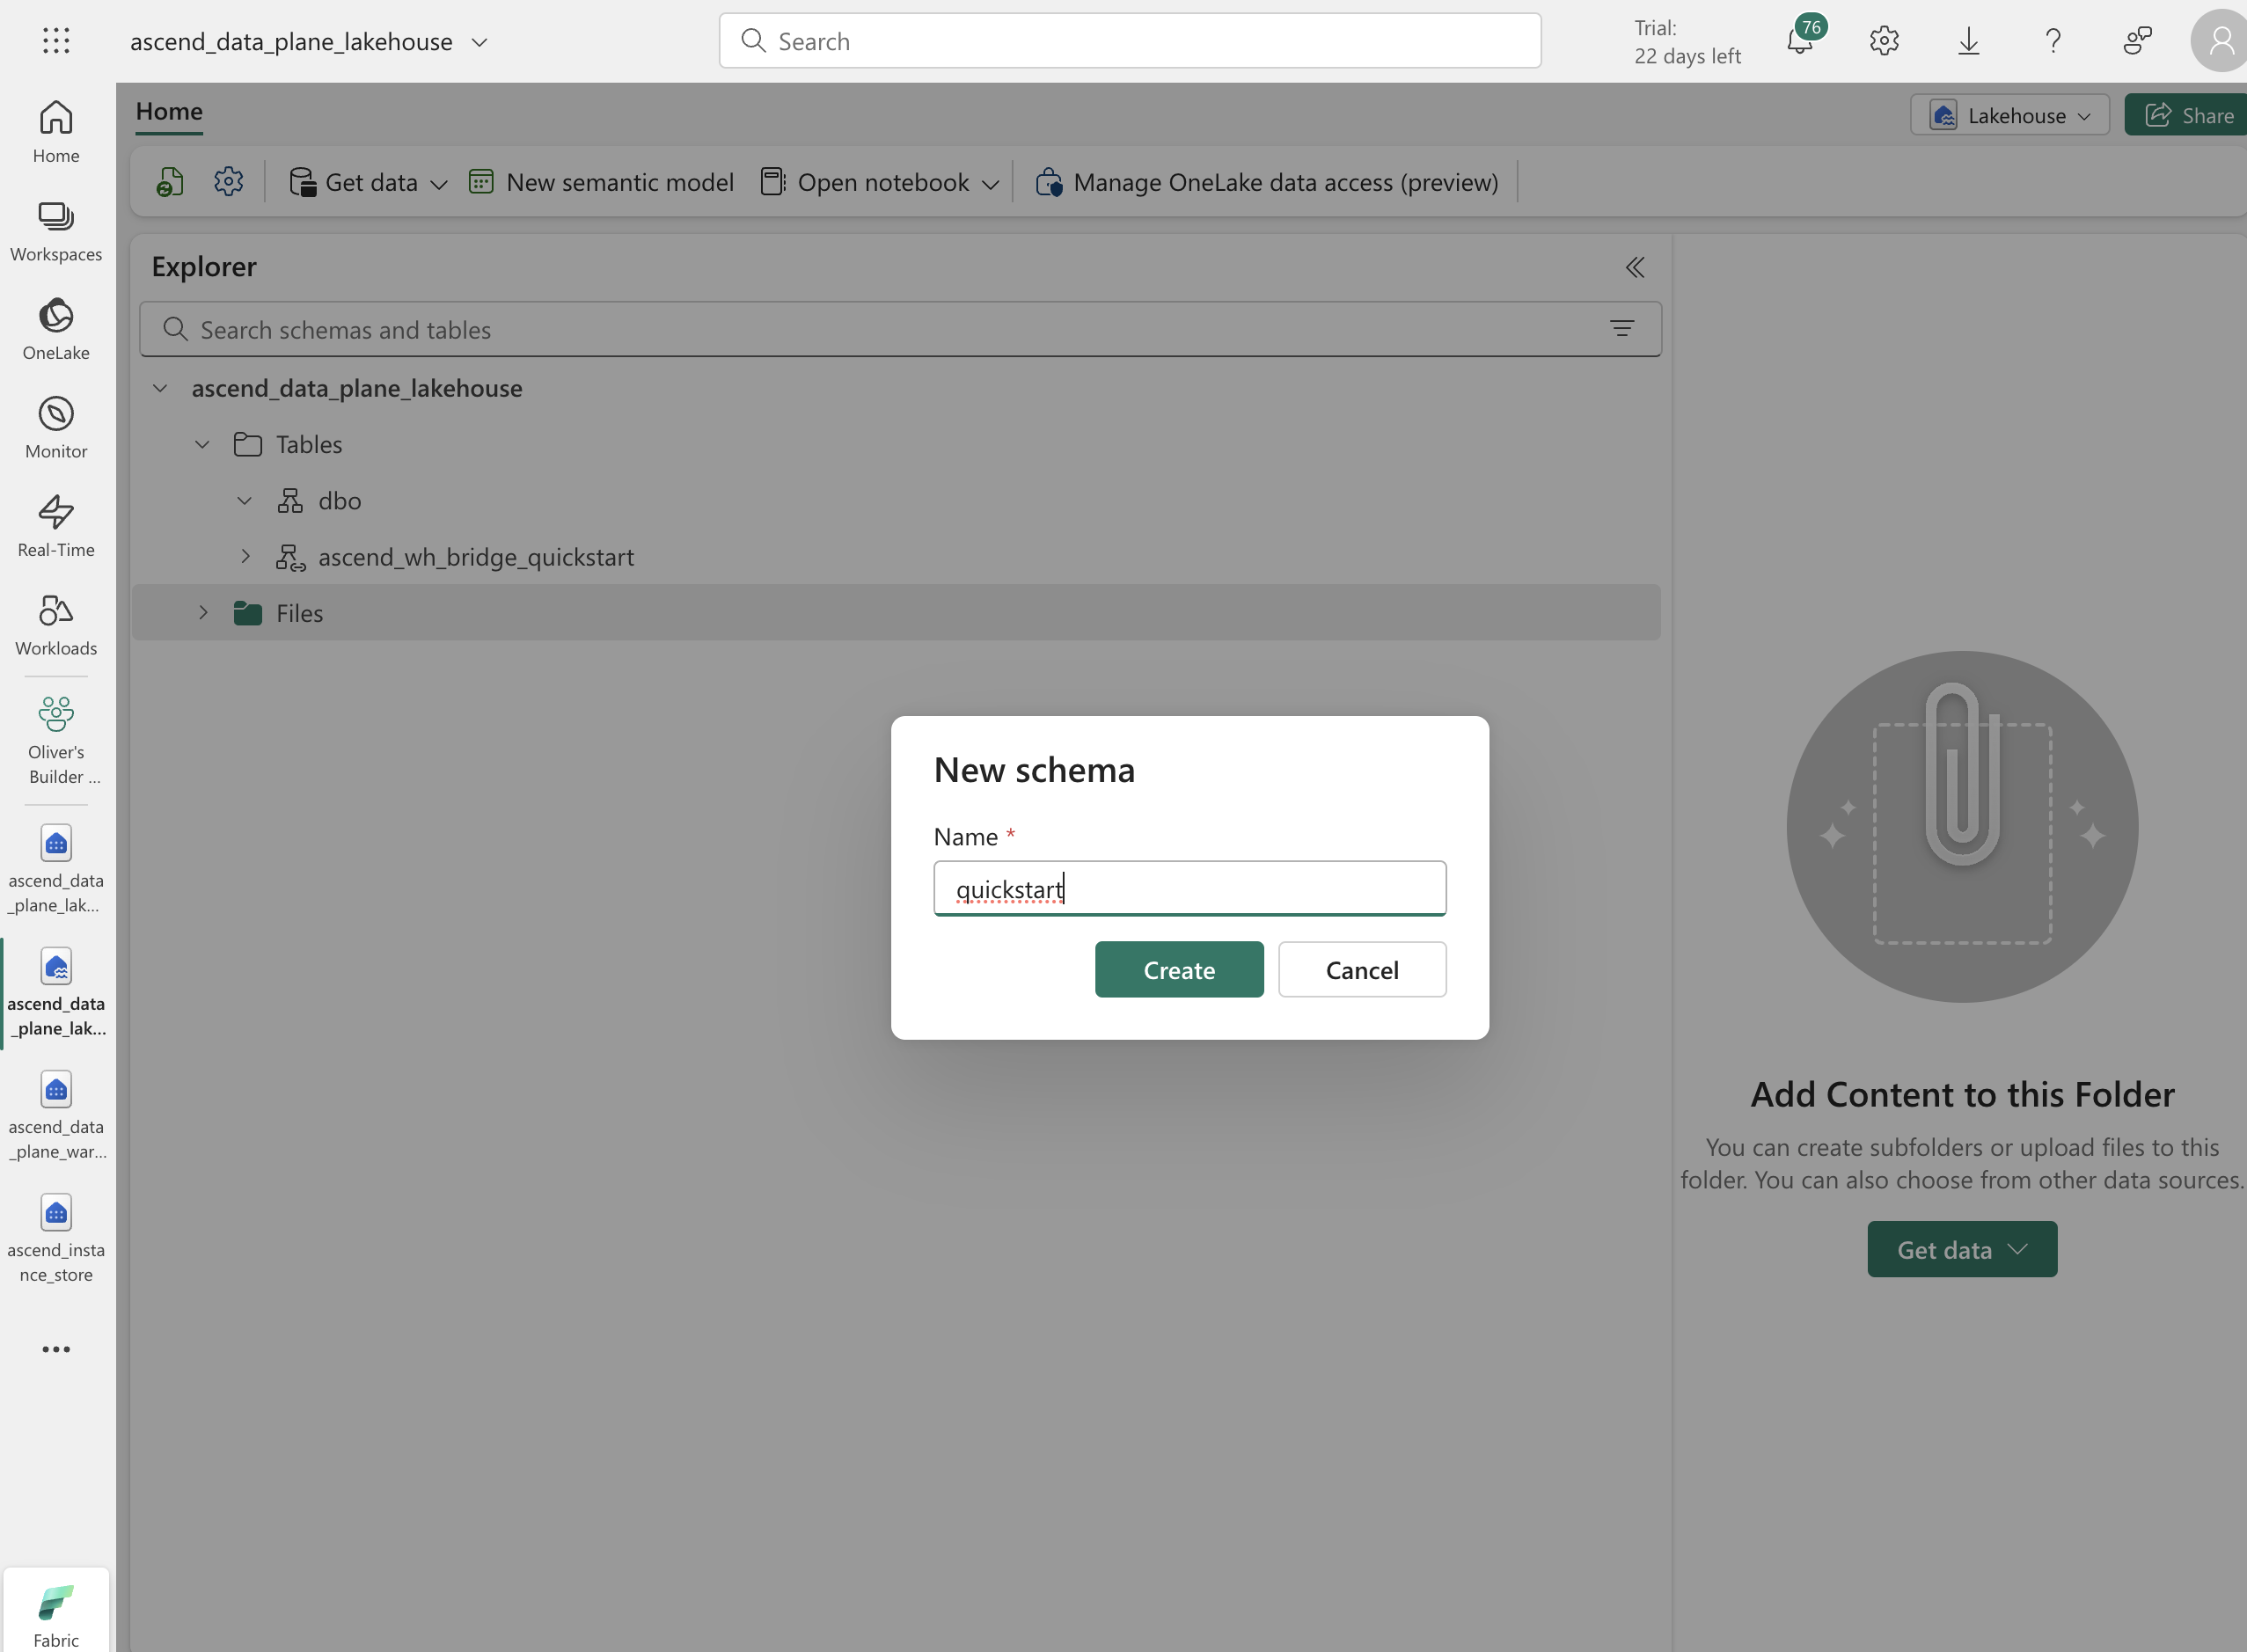
Setup Fabric for use as an Ascend Instance Store
The Instance Store is a Fabric schema that your Ascend Instance will use to store operational data, such as logs, metrics, and other metadata.
It is kept separate from your project's data, and uses a different service account to ensure security.
To use the Fabric warehouse you created above as the Instance Store, you first need to store the App Registration/Service Principal password from above in the Instance Vault. This allows Ascend to use your app to access the Azure and Fabric resources.
You can use Azure Key Vault (or other options) as your Instance Vault, though we recommend sticking with the Ascend Managed Vault for simplicity. If you are using an external vault, you must set the secret in the vault outside of the Ascend UI.
-
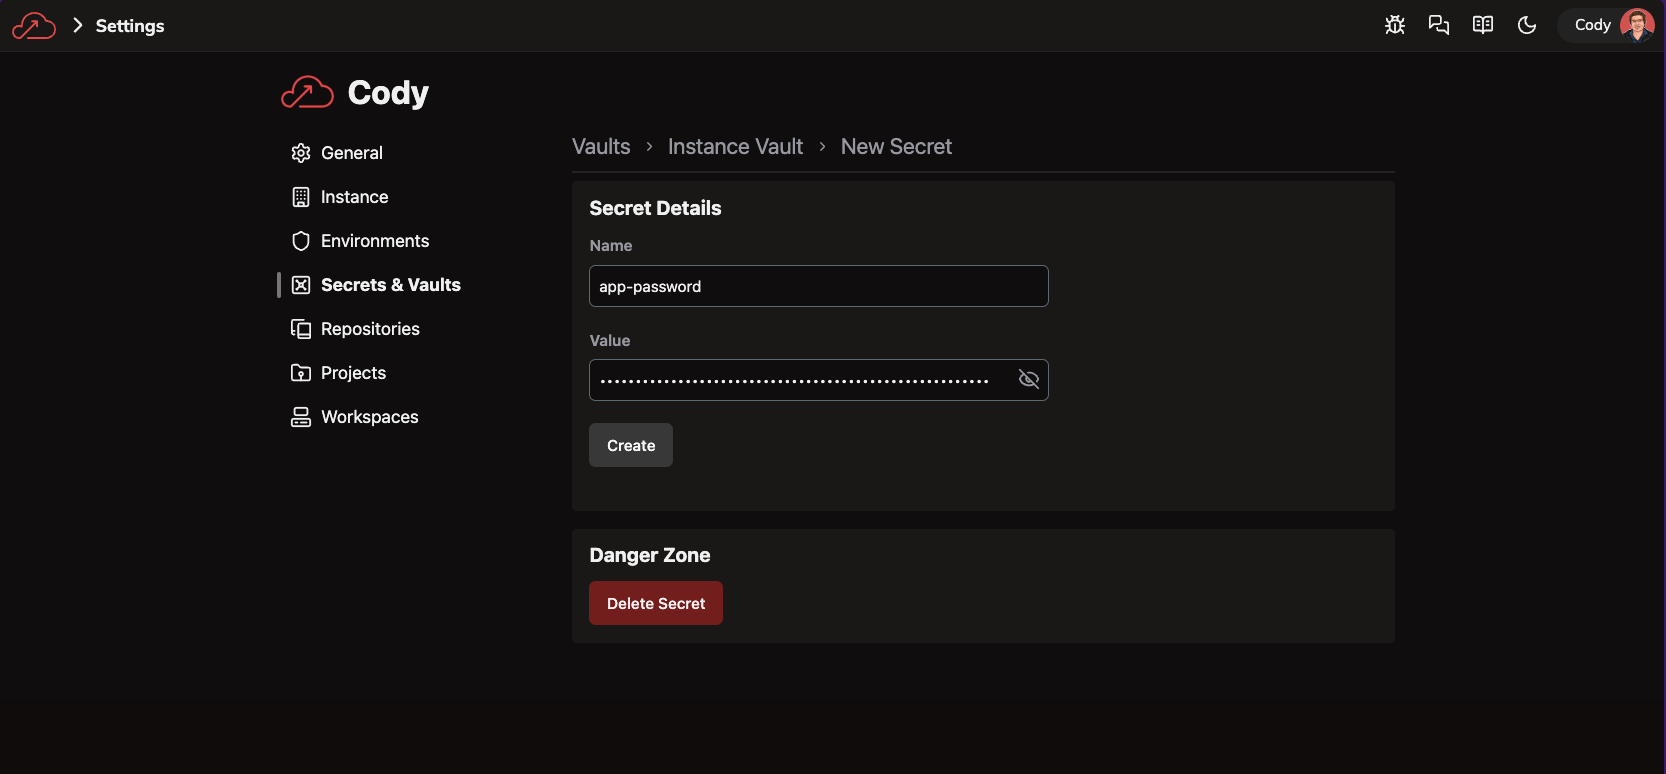
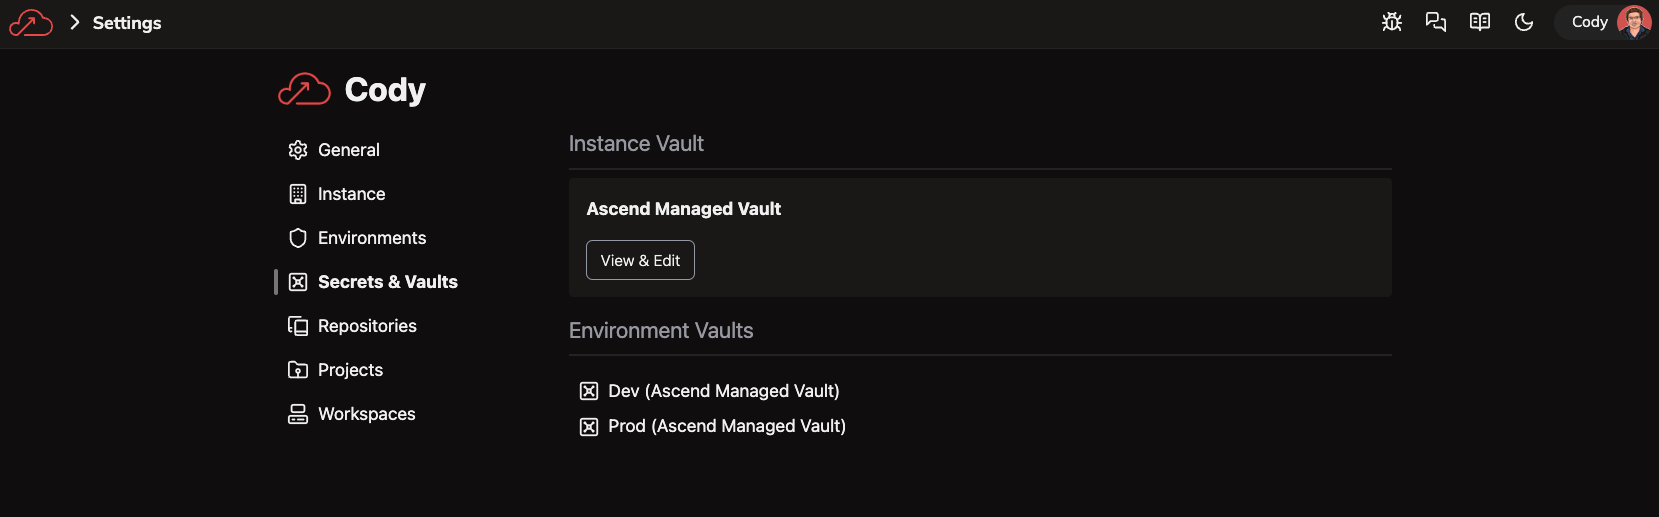
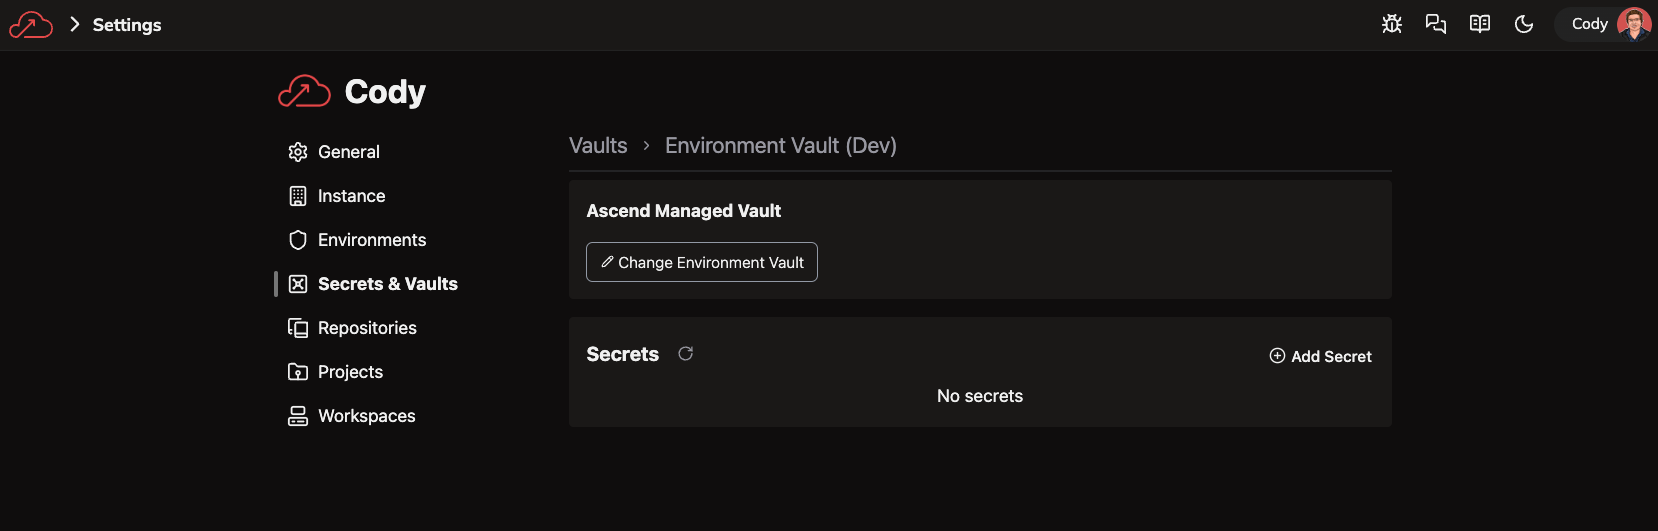
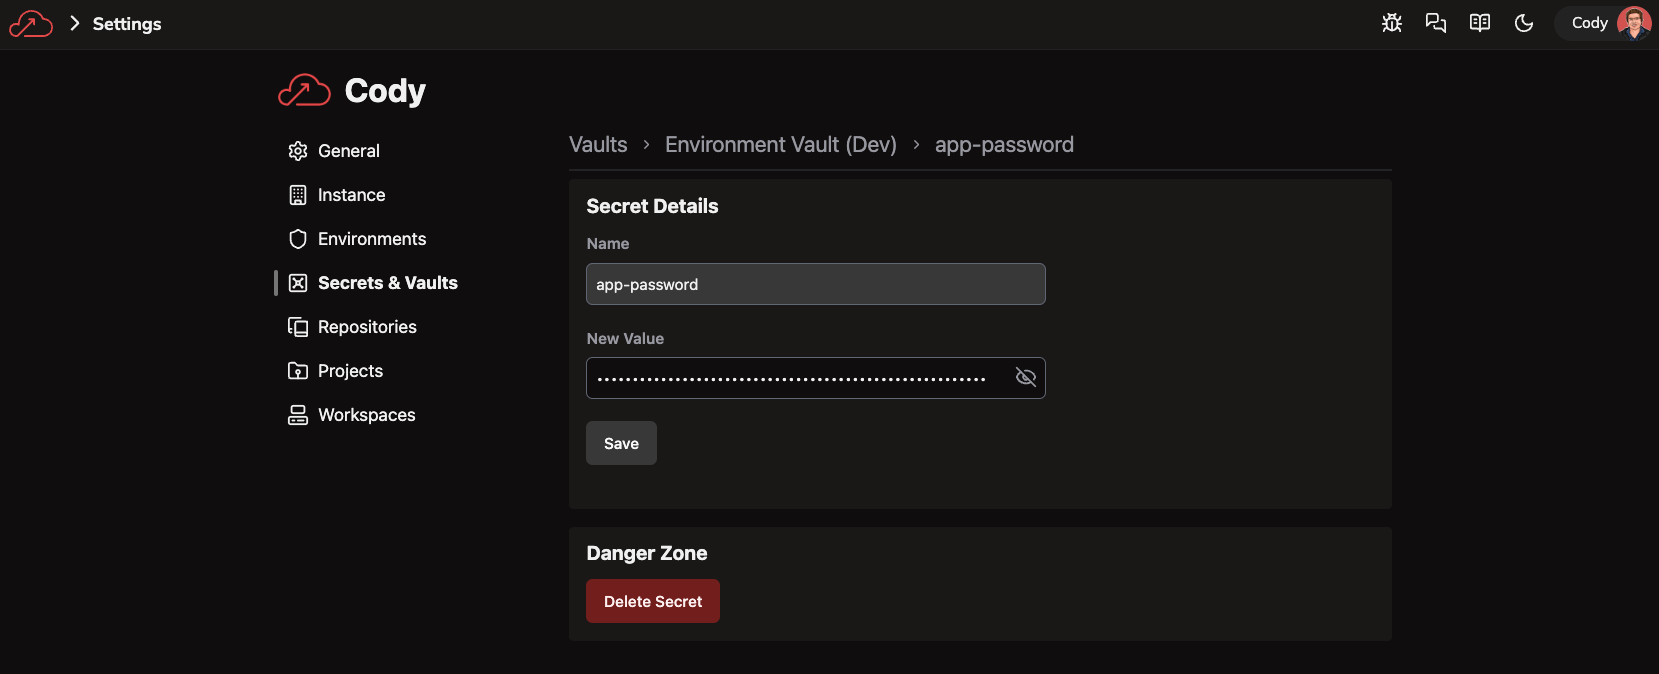
In the Ascend UI, navigate to Settings > Instance and click Manage Secrets under the Instance Vault section. Set the Instance Vault to an Ascend Managed Vault if needed. Click Add Secret and set the name to whatever you like (e.g.
app-passwordbelow) and the value to the password (client secret) for the Service Principal/App Registration you created above.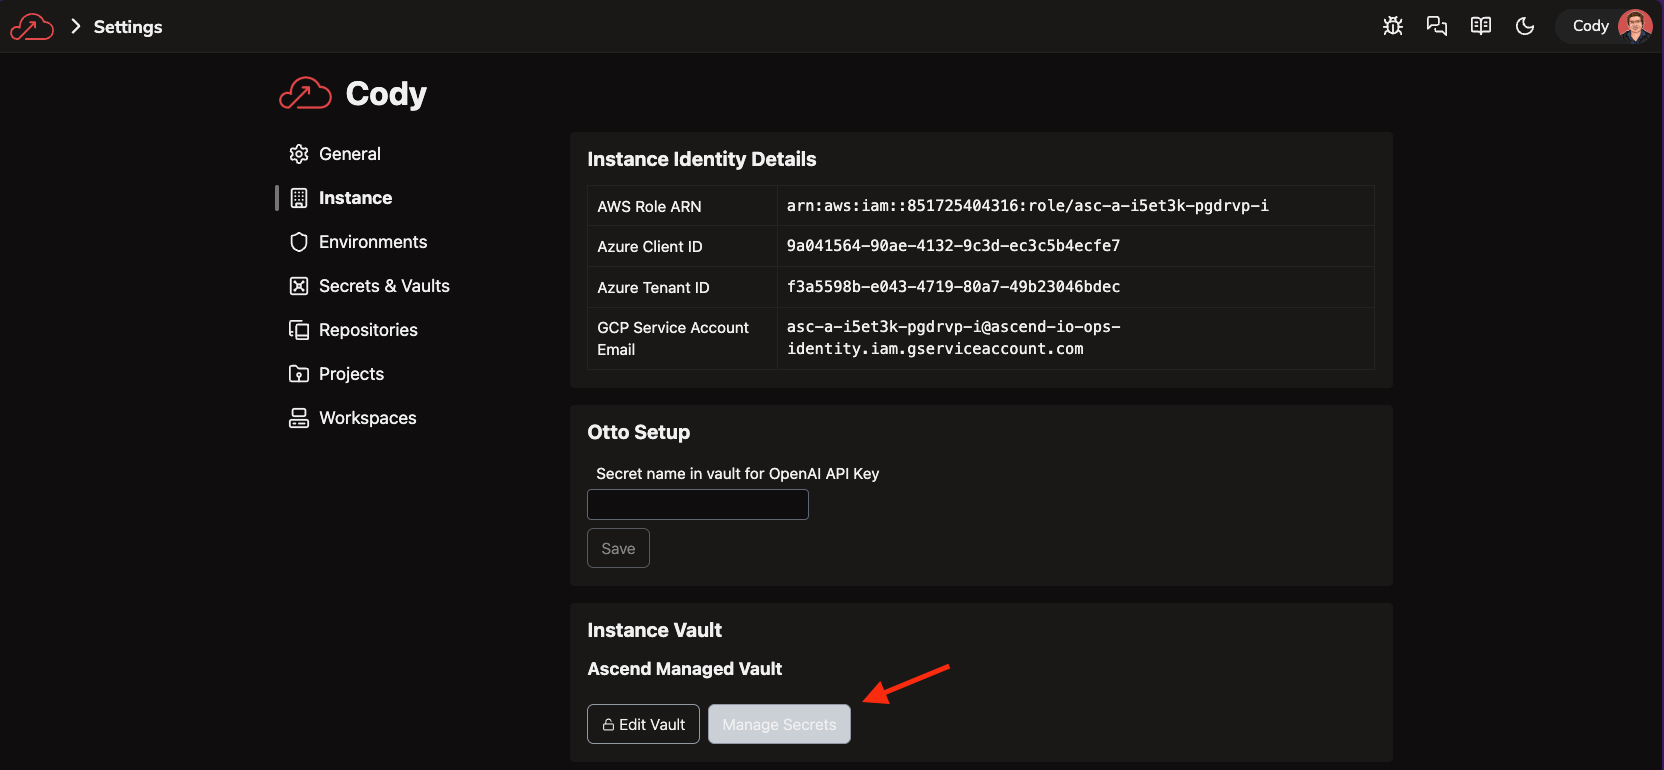 tip
tipIf you followed the CLI commands above, you can print out the password with:
echo $SP_OBJECTAlternatively, navigate to the Service Principal/App Registration in the Azure portal, go to Certificates & secrets, create a new client secret, and copy the value.
-
Navigate in the Ascend UI back to the instance settings (Settings > Instance) and edit your Instance Store to use the Microsoft Fabric warehouse you created earlier:
tipIf you followed the CLI commands above, you can get the User information with:
echo "User:\n$(echo $SP_OBJECT | jq -r .appId)@$(echo $SP_OBJECT | jq -r .tenant)"You may need to install
jq(e.g.brew install jq). Alternatively, you canecho $SP_OBJECTand manually construct the user information. The format for the user is<appId>@<tenant>. Noteclient_idis synonymous withappIdin Azure Service Principals/App Registrations andtenantis sometimestenant_id.For the server input, you must get the information from the Fabric UI. Navigate to the warehouse you created for the instance store and click the settings icon toward the top left and copy the SQL connection string for the Server.
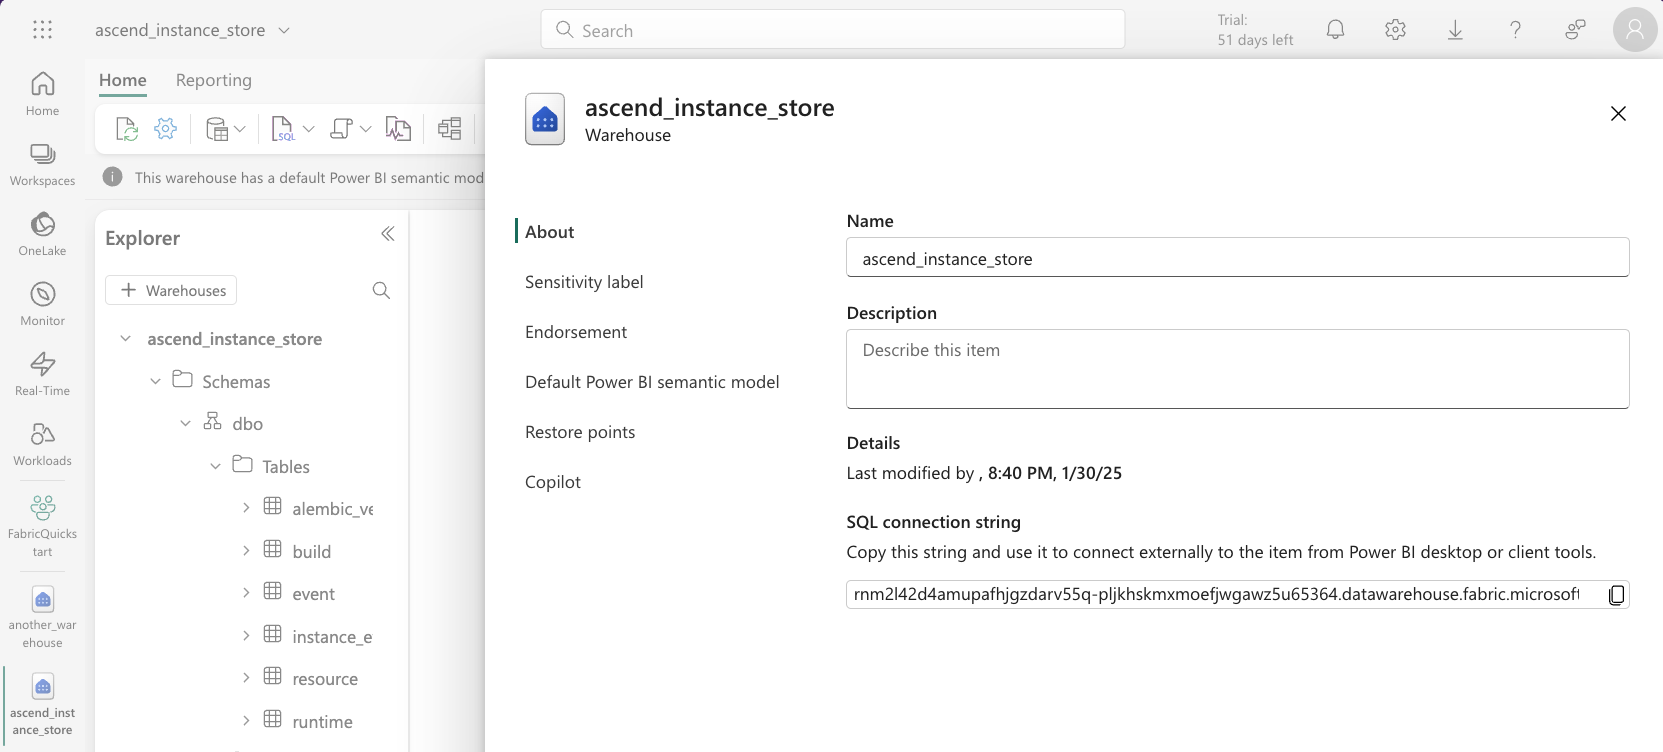
The Warehouse input is the name of the Warehouse in Fabric (e.g.
ascend_instance_storein the screenshot above).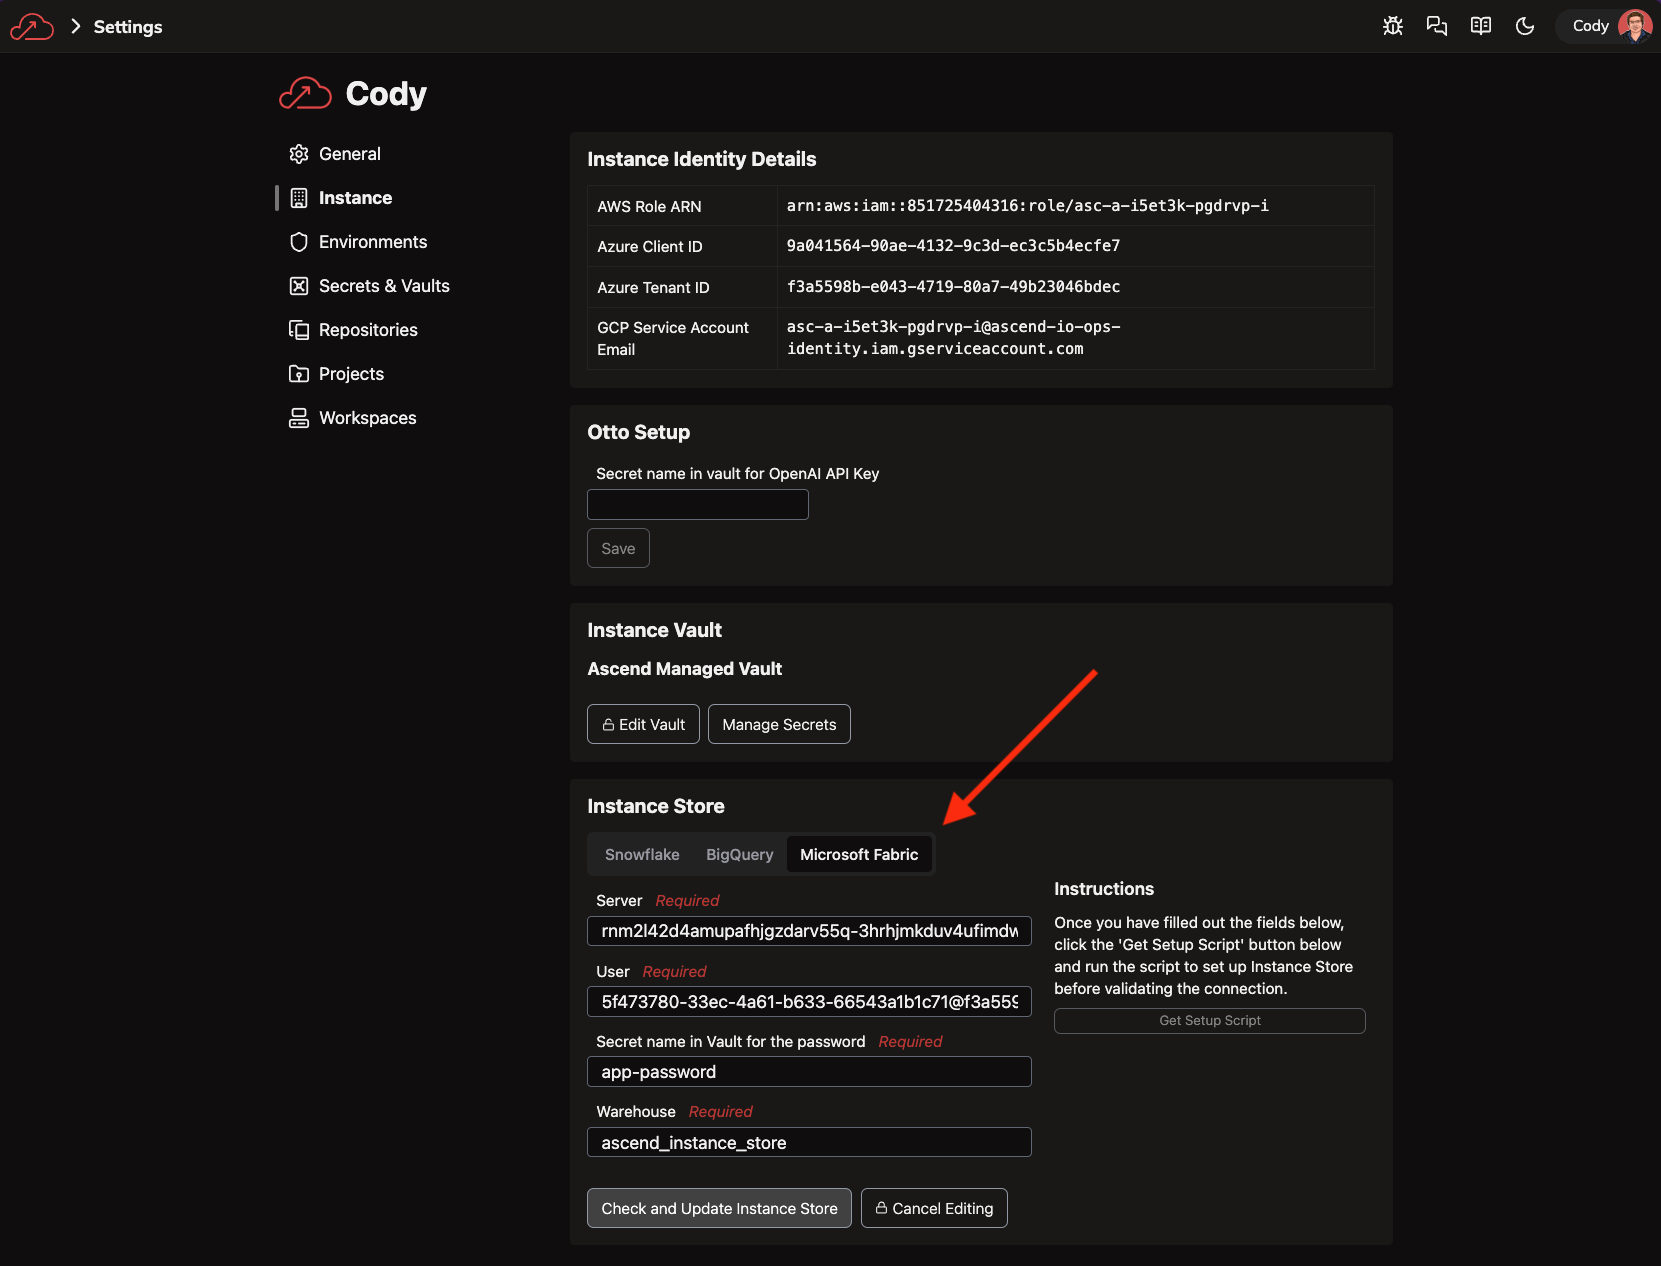
You have now setup Fabric as the Instance Store for your Ascend Instance! You can view the data Ascend stores in your warehouse.
Setup Fabric for use as an Ascend Data Plane
-
To use Fabric as a Data Plane, you first need to store the App Registration/Service Principal password from above in the Environment Vault(s). This allows Ascend to use your app to access the Azure and Fabric resources.
tipThe secret names used below are arbitrary -- you will need to use the same names in your Connection YAML file later.
tipFor production workloads, you should separate the Azure resources used for the Instance Store and each Environment according to your organization's security requirements. We reuse the same resources here for simplicity.
Repeat the steps below for each Environment you want to use with Fabric as the Data Plane.
In the Ascend UI, navigate to Settings > Environments.
Click into the Environment you want to setup:
Click "Manage Secrets". Add the Service Principal password as a secret in the Environment Vault:
tipIf you followed the CLI commands above, you can print out the password with:
echo $SP_OBJECTOr for just the password:
echo $SP_OBJECT | jq -r .passwordAlternatively, navigate to the Service Principal/App Registration in the Azure portal, go to "Certificates & secrets", create a new client secret, and copy the value.
-
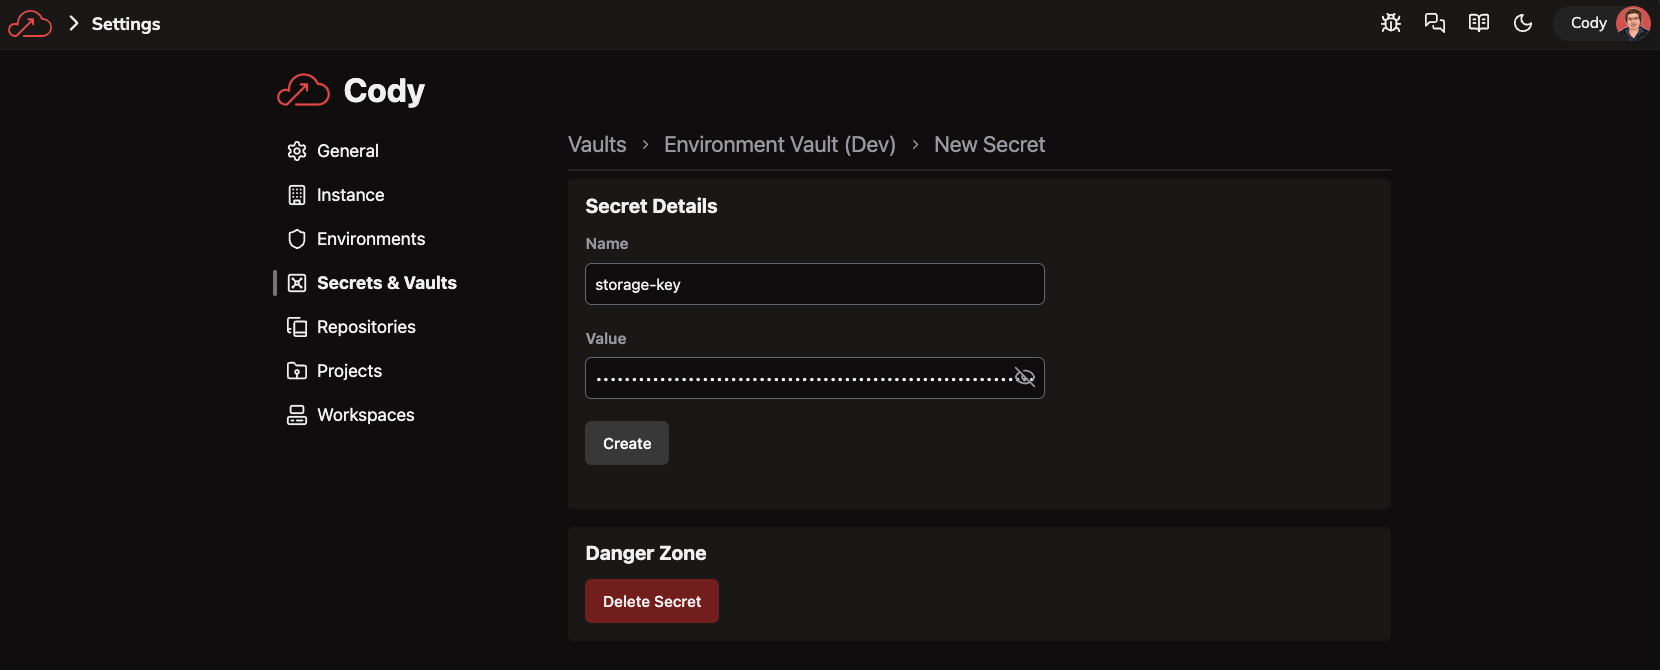
And add the Storage Account key as a secret named
storage-keyin the Environment Vault:tipYou can navigate to the Storage Account in the Azure portal and get the key from the "Access keys" section.
Alternatively, run:
az storage account keys list \
    --resource-group $RESOURCE_GROUP \
    --account-name $STORAGE_ACCOUNT_NAME \
    --query '[0].value' \
    --output tsv
to print it out.
-
Lastly, to enable Spark functionality, you need to generate a refresh token and store it in the Environment Vault. Ascend uses this token to generate access tokens in order to authenticate against the Spark Livy endpoint during flow runs.
This step requires running a small Python script locally. First, ensure you have the
msalPython package installed in your package manager of choice. For instance, if you are usingpipas your package manager, you can run:pip install msalCopy the following code snippet into a local file called
get_fabric_refresh_token.pyand update theapplication_client_idandtenant_idvariables to the values matching your Tenant ID and Application ID.
from msal import PublicClientApplication

app_client_id = ""  # Fill in app (aka client) ID of your Microsoft App Registration
app_tenant_id = ""  # Fill in tenant (aka directory) ID of your Microsoft App Registration

assert app_client_id, "You must set app_client_id"
assert app_tenant_id, "You must set app_tenant_id"

scopes = [
    "https://api.fabric.microsoft.com/Lakehouse.Execute.All",
    "https://api.fabric.microsoft.com/Lakehouse.Read.All",
    "https://api.fabric.microsoft.com/Item.ReadWrite.All",
    "https://api.fabric.microsoft.com/Workspace.ReadWrite.All",
    "https://api.fabric.microsoft.com/Code.AccessStorage.All",
    "https://api.fabric.microsoft.com/Code.AccessAzureKeyvault.All",
    "https://api.fabric.microsoft.com/Code.AccessAzureDataExplorer.All",
    "https://api.fabric.microsoft.com/Code.AccessAzureDataLake.All",
    "https://api.fabric.microsoft.com/Code.AccessFabric.All",
]

client = PublicClientApplication(
    client_id=application_client_id,
    authority=f"https://login.microsoftonline.com/{tenant_id}",
)
accessToken = client.acquire_token_interactive(scopes=scopes)

refreshToken = accessToken["refresh_token"]
print(f"refreshToken:\n{refreshToken}")
Run the script by executing the command python get_fabric_refresh_token.py in your terminal. It should open a new browser window asking for your Azure credentials, then ask for approval for the permissions listed in the code snippet. Once accepted, the python app will print a refresh token.
Copy the refresh token and store in the Environment Vault as a secret named refresh-token.
You have now setup Fabric as a Data Plane for your Ascend Instance!
Set up a Git Repository
When you develop in Ascend, you will need to provide a Git repository in which to store your code. This step will guide you through how to set up a Git repository and add it to your Ascend Instance.
-
Create a new repository
- GitHub
- Navigate to GitHub's New Repository page
- Set Owner to either your personal GitHub account, or your organization.
tip
If you have the appropriate permissions to your company's GitHub Organization, you can create a new repository within your organization. If you do not have admin access, you can create a new repository within your personal account, which will show up in the list as your GitHub name.
- Set Repository name to
ascend-quickstart-fabric(or your preferred name) - Set Description to
Ascend Quickstart Fabric - Set Public/Private to Private
- Click Create repository
-
Next, clone the Ascend Community Repository and push it to your new repository.
# Set the variables
GITHUB_ORG="<your-github-org>" # If you are using your personal account, set this to your username
GITHUB_REPO="ascend-quickstart-fabric"
# Clone the Ascend Community Repository
git clone git@github.com:ascend-io/ascend-community.git ${GITHUB_REPO}
cd ${GITHUB_REPO}
# Set the remote URL to your new repository
git remote set-url origin git@github.com:${GITHUB_ORG}/${GITHUB_REPO}.git
# Push the code to your new repository
git push -u origin main
Connect Ascend to your Git Repository
Create the SSH key pair
- Linux
- Mac
- Windows
-
On your local machine, open a terminal and run the following command:
mkdir -p ~/.ssh && ssh-keygen -t ed25519 -f ~/.ssh/ascend_quickstart_repo_key -q -N "" -
This command will generate a new SSH key pair in the
~/.sshdirectory. -
The public key will be saved in
~/.ssh/ascend_quickstart_repo_key.pub -
The private key will be saved in
~/.ssh/ascend_quickstart_repo_key.tipYou can copy the contents of a file (eg: the public key) to your clipboard by running:
cat ~/.ssh/ascend_quickstart_repo_key.pub | xclip -selection clipboardOr if xclip is not installed:
cat ~/.ssh/ascend_quickstart_repo_key.puband manually copy the output.
- On your local machine, open a terminal and run the following command:
mkdir -p ~/.ssh && ssh-keygen -t ed25519 -f ~/.ssh/ascend_quickstart_repo_key -q -N "" - This command will generate a new SSH key pair in the
~/.sshdirectory. - The public key will be saved in
~/.ssh/ascend_quickstart_repo_key.pub - The private key will be saved in
~/.ssh/ascend_quickstart_repo_key.tipYou can copy the contents of the public key to your clipboard by running:
cat ~/.ssh/ascend_quickstart_repo_key.pub | pbcopy
- On your local machine, open PowerShell and run the following commands:
# Create .ssh directory if it doesn't exist
New-Item -ItemType Directory -Force -Path "$env:USERPROFILE\.ssh"

# Generate SSH key
ssh-keygen -t ed25519 -f "$env:USERPROFILE\.ssh\ascend_quickstart_repo_key" -N '""' - This command will generate a new SSH key pair in the
.sshdirectory within your user profile folder. - The public key will be saved in
%USERPROFILE%\.ssh\ascend_quickstart_repo_key.pub - The private key will be saved in
%USERPROFILE%\.ssh\ascend_quickstart_repo_key.tipYou can copy the contents of the public key to your clipboard by running:
Get-Content "$env:USERPROFILE\.ssh\ascend_quickstart_repo_key.pub" | Set-Clipboard
Add the public key to your repository
- Bitbucket
- GitHub
- GitLab
To allow for Ascend to have write access to your Bitbucket repository, you will need to add your public key to a Bitbucket account with write access, not to the repository itself.
Please follow the instructions under Provide Bitbucket Cloud with your public key to add the public ssh key to a Bit Bucket user.
Please follow the instructions here to setup the public ssh key in your Github repository. You will need to allow write access.
Please follow the instructions here to setup the public ssh key in your Gitlab repository. You will to need to grant write permissions to the key.
Add the private key to Ascend
- In the Ascend UI, navigate to the instance settings by clicking on the button in the top right with your instance name and your user icon.
- Click on the Repositories settings tab.
- Click the Add Repository button.
- Set the Repository URI in this format:
git@github.com:<github-org>/<github-repo>.git. - Set SSH Private Key to the private key you generated in the previous step.
Make sure to copy the entire private key, including the lines that indicate the beginning and end of the key.
- Click Check and Create.
Create an Ascend Project
With your Git Repository connected, you can now create an Ascend Project.
- In the Ascend UI, navigate to the instance settings by clicking on the button in the top right with your instance name and your user icon.
- Click on the Projects settings tab.
- Click the Add Project button.
- Set Title to
Fabric Quickstart - Select Repository from the pulldown options.
- Set Project Root to 1quickstarts/fabric1
- Click Save.
Create your developer Workspace
Now, let's create a workspace for us to develop in.
- In the Ascend UI, navigate to the instance settings by clicking on the button in the top right with your instance name and your user icon.
- Click on the Workspaces settings tab.
- Click the Add Workspace button.
- Set Title to
My Workspace - Select Environment as
Dev - Set Project to the project you created above (
Fabric Quickstart) - Set Git Branch to
my-first-branch(You can type the branch name and click "New Branch:my-first-branch" to create it if it doesn't already exist) - Set Profile as
dev - Select Size as
X-Small - Set Storage to
8GB - Click Save.
Build & run your first flow
-
In the Ascend UI, navigate to the workspace you created above and open the Files view toward the top left of the screen. Edit the
profiles/dev.yamlfile and update the following parameters:- warehouse:
- server:
<your-fabric-data-plane-warehouse-server>(The SQL Connection String from the Fabric data plane warehouse you created above) - name:
ascend_data_plane_warehouse(Or the name of the warehouse you created above if you used something different) - schema:
quickstart(Or the name of the schema you created above if you used something different)
- server:
- service_principal:
- client_id:
<your-service-principal-client-id>(TheappIdfrom the Service Principal/App Registration you created above) - tenant_id:
<your-service-principal-tenant-id>(Thetenant_idfrom the Service Principal/App Registration you created above)
- client_id:
- storage_account:
- name:
<your-storage-account-name>(The name of the Storage Account you created above) - path:
ascend-staging(Or the name of the container you created above if you used something different)
- name:
- lakehouse:
- name:
ascend_data_plane_lakehouse(Or the name of the lakehouse you created above if you used something different) - schema:
quickstart(Or the name of the schema you created above if you used something different) - endpoint:
<your-fabric-data-plane-lakehouse-livy-endpoint>(The Livy endpoint or session job connection string from the Fabric data plane lakehouse you created above; see below for detailed instructions)
- name:
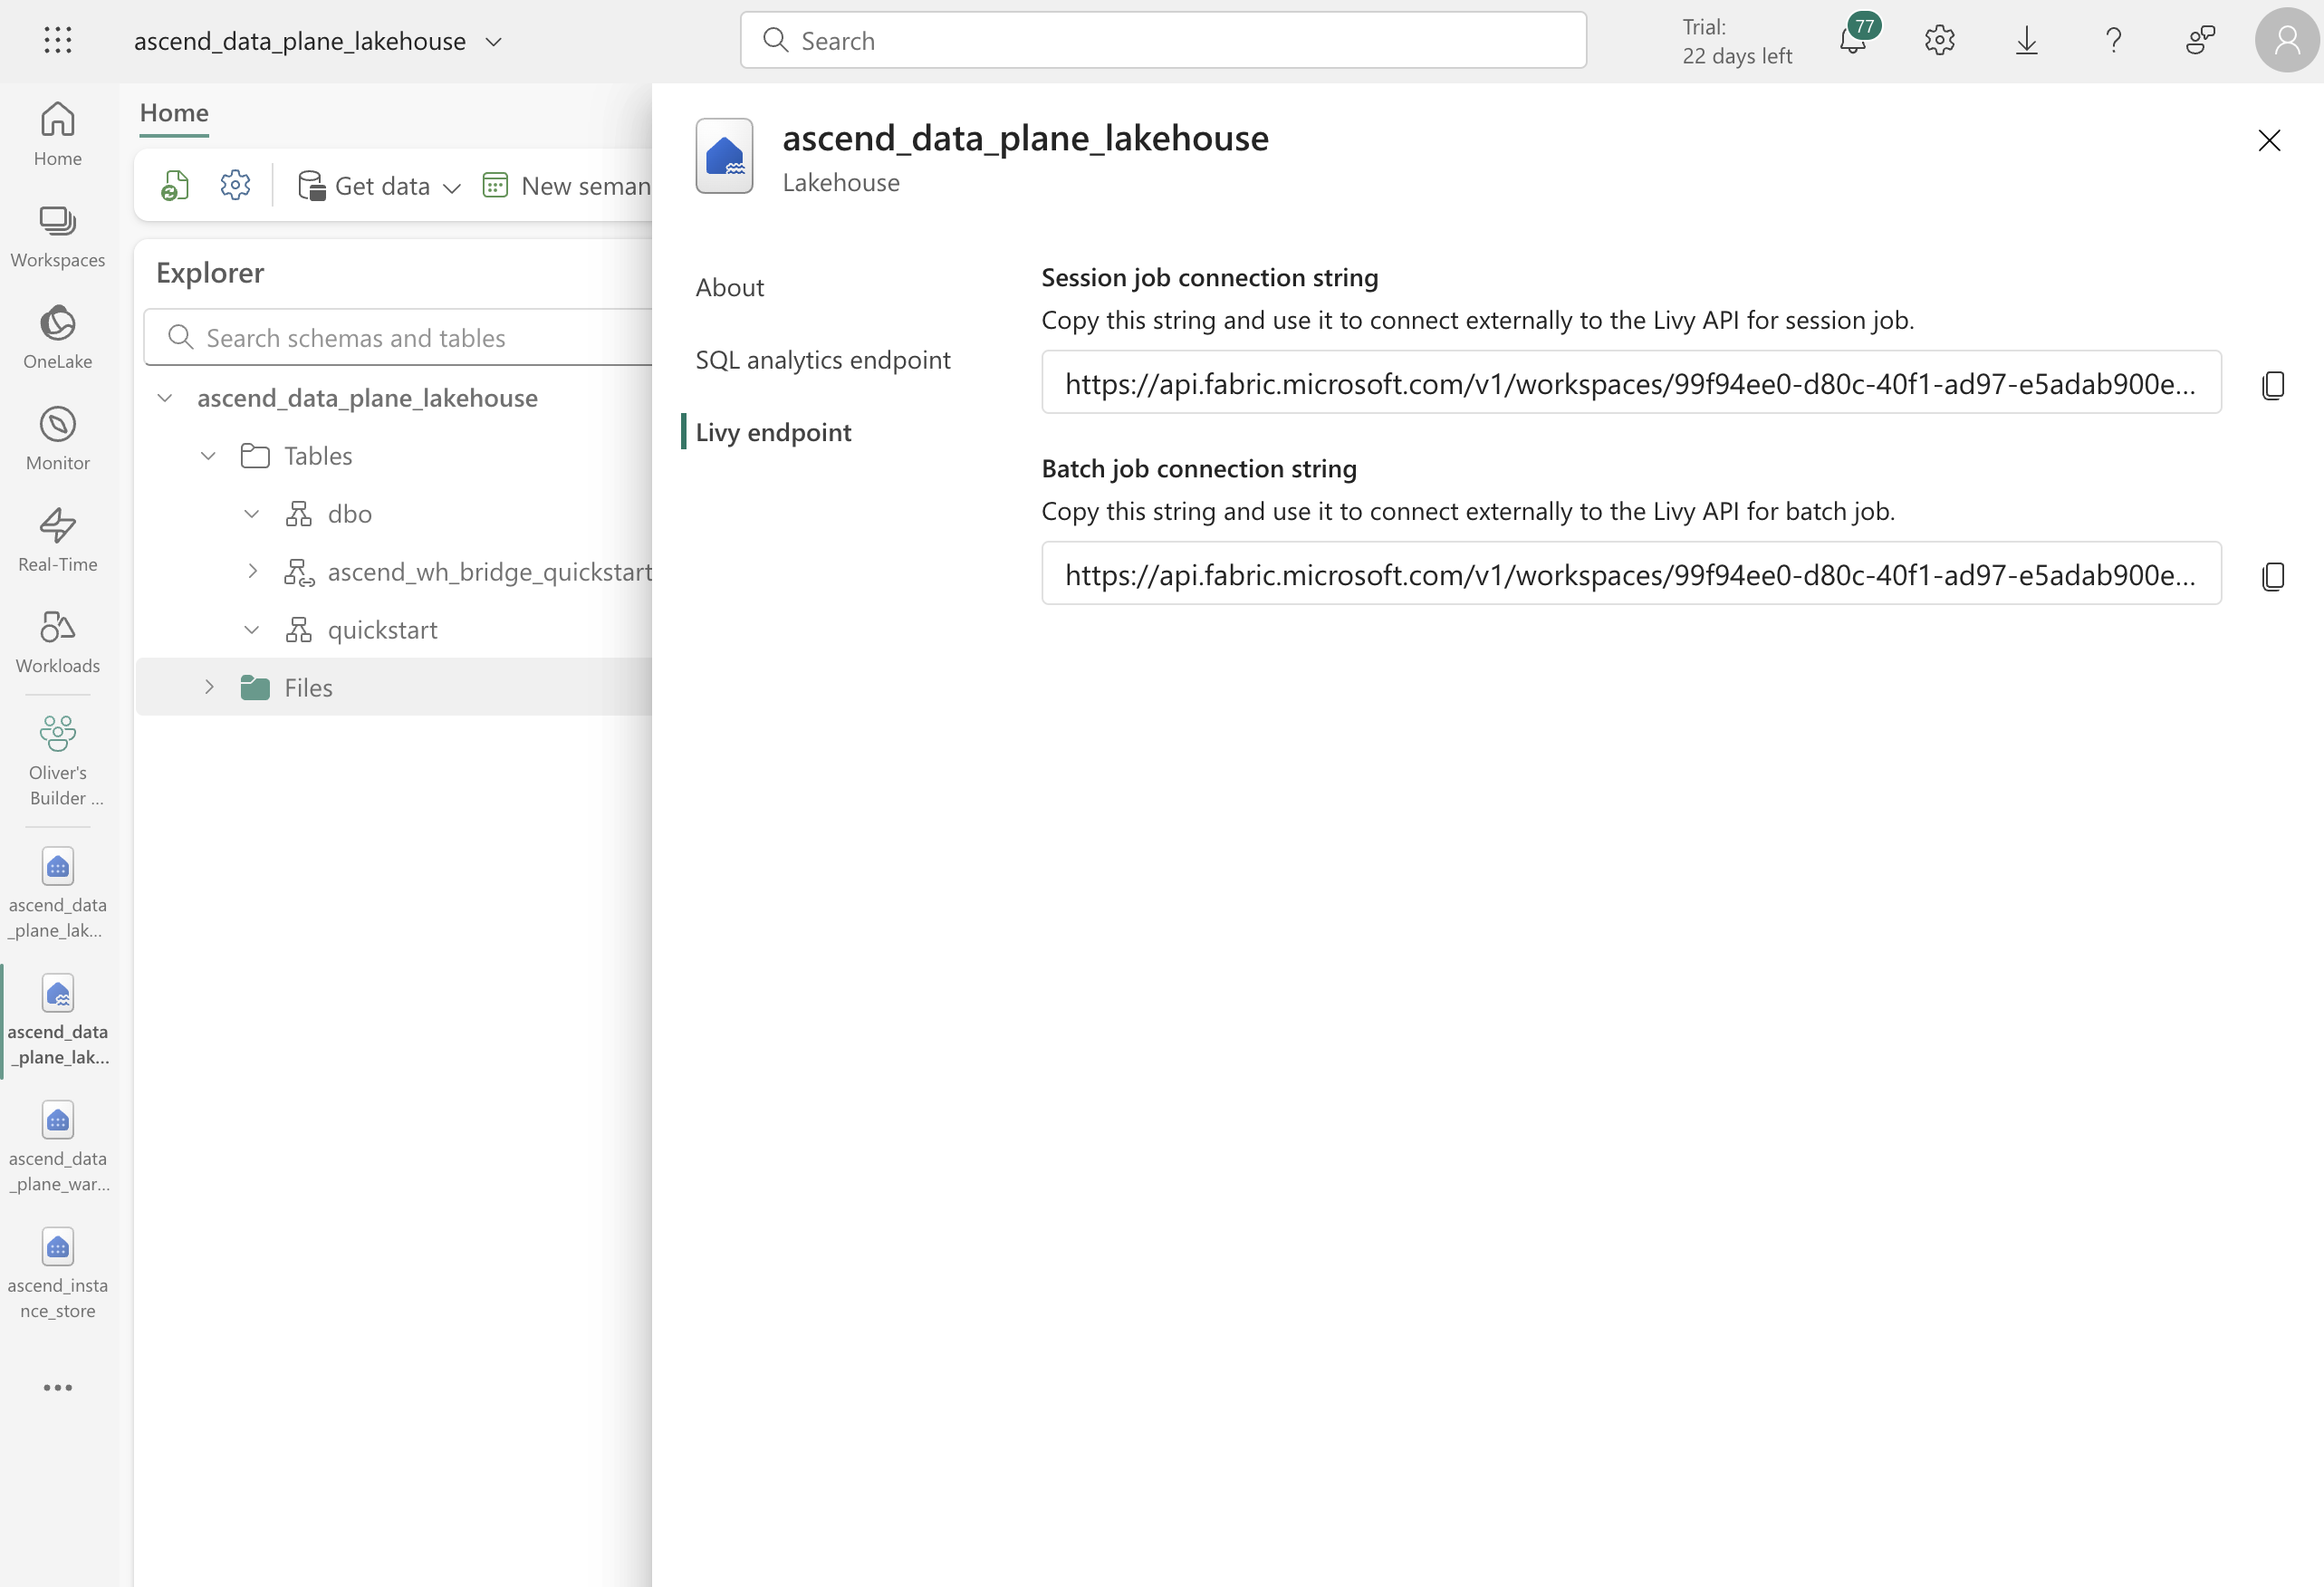
To find the Livy session job connection string, navigate to the lakehouse you created above, make sure you are in "Lakehouse" mode, and click the Settings icon toward the top left of the screen.
Click the Livy endpoint tab and copy the Session job connection string.
- warehouse:
-
If you used secrets names in your Environment Vault other than
app-password,storage-key, andrefresh-token, update theconnections/fabric_data_plane.yamlfile with the correct secret names. -
Finally, go into the quickstart flow and hit Run Flow!