Version: 3.0.0

Quickstart for Ascend on Databricks

Introduction​

In this quickstart, you will setup Ascend on Databricks.

To complete this quickstart you need:

tip

You can use the GUIs for the setup below, though we recommend using the CLIs for automation and repeatability.

warning

If you want to use separate Databricks workspaces per Ascend Environment, you will need to adjust the commands below. This guide uses one Databricks workspace across all Environments for simplicity while maintaining separation of Databricks Unity Catalog data and Databricks compute resources via separate Databricks service principals.

danger

Ensure the output of each command is as expected before proceeding to the next step.

Set up the Databricks CLI​

tip

If you followed an Ascend how-to guide for Databricks setup, you already have the Databricks CLI set up and can skip this section. Ensure you have the default profile set up for the Databricks workspace you want to use.

Check if the Databricks CLI is set up:

DATABRICKS_WORKSPACE_URL=$(databricks auth env | jq -r .env.DATABRICKS_HOST)

if [[ "$DATABRICKS_WORKSPACE_URL" ]]; then
echo "Using Databricks workspace:\n$DATABRICKS_WORKSPACE_URL"
fi

If the Databricks CLI is not set up, set the Databricks workspace URL:

DATABRICKS_WORKSPACE_URL=<your-databricks-workspace-url>

Open the Databricks workspace:

open $DATABRICKS_WORKSPACE_URL

In the Databricks UI, create a Personal Access Token (PAT) to configure the CLI:

databricks configure --host $DATABRICKS_WORKSPACE_URL
tip

The Databricks CLI uses profiles to manage working with multiple Databricks workspaces.

Check for a Databricks Unity Catalog metastore​

Check the Databricks Workspace has a Databricks Unity Catalog metastore assigned:

databricks metastores current

If a Databricks Unity Catalog metastore is not set on your Databricks workspace, follow one of our Databricks how-to setup guides before proceeding.

Create Databricks service principals for Ascend​

Create one Databricks service principal for the Ascend Instance and one for each Ascend Environment.

Ascend Instance​

Create a Databricks service principal for the Ascend Instance:

INSTANCE_SP_APP_ID=$(databricks service-principals create \
--display-name "ascend-instance-sp" \
| jq -r '.applicationId')
echo $INSTANCE_SP_APP_ID

Ascend Dev Environment​

Create a Databricks service principal for the Ascend Dev Environment:

ENV_DEV_SP_APP_ID=$(databricks service-principals create \
--display-name "ascend-env-dev-sp" \
| jq -r '.applicationId')
echo $ENV_DEV_SP_APP_ID

Ascend Staging Environment​

Create a Databricks service principal for the Ascend Staging Environment:

ENV_STAGING_SP_APP_ID=$(databricks service-principals create \
--display-name "ascend-env-staging-sp" \
| jq -r '.applicationId')
echo $ENV_STAGING_SP_APP_ID

Ascend Prod Environment​

Create a Databricks service principal for the Ascend Prod Environment:

ENV_PROD_SP_APP_ID=$(databricks service-principals create \
--display-name "ascend-env-prod-sp" \
| jq -r '.applicationId')
echo $ENV_PROD_SP_APP_ID

Create Databricks compute for the Ascend Instance​

Create a Databricks warehouse for the Ascend Instance Store:

WH_ID_INSTANCE=$(databricks warehouses create \
--cluster-size "2X-Small" \
--auto-stop-mins 5 \
--min-num-clusters 1 \
--max-num-clusters 1 \
--enable-photon \
--enable-serverless-compute \
--no-wait \
--name "ascend-instance" \
| jq -r '.id')
echo $WH_ID_INSTANCE

Set up Databricks catalogs and schemas for Ascend​

In this step, you will run SQL commands to create a catalog and schema for the Ascend Instance and give permissions to the corresponding service principal.

danger

Ensure you are seeing "SUCCEEDED" as the status.state after running each SQL command below.

If you prefer, you can run these SQL commands in a query editor or notebook in the Databricks UI. Using the CLI avoids copying and pasting Databricks service principal application IDs and reduces the risk of error.

First, verify the current metastore is setup correctly:

SQL="select current_metastore()"
databricks api post /api/2.0/sql/statements --json \
'{"warehouse_id": "'"$WH_ID_INSTANCE"'", "statement": "'"$SQL"'"}'

Set up Ascend Instance catalog and schema​

Set the variables for the Databricks Unity Catalog catalog and schema the Ascend Instance Store will use:

ASCEND_INSTANCE_CATALOG="ascend_instance_data"
ASCEND_INSTANCE_SCHEMA="instance_data"

Create a Databricks Unity Catalog catalog for the Ascend Instance Store to use:

SQL="CREATE CATALOG IF NOT EXISTS $ASCEND_INSTANCE_CATALOG"
databricks api post /api/2.0/sql/statements --json \
'{"warehouse_id": "'"$WH_ID_INSTANCE"'", "statement": "'"$SQL"'"}'

And a schema:

SQL="CREATE SCHEMA IF NOT EXISTS $ASCEND_INSTANCE_CATALOG.$ASCEND_INSTANCE_SCHEMA"
databricks api post /api/2.0/sql/statements --json \
'{"warehouse_id": "'"$WH_ID_INSTANCE"'", "statement": "'"$SQL"'"}'

Give the Ascend Instance's corresponding Databricks service principal access to the Databricks Unity Catalog catalog:

SQL="GRANT USE CATALOG ON CATALOG $ASCEND_INSTANCE_CATALOG TO \`$INSTANCE_SP_APP_ID\`"
databricks api post /api/2.0/sql/statements --json \
'{"warehouse_id": "'"$WH_ID_INSTANCE"'", "statement": "'"$SQL"'"}'

And schema:

SQL="GRANT ALL PRIVILEGES ON SCHEMA $ASCEND_INSTANCE_CATALOG.$ASCEND_INSTANCE_SCHEMA TO \`$INSTANCE_SP_APP_ID\`"
databricks api post /api/2.0/sql/statements --json \
'{"warehouse_id": "'"$WH_ID_INSTANCE"'", "statement": "'"$SQL"'"}'

Set up Ascend Dev Data Plane catalog and schema​

Set the variables for the Databricks Unity Catalog catalog and schema the Ascend Dev Data Plane will use:

ASCEND_DEV_CATALOG="ascend_data_plane_dev"
ASCEND_DEV_SCHEMA="default"

Create a Databricks Unity Catalog catalog for the Ascend Dev Data Plane to use:

SQL="CREATE CATALOG IF NOT EXISTS $ASCEND_DEV_CATALOG"
databricks api post /api/2.0/sql/statements --json \
'{"warehouse_id": "'"$WH_ID_INSTANCE"'", "statement": "'"$SQL"'"}'

And a schema:

SQL="CREATE SCHEMA IF NOT EXISTS $ASCEND_DEV_CATALOG.$ASCEND_DEV_SCHEMA"
databricks api post /api/2.0/sql/statements --json \
'{"warehouse_id": "'"$WH_ID_INSTANCE"'", "statement": "'"$SQL"'"}'

Give the Ascend Dev Environment's corresponding Databricks service principal access to the Databricks Unity Catalog catalog:

SQL="GRANT USE CATALOG ON CATALOG $ASCEND_DEV_CATALOG TO \`$ENV_DEV_SP_APP_ID\`"
databricks api post /api/2.0/sql/statements --json \
'{"warehouse_id": "'"$WH_ID_INSTANCE"'", "statement": "'"$SQL"'"}'

And schema:

SQL="GRANT ALL PRIVILEGES ON SCHEMA $ASCEND_DEV_CATALOG.$ASCEND_DEV_SCHEMA TO \`$ENV_DEV_SP_APP_ID\`"
databricks api post /api/2.0/sql/statements --json \
'{"warehouse_id": "'"$WH_ID_INSTANCE"'", "statement": "'"$SQL"'"}'

Set up Ascend Staging Data Plane catalog and schema​

Set up the variables for the Databricks Unity Catalog catalog and schema the Ascend Staging Data Plane will use:

ASCEND_STAGING_CATALOG="ascend_data_plane_staging"
ASCEND_STAGING_SCHEMA="default"

Create a DataBricks Unity Catalog catalog for the Ascend Staging Data Plane to use:

SQL="CREATE CATALOG IF NOT EXISTS $ASCEND_STAGING_CATALOG"
databricks api post /api/2.0/sql/statements --json \
'{"warehouse_id": "'"$WH_ID_INSTANCE"'", "statement": "'"$SQL"'"}'

And a schema:

SQL="CREATE SCHEMA IF NOT EXISTS $ASCEND_STAGING_CATALOG.$ASCEND_STAGING_SCHEMA"
databricks api post /api/2.0/sql/statements --json \
'{"warehouse_id": "'"$WH_ID_INSTANCE"'", "statement": "'"$SQL"'"}'

Give the Ascend Staging Environment's corresponding Databricks service principal access to the Databricks Unity Catalog catalog:

SQL="GRANT USE CATALOG ON CATALOG $ASCEND_STAGING_CATALOG TO \`$ENV_STAGING_SP_APP_ID\`"
databricks api post /api/2.0/sql/statements --json \
'{"warehouse_id": "'"$WH_ID_INSTANCE"'", "statement": "'"$SQL"'"}'

And schema:

SQL="GRANT ALL PRIVILEGES ON SCHEMA $ASCEND_STAGING_CATALOG.$ASCEND_STAGING_SCHEMA TO \`$ENV_STAGING_SP_APP_ID\`"
databricks api post /api/2.0/sql/statements --json \
'{"warehouse_id": "'"$WH_ID_INSTANCE"'", "statement": "'"$SQL"'"}'

Set up Ascend Prod Data Plane catalog and schema​

Set up the variables for the Databricks Unity Catalog catalog and schema the Ascend Prod Data Plane will use:

ASCEND_PROD_CATALOG="ascend_data_plane_prod"
ASCEND_PROD_SCHEMA="default"

Create a Databricks Unity Catalog catalog for the Ascend Prod Data Plane to use:

SQL="CREATE CATALOG IF NOT EXISTS $ASCEND_PROD_CATALOG"
databricks api post /api/2.0/sql/statements --json \
'{"warehouse_id": "'"$WH_ID_INSTANCE"'", "statement": "'"$SQL"'"}'

And a schema:

SQL="CREATE SCHEMA IF NOT EXISTS $ASCEND_PROD_CATALOG.$ASCEND_PROD_SCHEMA"
databricks api post /api/2.0/sql/statements --json \
'{"warehouse_id": "'"$WH_ID_INSTANCE"'", "statement": "'"$SQL"'"}'

Give the Ascend Prod Environment's corresponding Databricks service principal access to the Databricks Unity Catalog catalog:

SQL="GRANT USE CATALOG ON CATALOG $ASCEND_PROD_CATALOG TO \`$ENV_PROD_SP_APP_ID\`"
databricks api post /api/2.0/sql/statements --json \
'{"warehouse_id": "'"$WH_ID_INSTANCE"'", "statement": "'"$SQL"'"}'

And schema:

SQL="GRANT ALL PRIVILEGES ON SCHEMA $ASCEND_PROD_CATALOG.$ASCEND_PROD_SCHEMA TO \`$ENV_PROD_SP_APP_ID\`"
databricks api post /api/2.0/sql/statements --json \
'{"warehouse_id": "'"$WH_ID_INSTANCE"'", "statement": "'"$SQL"'"}'

Create Databricks compute for Ascend Data Planes​

Create a Databricks cluster for each Ascend Data Plane.

tip

We recommend creating the all-purpose cluster in the Databricks UI to to customize your cluster. You can copy the JSON from the GUI there for re-use in the CLI or other automation.

Choose the cluster type ID​

The Databricks cluster type ID corresponds to cloud-specific compute types. Choose your cloud provider:

NODE_TYPE_ID="m5.large"

Ascend Dev Data Plane​

Create a Databricks cluster for the Ascend Dev Data Plane:

CLUSTER_ID_DEV=$(databricks clusters create \
--data-security-mode DATA_SECURITY_MODE_STANDARD \
--autotermination-minutes 20 \
--kind CLASSIC_PREVIEW \
--node-type-id $NODE_TYPE_ID \
--num-workers 1 \
--timeout 60m0s \
--no-wait \
--cluster-name ascend-data-plane-dev \
--json '{
"spark_version": "15.4.x-scala2.12",
"spark_conf": {
"spark.databricks.sql.initial.catalog.namespace": "'"$ASCEND_DEV_CATALOG"'"
}
}' \
| jq -r '.cluster_id')
echo $CLUSTER_ID_DEV

Ascend Staging Data Plane​

warning

We recommend skipping this step until you understand your compute requirements in your Ascend Dev Data Plane.

If you do create the cluster, you may want to immediately terminate it to avoid incurring unnecessary costs.

Create a Databricks cluster for the Ascend Staging Data Plane:

CLUSTER_ID_STAGING=$(databricks clusters create \
--data-security-mode DATA_SECURITY_MODE_STANDARD \
--autotermination-minutes 10 \
--kind CLASSIC_PREVIEW \
--node-type-id $NODE_TYPE_ID \
--num-workers 1 \
--timeout 60m0s \
--no-wait \
--cluster-name ascend-data-plane-staging \
--json '{
"spark_version": "15.4.x-scala2.12",
"spark_conf": {
"spark.databricks.sql.initial.catalog.namespace": "'"$ASCEND_STAGING_CATALOG"'"
}
}' \
| jq -r '.cluster_id')
echo $CLUSTER_ID_STAGING

Ascend Prod Data Plane​

warning

We recommend skipping this step until you understand your compute requirements in your Ascend Dev Data Plane.

If you do create the cluster, you may want to immediately terminate it to avoid incurring unnecessary costs.

Create a Databricks cluster for the Ascend Prod Data Plane:

CLUSTER_ID_PROD=$(databricks clusters create \
--data-security-mode DATA_SECURITY_MODE_STANDARD \
--autotermination-minutes 10 \
--kind CLASSIC_PREVIEW \
--node-type-id $NODE_TYPE_ID \
--num-workers 1 \
--timeout 60m0s \
--no-wait \
--cluster-name ascend-data-plane-prod \
--json '{
"spark_version": "15.4.x-scala2.12",
"spark_conf": {
"spark.databricks.sql.initial.catalog.namespace": "'"$ASCEND_PROD_CATALOG"'"
}
}' \
| jq -r '.cluster_id')
echo $CLUSTER_ID_PROD

Give Databricks service principals access to the Databricks compute​

In the Databricks UI, navigate to Compute > SQL warehouses, select the warehouse you created above, and add the service principal for the Ascend Instance as a user.

For each Ascend Environment:

  1. In the Databricks UI, navigate to Compute -> All-purpose compute, select the corresponding Databricks cluster you created above, and add the Databricks service principal corresponding to the Ascend Environment as a user.

Create secrets in the Ascend Vaults for Databricks service principals​

For each Databricks service principal (one for the Instance and one for each Environment):

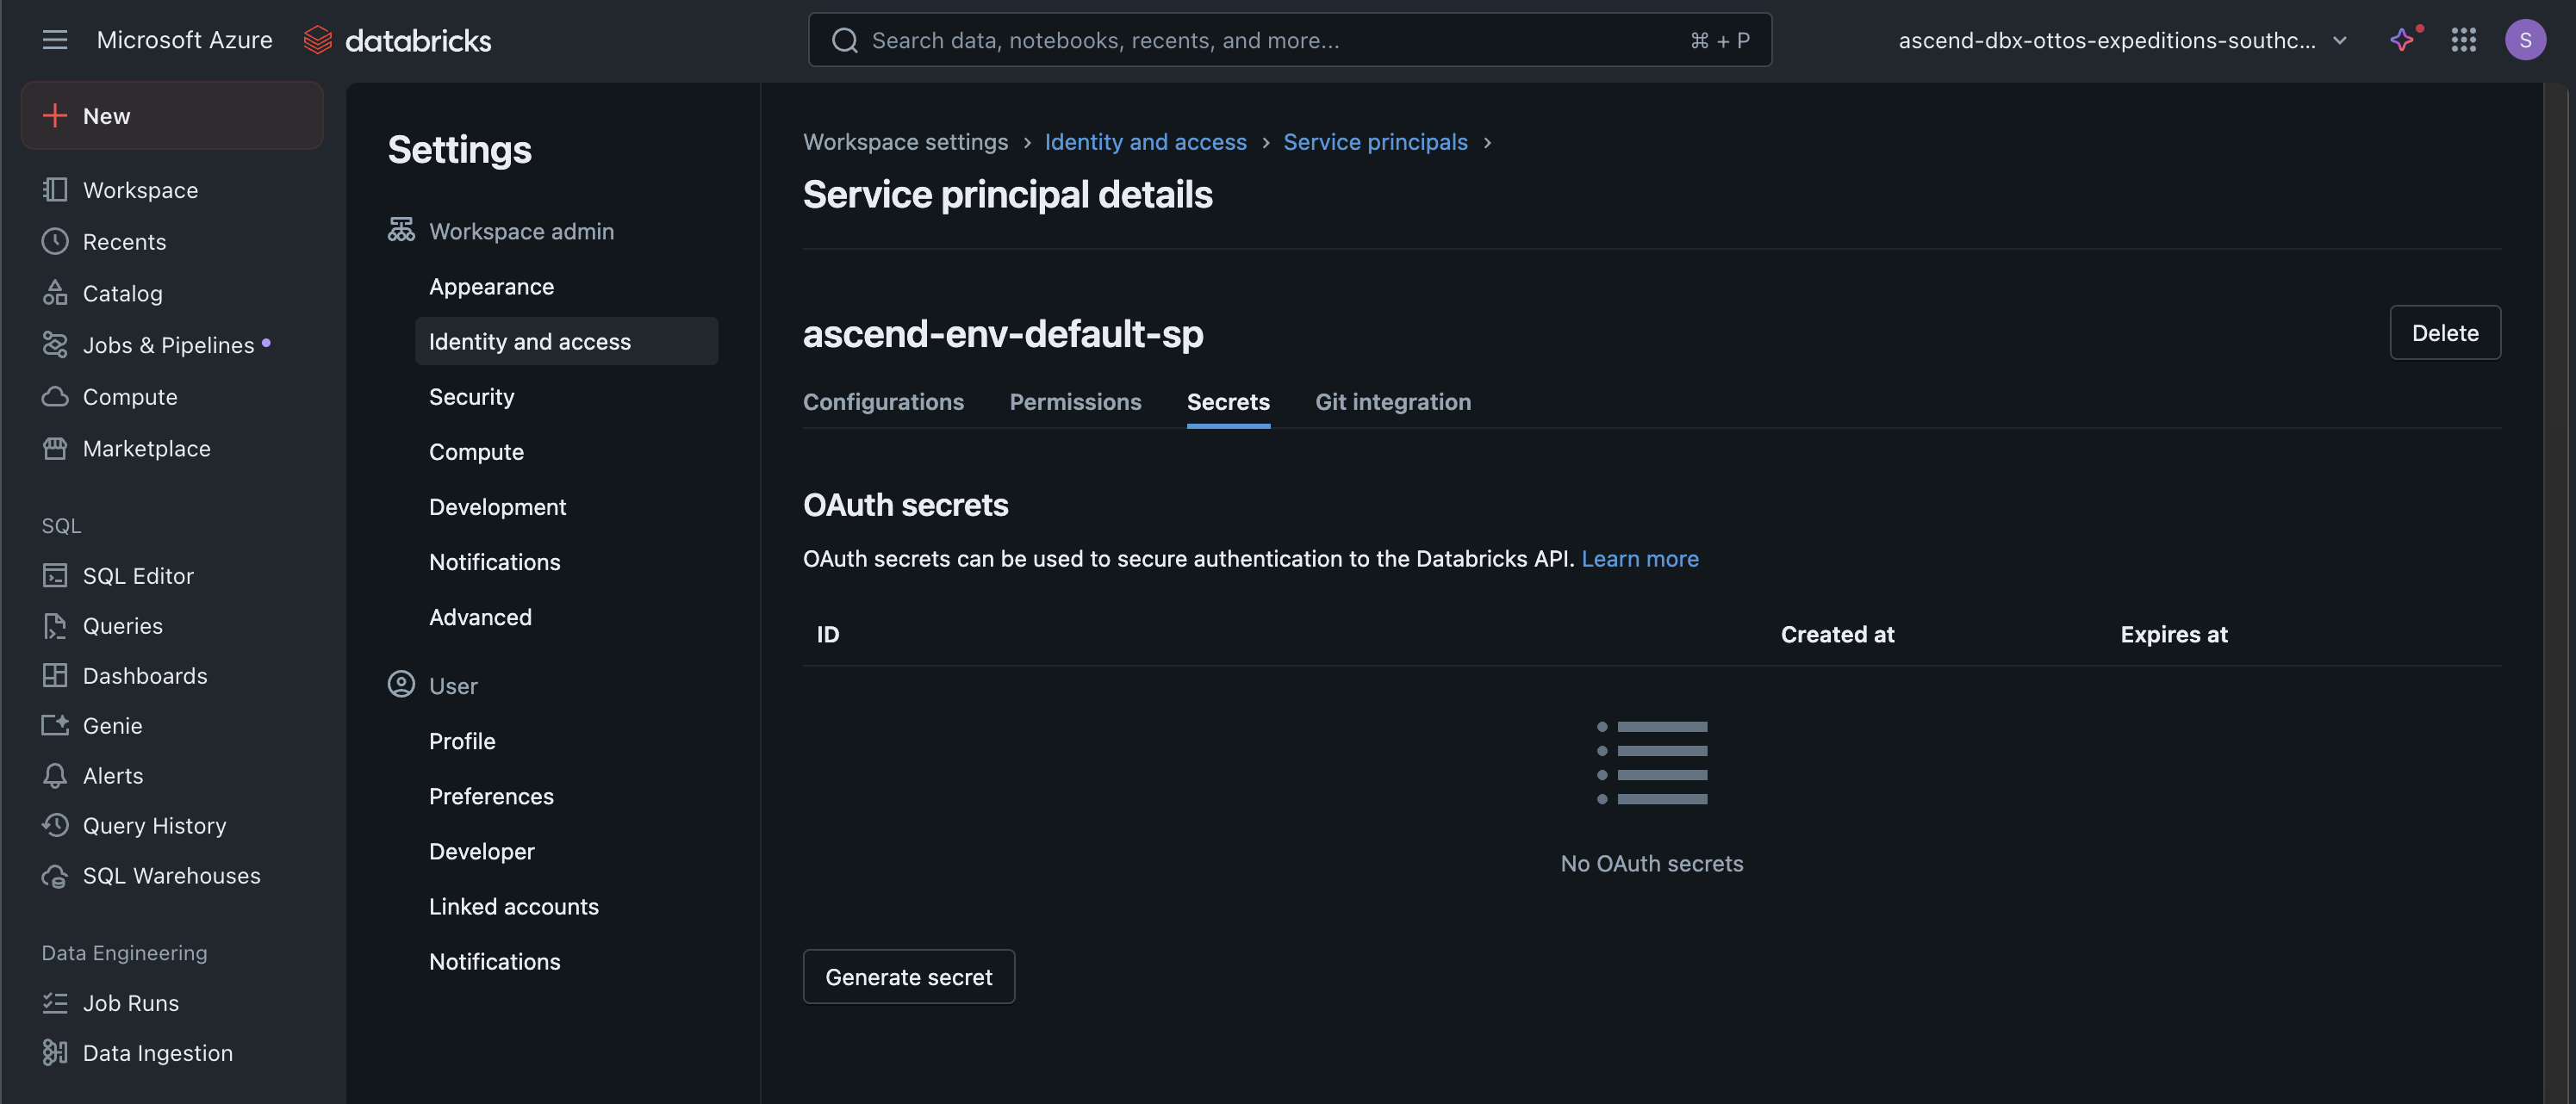
  1. In the Databricks UI, navigate to Settings > Identity and access > Service principals. Click on the service principal for the Ascend Instance. Navigate to Secrets, click Generate secret, and copy the secret value.
  2. In the Ascend UI, navigate to Settings > Secrets & Vaults > Vault > Manage Secrets. Add the secret value as a new secret with the name app-password (or whatever you prefer).
tip

Keep the secret names as app-password for simple configuration that works with the Otto's Expeditions project.

Set up the Ascend Instance Store​

In the Ascend UI, navigate to Settings > Instance > Instance Store and click Edit Instance Store. Choose Databricks and fill out the form using the following details:

WH_HOSTNAME=$(databricks warehouses get $WH_ID_INSTANCE | jq -r '.odbc_params.hostname')

echo "\n\n---\n"
echo "Server (Ascend Instance Store setup):"
echo "$WH_HOSTNAME"
echo "Service Principal Client ID (Ascend Instance Store setup):"
echo "$INSTANCE_SP_APP_ID"
echo "SQL Warehouse ID (Ascend Instance Store setup):"
echo "$WH_ID_INSTANCE"
echo "Catalog (Ascend Instance Store setup):"
echo "$ASCEND_INSTANCE_CATALOG"
echo "Schema (Ascend Instance Store setup):"
echo "$ASCEND_INSTANCE_SCHEMA"
echo "\n---"

Set up Otto's Expeditions in Ascend​

For this quickstart, you will run our Otto's Expeditions community project. This will give you a fully-featured Ascend project to explore and build on top of.

Create the Ascend Repository and Project​

Follow our how-to guide to set up the Ascend Repository and Project for Otto's Expeditions using GitHub.

Ascend Repositories can authenticate with any Git provider over SSH. This includes GitHub, GitLab, Bitbucket, Azure Repos, and more. We recommend using the above guide with GitHub (on your personal account or an organization you have access to) for simplicity.

To set up Otto's Expeditions or any Ascend Project with another Git provider, the steps are:

  • Create the Ascend Project code in your Git repository
  • Create the Ascend Repository in the Ascend UI
    • Use <username>@<servername>:<owner>/<repo>.git for the Repository URI
      • For GitHub, <username> is always git and <servername> is github.com, e.g. git@github.com:ascend-io/ascend-community.git
    • Use a SSH private key with read/write access to the repository for the SSH Private Key
  • Create the Ascend Project in the Ascend UI
    • Use the Ascend Repository you created above
    • Use the path to the project code for the Project Root, e.g. ottos-expeditions/projects/databricks

Create an Ascend Workspace​

You need an Ascend Workspace to develop your Ascend Project. In the Ascend UI, navigate to Settings > Workspaces and click Add Workspace. Choose your development Ascend Environment, the Ascend Project you created above, and the Ascend Profile corresponding to the development environment (dev in Otto's Expeditions).

tip

We recommend choosing at least Medium (4 CPU, 16GB RAM, 32GB Storage) for the Workspace Sizes and Resources.

Set up Ascend Data Planes​

In your Ascend Workspace, navigate to the Files. Open connections/databricks_data_plane.yaml to see the Ascend Data Plane configuration for Databricks. Note that the values are specified in the Ascend Environment Vault and Ascend Profile, allowing you to easily switch between environments for development, staging, and production.

To set up your Ascend Data Planes on Databricks, you will need to edit the YAML files in the profiles/ directory.

tip

For development in particular, you will often create one profile per developer. This allows each developer to separate their data and/or compute resources as needed.

warning

The HTTP Path for Databricks all-purpose clusters can only be retrieved from the Databricks UI. You can find it in Compute > Configuration > Advanced options > JDBC/ODBC.

Dev​

You'll need to edit profiles/dev.yamldirectory using:

echo "\n\n---\n"
echo "Workspace URL (Ascend Data Plane setup):"
echo "$WORKSPACE_URL"
echo "Cluster ID (Ascend Data Plane setup):"
echo "$CLUSTER_ID_DEV"
echo "Dev Environment Service Principal Client ID (Ascend Data Plane setup):"
echo "$ENV_DEV_SP_APP_ID"
echo "HTTP Path (Ascend Data Plane setup):"
echo "[must retrieve from Databricks UI > Compute > Configuration > Advanced options > JDBC/ODBC]"
echo "Catalog (Ascend Data Plane setup):"
echo "$ASCEND_DEV_CATALOG"
echo "Schema (Ascend Data Plane setup):"
echo "$ASCEND_DEV_SCHEMA"
echo "\n---"

Staging​

You'll need to edit profiles/staging.yamldirectory using:

echo "\n\n---\n"
echo "Workspace URL (Ascend Data Plane setup):"
echo "$WORKSPACE_URL"
echo "Cluster ID (Ascend Data Plane setup):"
echo "$CLUSTER_ID_STAGING"
echo "Staging Environment Service Principal Client ID (Ascend Data Plane setup):"
echo "$ENV_STAGING_SP_APP_ID"
echo "HTTP Path (Ascend Data Plane setup):"
echo "[must retrieve from Databricks UI > Compute > Configuration > Advanced options > JDBC/ODBC]"
echo "Catalog (Ascend Data Plane setup):"
echo "$ASCEND_STAGING_CATALOG"
echo "Schema (Ascend Data Plane setup):"
echo "$ASCEND_STAGING_SCHEMA"
echo "\n---"

Prod​

You'll need to edit profiles/prod.yamldirectory using:

echo "\n\n---\n"
echo "Workspace URL (Ascend Data Plane setup):"
echo "$WORKSPACE_URL"
echo "Cluster ID (Ascend Data Plane setup):"
echo "$CLUSTER_ID_PROD"
echo "Prod Environment Service Principal Client ID (Ascend Data Plane setup):"
echo "$ENV_PROD_SP_APP_ID"
echo "HTTP Path (Ascend Data Plane setup):"
echo "[must retrieve from Databricks UI > Compute > Configuration > Advanced options > JDBC/ODBC]"
echo "Catalog (Ascend Data Plane setup):"
echo "$ASCEND_PROD_CATALOG"
echo "Schema (Ascend Data Plane setup):"
echo "$ASCEND_PROD_SCHEMA"
echo "\n---"

Build & run the elt Flow​

In your Ascend Workspace, navigate to elt Flow and click Run Flow.

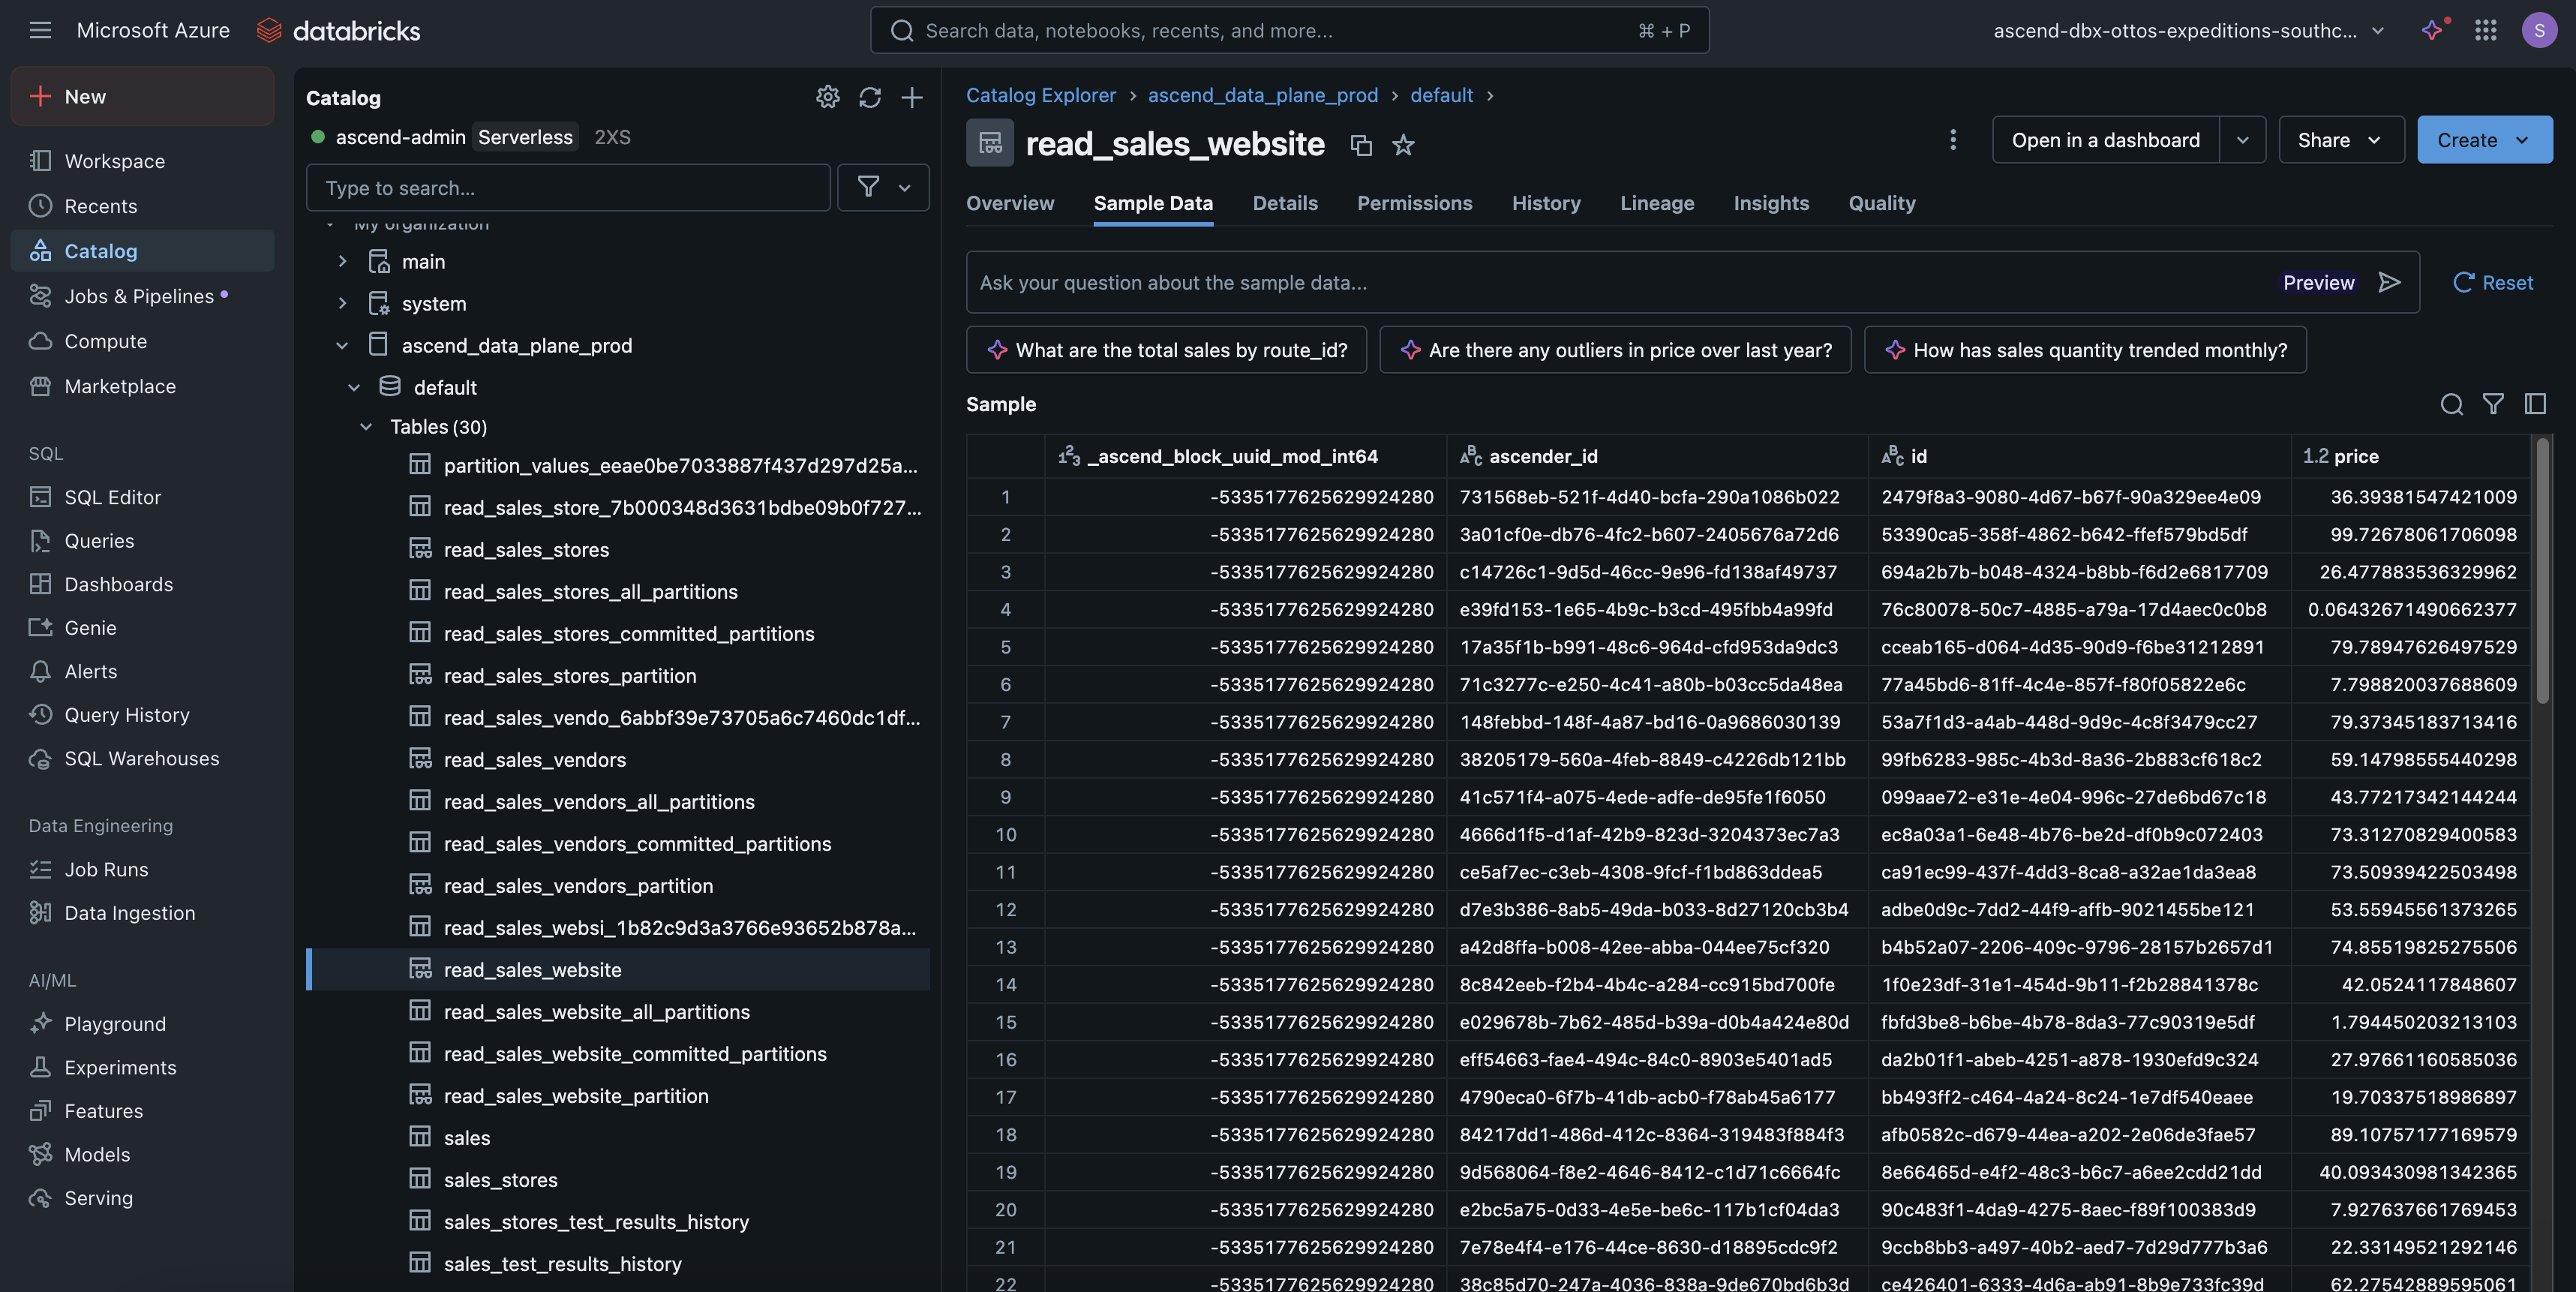
Congratulations! You have successfully set up Ascend on Databricks and run your first Flow.