Your First Agentic Pipeline — Guided Lab
This is a guided lab for building an agentic data pipeline with Otto on Ascend — configure context, tools, and triggers (CTT), then build and automate a real pipeline. You've mapped the lifecycle, traced the failure modes, and read the theory. The earlier modules described context, tools, and triggers as the three design decisions at the heart of agentic systems. This lab makes that concrete. You're going to configure each one yourself — not as a configuration exercise, but because each one changes what Otto can do and how reliably it does it.
Enough theory. Let's build something.
In this lab, agentic means you direct the work — you specify outcomes, configure the system, and verify results — while Otto plans, builds, and runs the pipeline. If you're new to the concept, What is Agentic Data Engineering? covers it from the ground up.
By the end of this lab, you will be able to:
- Orient yourself to the Ascend platform and the
otto/project directory - Write a rules file that gives Otto persistent, domain-specific context for the Expeditions dataset
- Identify the Context, Tools, and Triggers (CTT) active during each phase of the build
- Write an outcome-specified prompt using clear intent (output shape, constraints, scope, and a pre-build check)
- See the observe-decide-act loop in a live build during Phase 5 and explain what Otto is doing at each step
- Schedule the pipeline with a
run_flowautomation and add aFlowRunFailurefailure automation that emails you an Otto-generated diagnostic summary
No prior agent-building experience required. This lab is Module 7 in ADE Foundations (101) — completing Modules 1–6 first is recommended but not required.
About the tools: This lab uses Ascend because it provides agentic data engineering infrastructure — data warehouse, orchestration, and an AI agent — in a single workspace, with no setup required beyond signing up. The patterns you'll practice (writing rules, specifying outcomes, building automations) apply to any agent-enabled data environment.
Phase 1: Setup
Step 1: Sign up for a free trial
The Ascend free trial gives you 14 days or 100 Ascend Credits of access, whichever comes first. Check Getting Started for up-to-date limits and what happens when credits run out.
Go to app.ascend.io and click Start your free trial.
Sign up with Google, LinkedIn, Microsoft, or GitHub, or use an email address and password.
If you sign up with an email address and password, check your email for a verification message from support@ascend.io.
Step 2: Complete onboarding
Once signed in, you'll see the onboarding screen. When asked how you'd like to get started, select Start with Otto's Expeditions.
Otto will provision your workspace — your project container in Ascend where your data and pipelines live — pre-loaded with the Expeditions data and flows (Ascend's term for a data pipeline). This usually takes under a minute or two.
If you've already started a trial, skip to Step 3 and navigate to your existing workspace.
This lab uses Ascend because it provides agentic data engineering infrastructure in a single workspace. The patterns in each phase transfer to any agent-enabled environment:
- Write a rule — add a conventions or business rules file that the agent reads before acting. In a dbt + large language model (LLM) setup, this is a
conventions.mdincluded in every context window. - Specify outcomes, not steps — applicable to any LLM-based tool. Define what "done" looks like; let the agent determine implementation.
- Automate with triggers — wherever your orchestration layer supports event-driven runs, a cron schedule plus a failure webhook covers most production use cases.
Step 3: Configure Otto
Open Otto with Ctrl+I (Windows/Linux) or Cmd+I (Mac).
At the bottom of the Otto panel, click + Runtime and select your workspace. A Runtime is the compute environment that executes your pipelines — connecting it gives Otto access to your actual schema and data.
Enable web browsing and auto-run queries in the Otto panel so Otto can look up documentation and execute queries without manual approval at each step.

Connecting a Runtime and enabling web browsing and auto-run queries are tool decisions — not just setup steps. From Context, Tools, and Triggers:
- Runtime gives Otto access to your workspace's real schema, lineage graph, and file structure. It's what lets Otto read your actual data model instead of guessing from training data — the difference between an agent working from real context and one working from a best guess.
- Web browsing and auto-run queries are tool calls — permissions you're granting Otto to act. Web browsing lets Otto fetch live documentation and API specs; auto-run queries lets Otto execute SQL against your warehouse without pausing for manual approval at each step.
Tool scope is also a risk decision. In a production system, you'd scope tool access to the minimum necessary for the task.
Phase 2: Tour the platform
Before building anything, take 5 minutes to orient yourself. You'll use these areas throughout the lab.
The Workspace and Super Graph
Your workspace is the central hub for building and managing data pipelines. When you land after onboarding, you'll see the Super Graph — a high-level view of all flows in your workspace.
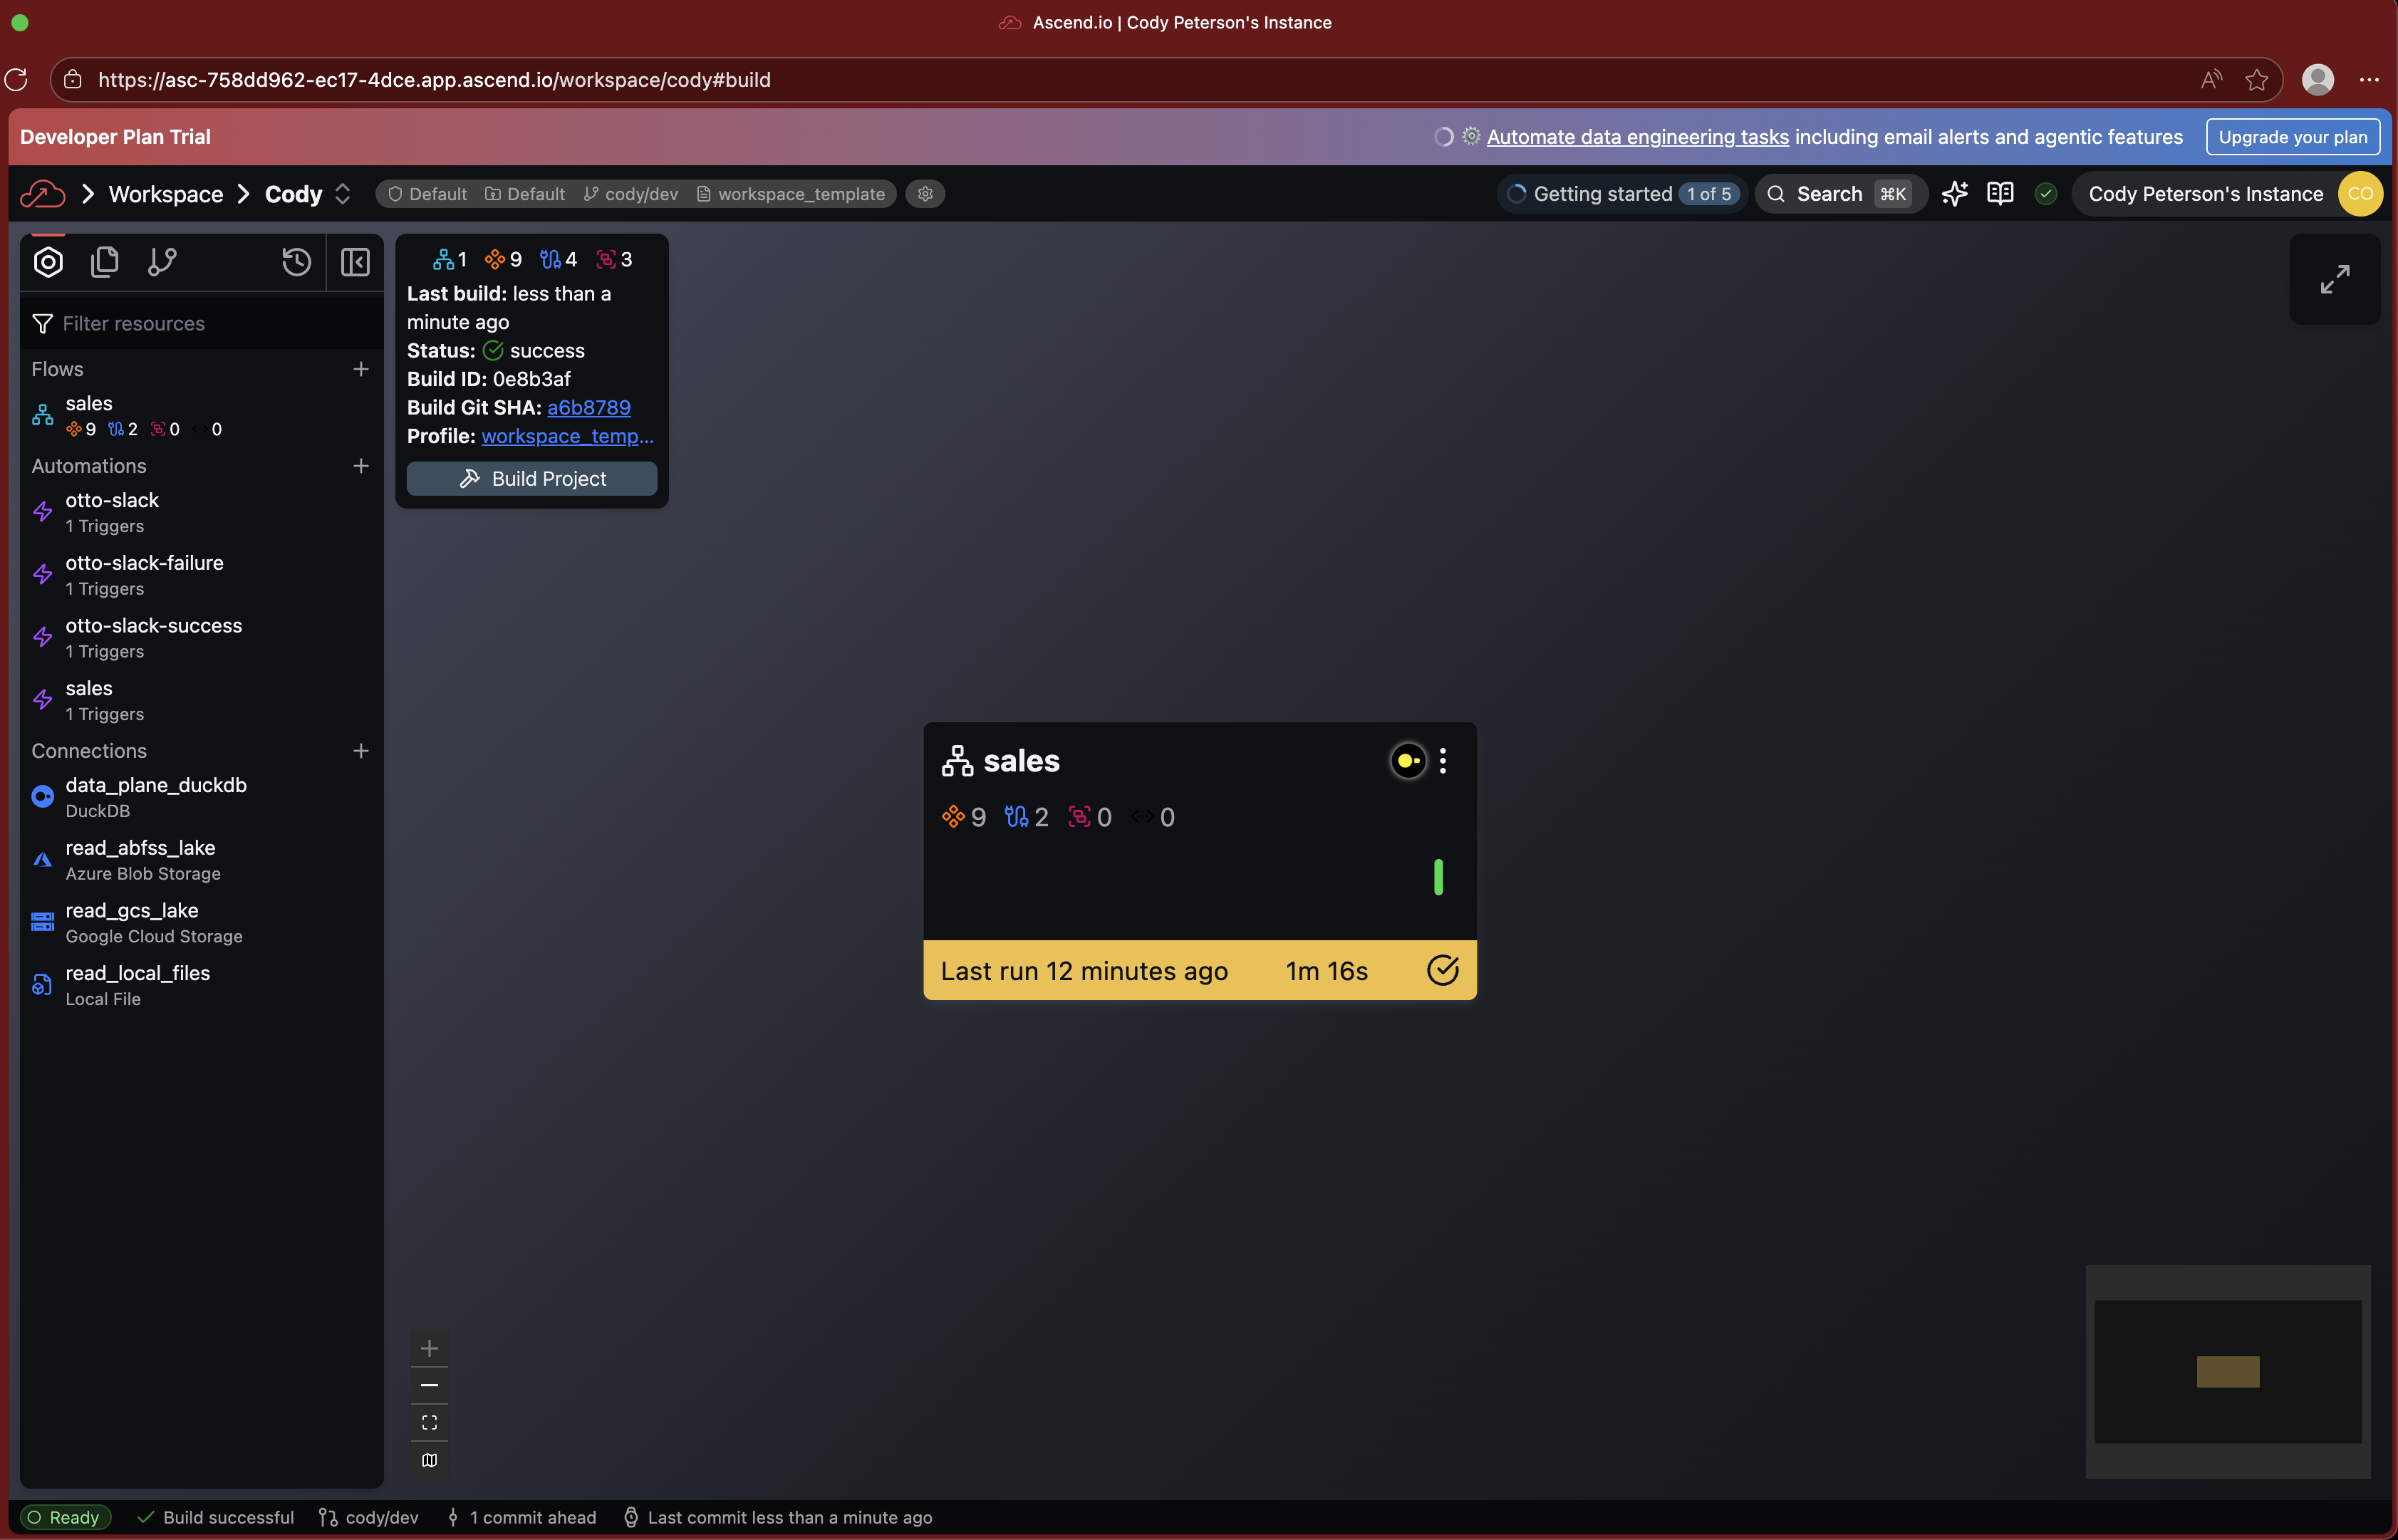
Double-click any flow to drill into its Flow Graph, which shows all the components inside it:
- Read Components — ingest data from external sources
- Transforms — process and transform data using SQL or Python
- Write Components — send data to external destinations
- Task Components — run custom code using Python or SQL
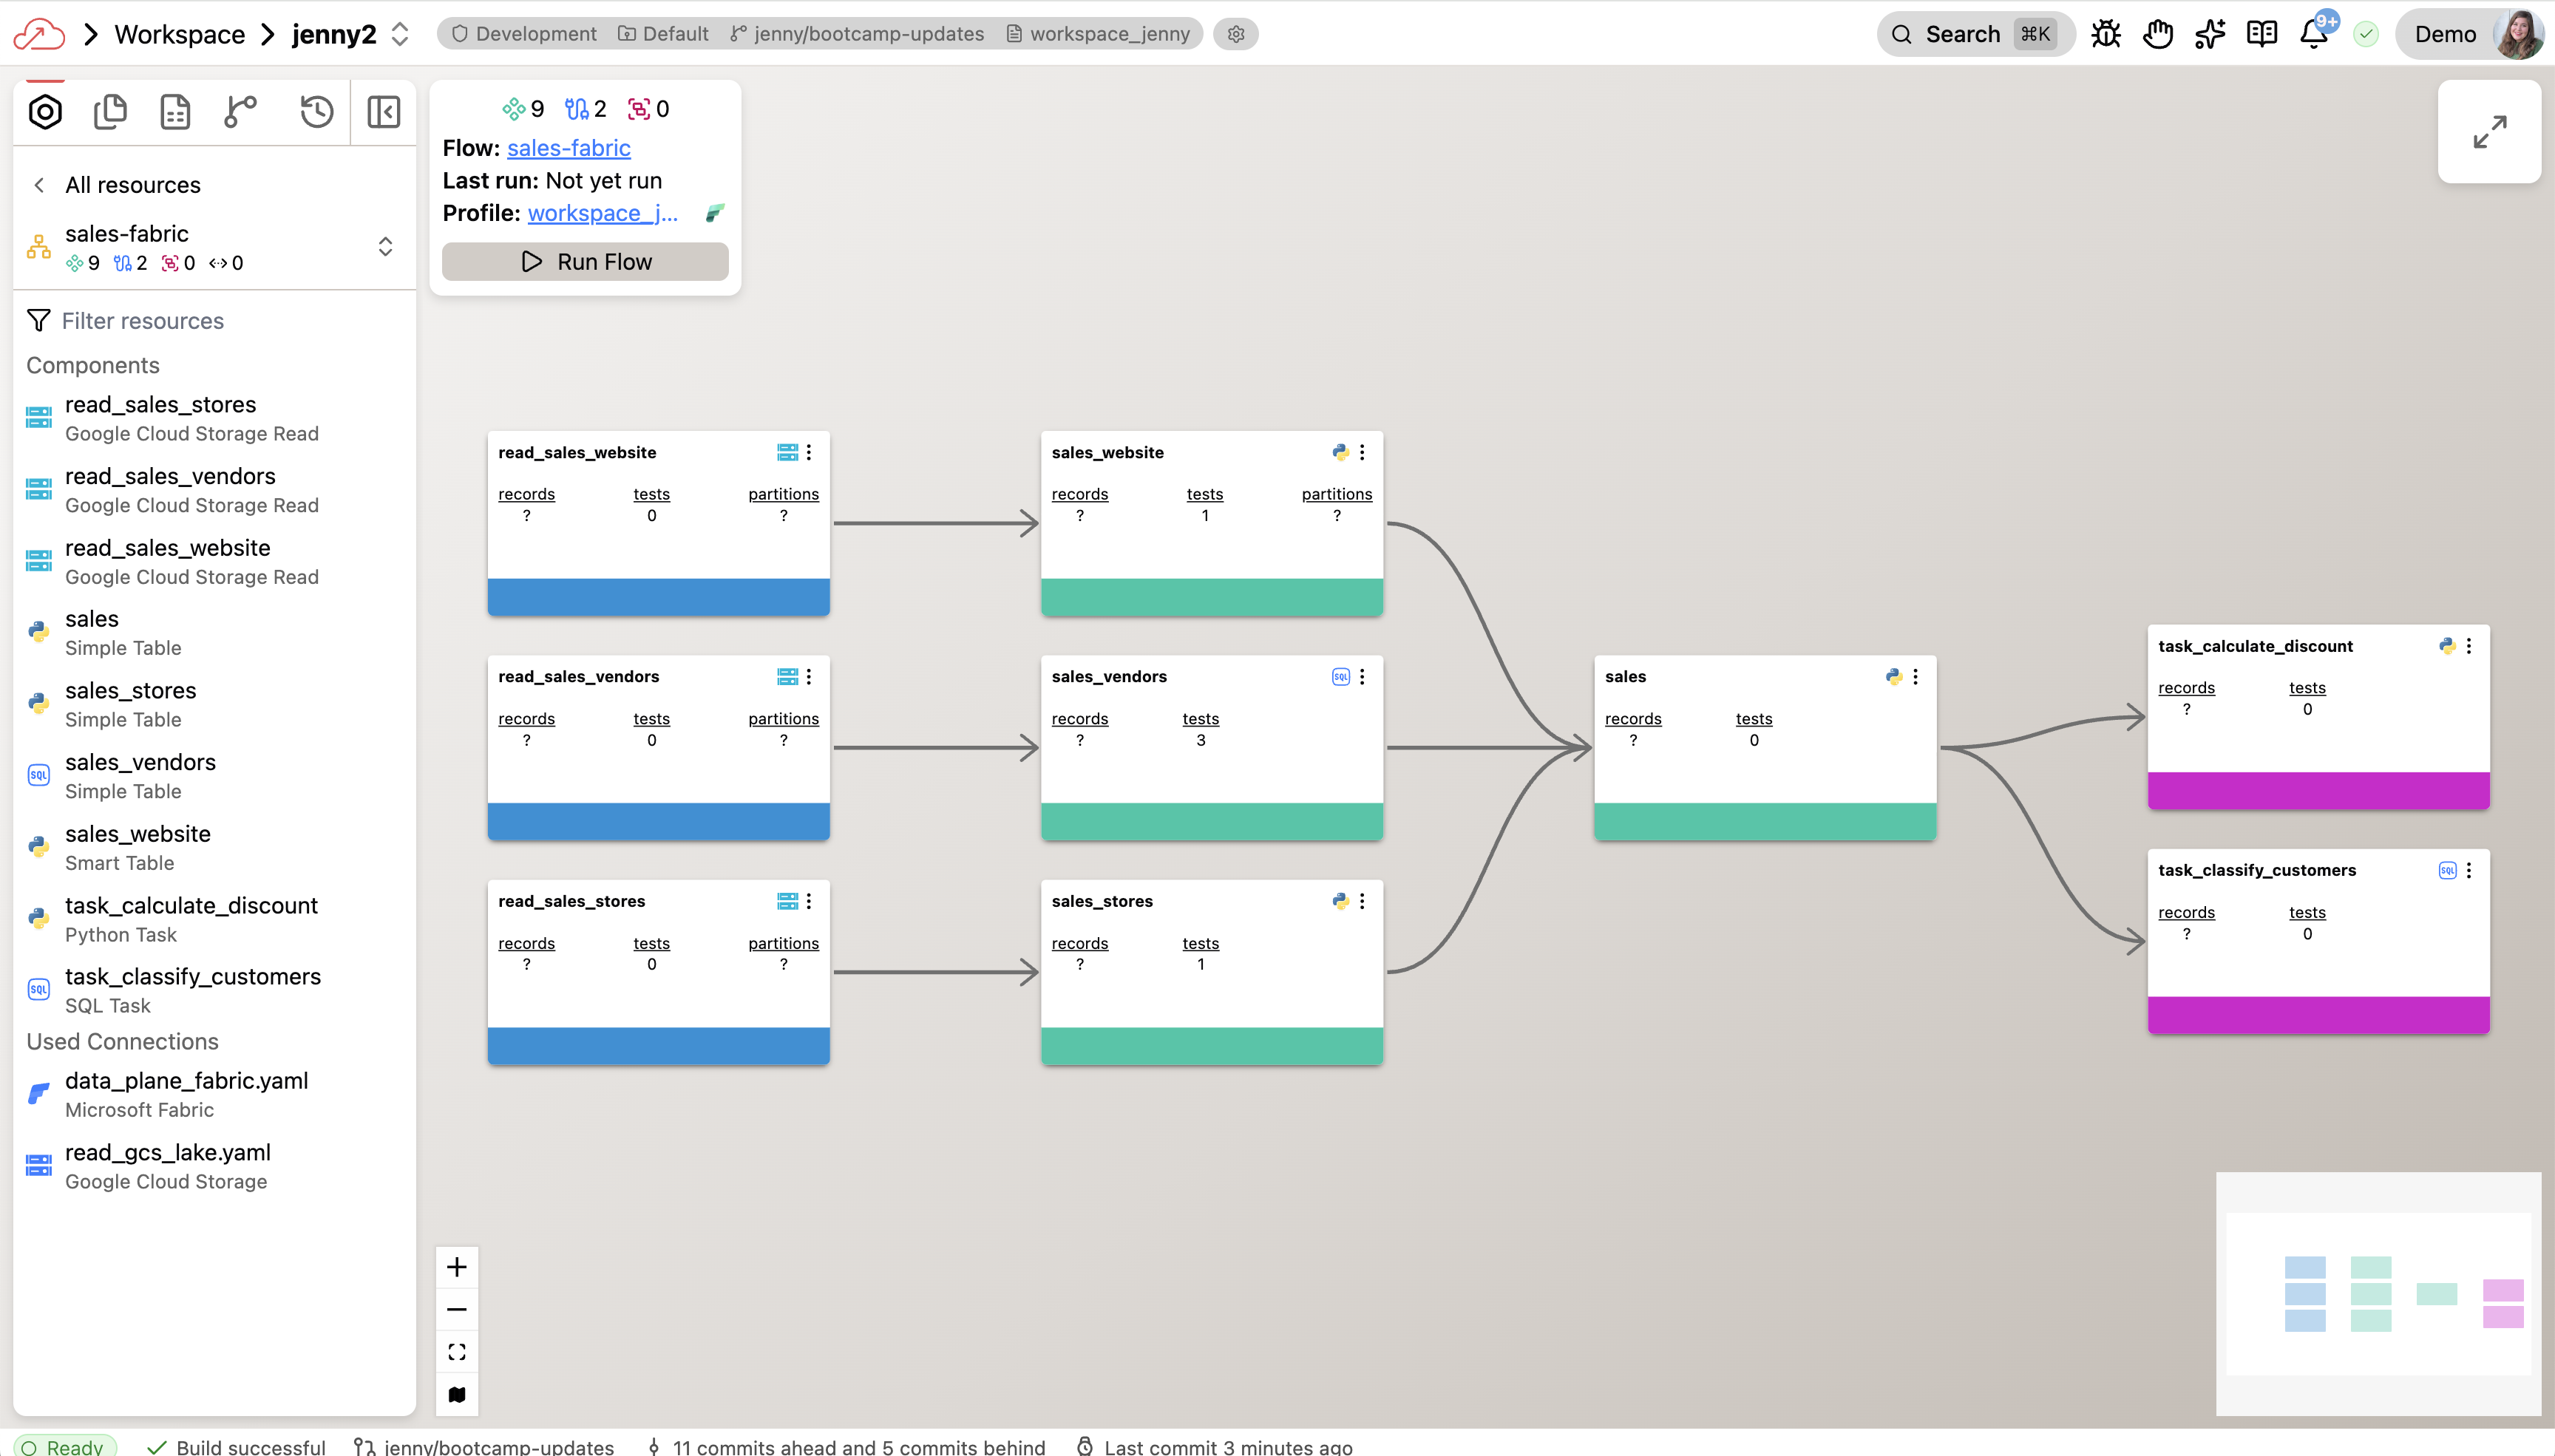
Double-click any component to inspect its code, run history, and output data.
The Toolbar
The toolbar on the right side of your screen gives you quick access to:
- Resources — browse all datasets and components in your workspace
- Files — view and edit project files, including your
otto/directory - Worksheets — run ad-hoc SQL queries against your data
- Source Control — review diffs, commit changes, and manage branches
The otto/ directory
Click Files in the toolbar and open the otto/ folder. This is where you configure Otto's behavior for this project.

Here's the structure:
otto/
├── rules/      ← context files that shape Otto's behavior (you'll create one in Phase 4)
├── agents/     ← custom agents (not needed for this lab; covered in ADE 201)
├── commands/   ← reusable prompt templates (not needed for this lab; covered in ADE 201)
└── mcp.yaml    ← external tool connections via Model Context Protocol
The agents/ and commands/ folders are used in ADE 201.
Navigation shortcuts
Ctrl+I(orCmd+Ion Mac) — open Otto from anywhereCtrl+K(orCmd+Kon Mac) — search and navigate anywhere in the platform
You're oriented. Now let's understand the data.
Phase 3: Explore — understand the data before building
Otto's Expeditions project is a sample dataset modeling a fictional outdoor expeditions business: trips, guides, customers, bookings, and revenue. Before you build anything, explore what's there. Understanding the data before you design a pipeline is a habit worth keeping regardless of the tool you use.
Open Otto and try these prompts one at a time, reading the responses before moving on:
What tables are in the Expeditions project? Give me a brief description
of what each one represents.
Read the response. Then:
Show me the schema for the bookings table. What are the key fields,
and what are the data types?
And then:
How are the tables related to each other? Walk me through the
join relationships I'd need to produce a customer-level summary
of bookings and revenue.
When Otto has Runtime access to your workspace, it uses tools to read your actual schema, metadata, and lineage — rather than relying solely on training data. If you compare the schema details it returns to what's in your workspace, they should closely align — spot-check any discrepancies in the UI or metadata view. Responses may still vary based on tool access, permissions, and model behavior.
Pay attention to how Otto describes the bookings table status field and what it counts as revenue. You'll be encoding your own definition in the next phase — notice whether Otto's default interpretation matches what you'd want.
Take a moment to orient yourself in the data before moving on. Understanding what you're working with is the first context engineering (deliberately choosing what information the agent sees) decision.
Phase 4: Context — write a rule
You just explored the Expeditions data. Now encode what you learned as durable context — so Otto uses your business definitions every time, not its own.
What rules are
Rules are markdown files stored in otto/rules/ that get injected into Otto's context when a condition matches:
- Always-on (
alwaysApply: true) — fires in every conversation in this project - Glob-scoped — fires when Otto is working with matching file types (e.g.,
*.sql,*.py) - Keyword-scoped — fires when a specific phrase appears in your prompt
They're how you encode your team's domain knowledge, business definitions, and standards as durable context — rather than re-explaining them in every prompt. In the Context, Tools, and Triggers framework, rules files are the primary mechanism for engineering your context stack.
Write a code standards file for Expeditions
Open a new Otto thread and paste this prompt:
Create an always-on rule at otto/rules/expeditions-code-standards.md.
Define these coding standards for all SQL in this project:

1. Use snake_case for all column names and model names.
2. Staging models are prefixed with stg_ and transformation models with tr_.
3. Every model must include a comment block at the top describing what it produces and the grain (what one row represents).
4. Filter out cancelled and refunded bookings before any revenue calculation.
5. Always alias aggregated columns explicitly — no unnamed expressions.

Keep the rule short and specific.
What to look for
After Otto creates the file, open it in the Files panel — click the Files icon in the toolbar, then navigate to otto/rules/. The file opens with a YAML frontmatter block (a section delimited by --- markers at the top of the file) containing:
otto:
  rule:
    alwaysApply: true
    description: "SQL coding standards for the Expeditions project"
The alwaysApply: true means this rule fires on every conversation in this project — always in Otto's context stack. In a more complex project, you'd use globs or keywords to scope rules, so detailed guidance only loads when it's relevant and unrelated context stays out of the window.
Without this rule, Otto makes its own choices about column naming, model prefixes, and comment style. With it, every model Otto generates follows your team's conventions. When you audit or hand off the code, it reads like it was written by a single author — because the standards were consistent from the start. That auditability is part of what makes agentic output governable.
Phase 5: Build — specify outcomes, plan, then execute
The rule is in place. Now build the pipeline. The pattern here is: specify what you want → ask Otto to plan how — then review before any code gets written. Planning catches misunderstandings when they're still sentences, not SQL.
Specify the outcome and request a plan
Open a new Otto thread and paste this prompt:
I want to build a new flow that shows monthly revenue trends by channel
over the available data range.

The output should have one row per channel per month, with columns for:
channel, transaction count, distinct customer count, average transaction
value, and total revenue.

Before writing any code, create a plan at plan/lab-101.md that covers:
1. Which tables you'll read from and what each one represents
2. What transforms or aggregations are needed to produce this output
3. What assumptions you're making about the data that could affect the result

Don't write any SQL yet. I'll review the plan before you start building.
Read the plan before continuing. Check:
- Does it name the actual source tables from this project (not generic examples)?
- Does it state the output grain explicitly — one row per what?
- Does the assumptions list name specific things — not just "I assumed the data is clean"?
When the plan is grounded and specific, tell Otto to proceed — then watch what happens.
While Otto builds, watch what happens when it hits an error — because it will. It reads the error output (observe), picks a different approach (decide), runs the component again (act), and checks whether it worked. That cycle is the core loop from How Agents Work: a for loop with an LLM call inside it, running until the task resolves or a stopping condition fires.
This isn't intelligence — it's structure. The result of each tool call gets injected back as context for the next prompt. Otto isn't "thinking harder" on the retry. It's running another iteration with more information in the context window.
Practical implication: If Otto loops without converging after several attempts, the fix is usually more specific context — not rephrasing the same prompt.
While Otto builds, watch for:
- Observe — what does Otto read? (error messages, schema, existing code)
- Decide — what does it choose to do next? (rewrite the SQL, try a different join)
- Act — what does it execute? (edit a file, run a query, return output)
Spot-check the output
Before moving to triggers, ask Otto for a quick sanity check:
Give me a quick summary of what the flow produces. How many distinct
customers are represented? Which channels have the most transactions?
Does anything about the distribution look off?
Read the answer. If something looks off — a channel with unexpectedly low or zero transactions, or a total that doesn't match your rough expectation — ask Otto to show you the underlying records for that specific number.
The full verification framework — aggregate check, code inspection, data-level drill-down — is in Trust and Verify in ADE 201. You'll apply all three checks to this pipeline in the capstone lab.
This lab focuses on speed of building. The next course covers the concerns senior teams raise before promoting agentic pipelines to production: cost and latency of agent loops, PII in prompts, immutable audit of generated SQL, and role-based access control (RBAC) on Agent mode. See ADE 201 when you're ready.
Phase 6: Trigger — automate the pipeline
The pipeline runs when you prompt Otto to run it — Otto is an agent that operates on the pipeline, not part of it. A prompt is a manual trigger. For anything that should run reliably in production, you need a trigger that doesn't depend on someone being available. Here you'll add two automations: one that runs the pipeline on a schedule, and one that alerts you when it fails.
The automation YAML files you'll create in this phase tell Ascend when and how to trigger your flow. Automations only execute in Deployments — a separate environment that runs on a branch of your project. In a trial workspace, you will author the YAML files and they will be valid configuration, but they will not fire until you merge your changes to a Deployment.
To see the automations run: create a Deployment and merge your workspace changes. If you want to complete this phase as a configuration exercise first and deploy later, that's a reasonable path — the YAML files you create here are reusable.
You're done with Phase 6 when:
- ✓
automations/contains a schedule YAML with a cron expression andrun_flowaction - ✓
automations/contains a failure YAML with aFlowRunFailuretrigger andemail_alertaction - ✓ Both files are syntactically valid (Otto will tell you if there's a YAML error)
Authoring valid, production-style automation config is the learning milestone for this phase — execution happens after you merge to a Deployment.
Schedule the pipeline
In the same Otto thread, paste:
Create an Automation YAML file that runs this flow every day at 6 AM UTC.
Save it in the automations/ folder.
Otto will create a YAML file in automations/. Open it in the Files panel. The file wires a time-based trigger (a cron schedule; for example, 0 6 * * * means every day at 6:00 UTC) to a run_flow action — that's the full trigger pattern: schedule tick → automation fires → run_flow executes the pipeline. This automation is pure orchestration; the schedule trigger does not invoke Otto as an agent. (The failure automation below uses email_alert with an Otto-generated summary embedded — a different pattern.)
Add failure alerting
Now add the second automation — the one that fires when something breaks:
Create a separate automation YAML for this flow. When this flow fails,
send me an email alert that includes an Otto summary of what failed
and its best diagnosis of why.
Otto will generate a YAML with the to: field populated — open the file to confirm or update the email address before merging to a Deployment. Verify that outbound email is enabled in your instance settings, or see Send email alerts for configuration steps.
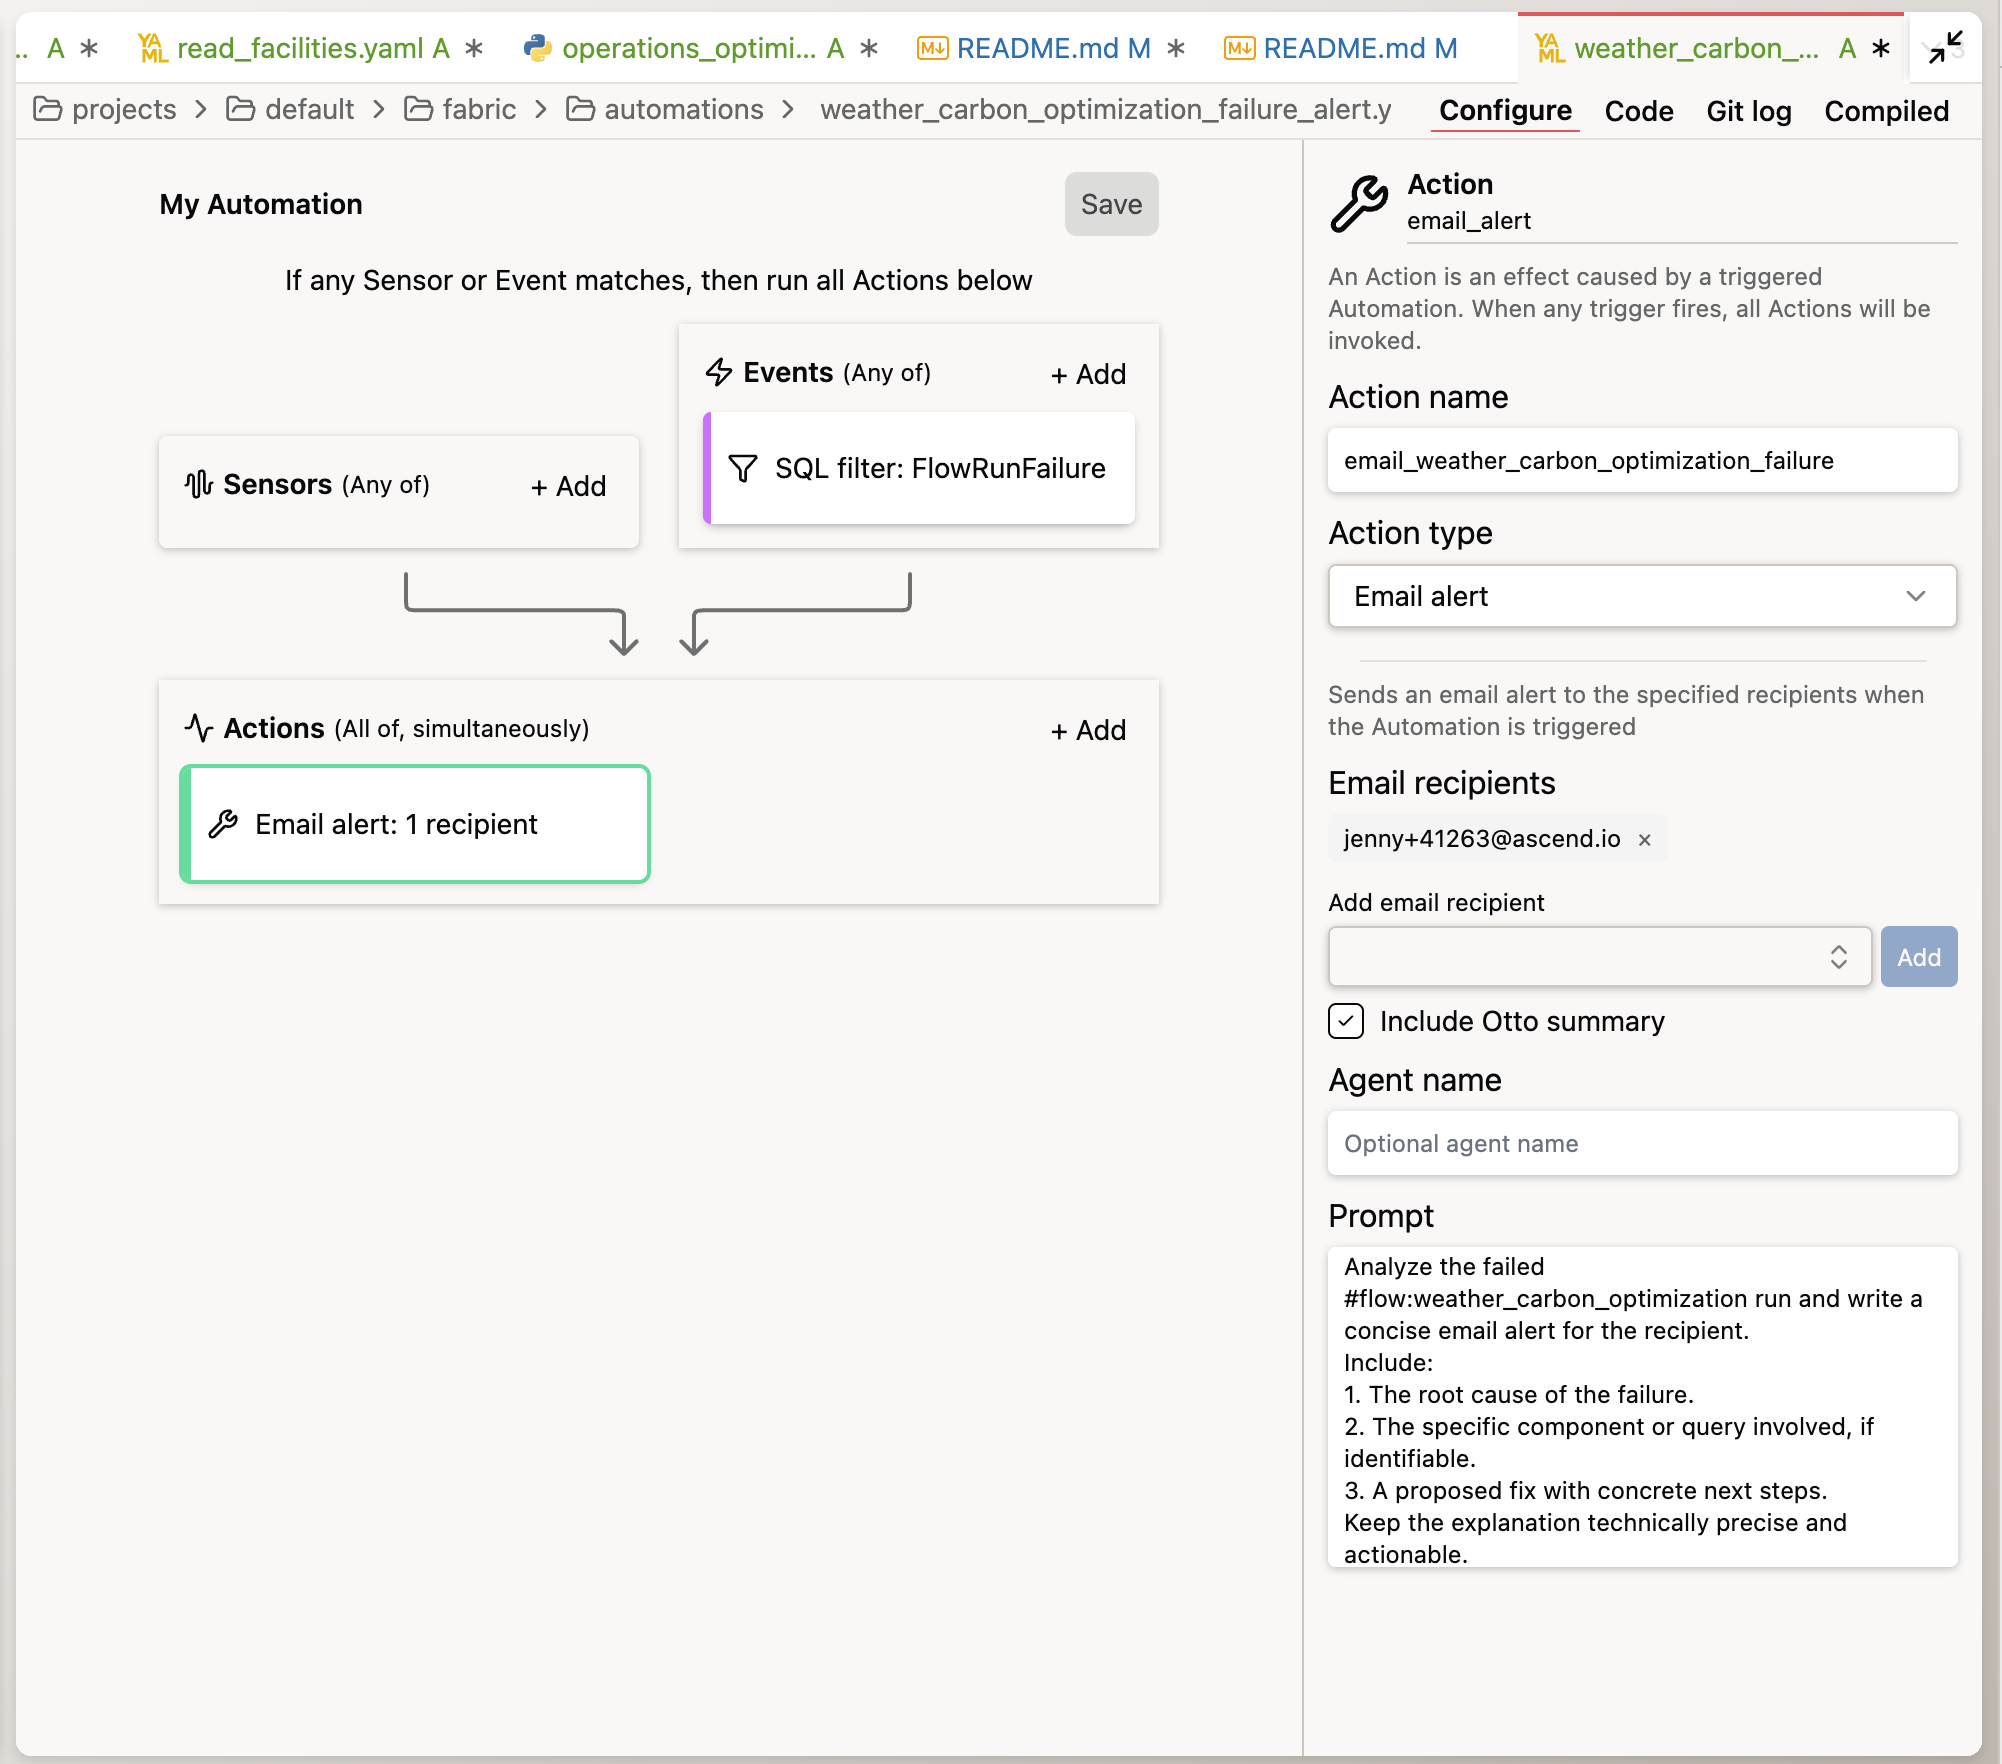
A schedule fires on a clock event and knows nothing about what happened in the pipeline. An event trigger (FlowRunFailure) fires when a specific system event occurs — and it can carry context about that event (which pipeline failed, which component, what the error was) directly into Otto's context.
Otto's diagnostic output is AI-generated — treat suggested causes and next steps as hypotheses to validate, not verified root cause analysis. From Context, Tools, and Triggers: "The best triggers are the ones that currently wake you up at 3am."
Tools: MCP connections
You've given Otto context via a rules file and configured event-based triggers via automations. The third axis of the CTT framework — tools — includes not just workspace access (Runtime) but external integrations via MCP (Model Context Protocol).
MCP is how you wire Otto to services outside Ascend. You author an otto/mcp.yaml file that registers the server, and Otto can then invoke those external tools alongside its workspace tools.
MCP gives Otto access to external systems:
- Slack or Teams — post alerts and summaries
- GitHub — open issues, read PR context
- PagerDuty — route incidents
Setting up an MCP server requires external service credentials and is covered in a dedicated tutorial: Set up Slack via MCP. You'll use MCP in the ADE 201 capstone to route failure alerts to a Slack channel rather than email.
email_alert+include_otto_summary: true— Ascend sends the email directly with Otto's diagnostic summary embedded. This is what you just built.run_otto— invokes Otto as a full agent in response to the event. Otto can take actions — post to Slack via MCP, open a GitHub issue, run a query to gather context. This is the pattern covered in the ADE 201 capstone.
What just happened
You configured all three building blocks of the Context, Tools, and Triggers (CTT) framework — deliberately, in the right order:
- Context — a code standards file injected into every Otto conversation in this project. Every model Otto generated followed your naming conventions and comment requirements — without you re-explaining them in each prompt.
- Tools — Runtime access scoped to your workspace; Agent mode granting action permissions; MCP as the path to extend tool access to external services.
- Trigger — two automations: a daily schedule that runs the pipeline without a human prompt, and a failure event that fires Otto's diagnostic loop when something breaks.
In this lab path, you didn't need to hand-author SQL — Otto owned the SQL, with you specifying outcomes and reviewing the output. Reading the SQL Otto produced to verify it matched your business rules — not writing SQL from scratch — still mattered for encoding the right business logic in a rule and checking that the output matched your definition. The skill that mattered most wasn't code generation. It was clarity about what you wanted, context that made the agent's behavior predictable, and a check that confirmed it.
That's the division of labor in agentic data engineering. The agent executes. You direct, configure, and govern.
- Rules files are your context stack. Encoding standards in
otto/rules/gives Otto persistent instructions that shape every output — without re-explaining them in every prompt. A well-maintained rules library compounds over time: each standard you add makes Otto's output more predictable and auditable. - Specify outcomes, not steps. Prompts that tend to perform well define what "done" looks like — the output schema, the grain (what one row represents), the constraints — and let the agent determine implementation. Include a verification step ("confirm which tables contain X before building") for any non-trivial build.
- Triggers turn a pipeline into a system. A flow that only runs when you prompt it is a tool. A flow with a schedule automation and a failure trigger is a system — one that operates without requiring a person to be available, and that wakes Otto instead of waking you when something goes wrong.
If you're evaluating Ascend for your team, you can book a session with a data engineer → to explore what an agentic approach would look like in your environment. You can also explore the Ascend documentation for more on Otto, flows, rules, and automations.
You've completed all the hands-on labs in ADE Foundations. Ready to make it official?
← Back to ADE Foundations (101) — and check whether your course includes a certification assessment.
Additional Reading
Ascend documentation:
- Ascend developer docs — Search "Otto" for agent configuration, Runtime setup, and tool access; search "rules" for the full rules file reference; search "automations" for the trigger and automation configuration reference.
- Set up Slack via MCP — Step-by-step tutorial for connecting Slack to Otto via Model Context Protocol.
Context engineering:
- Anthropic — Prompt Engineering Overview — An orientation to prompt engineering with pointers to specific techniques and Console tools that apply directly to the outcome-specified prompts you used in this lab.
Agentic output verification:
- Anthropic — Define success criteria and build evaluations — Official guidance on defining success criteria, building test cases, and grading evaluations — a structured complement to the spot-check you ran and the full three-check framework in ADE 201.