Smart Python Transform
In this guide, we'll build a Smart Python Transform that uses the reshape="map" option to apply custom per-partition transformations for optimized processing.
To learn more about the supported input formats for Python Transforms, check out our concept guide.
Prerequisites
- Ascend Flow
Create a Transform
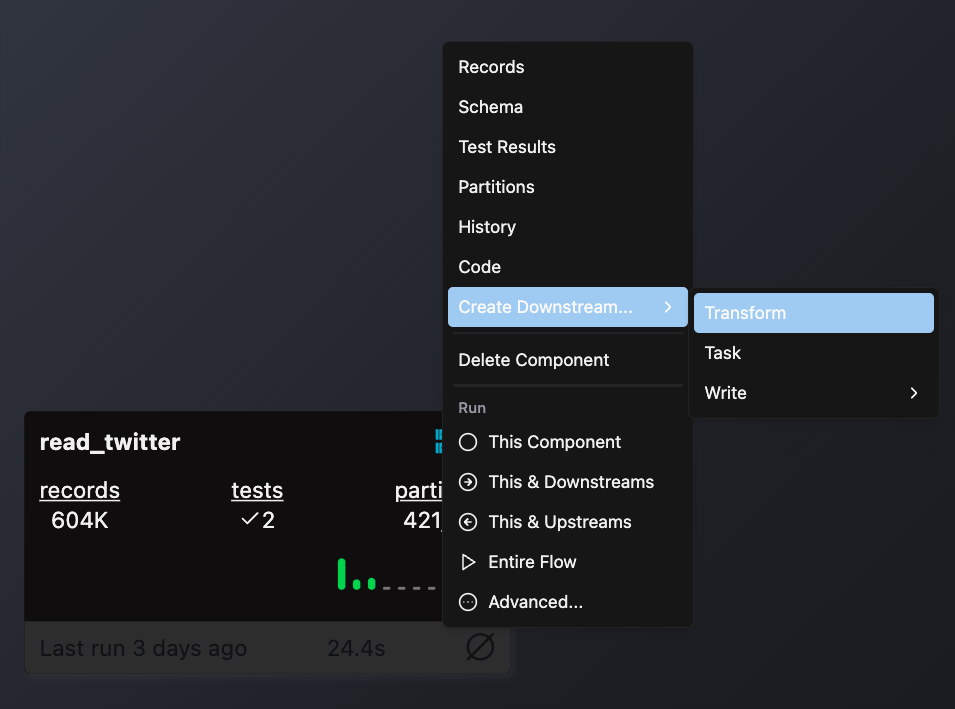
You can create a Transform in two ways: through the form UI or directly in the Files panel.
- Form
- Files panel
- Double-click the Flow where you want to add your Transform
- Right-click on an existing component (typically a Read component or another Transform) that will provide input data
- Select Create Downstream → Transform
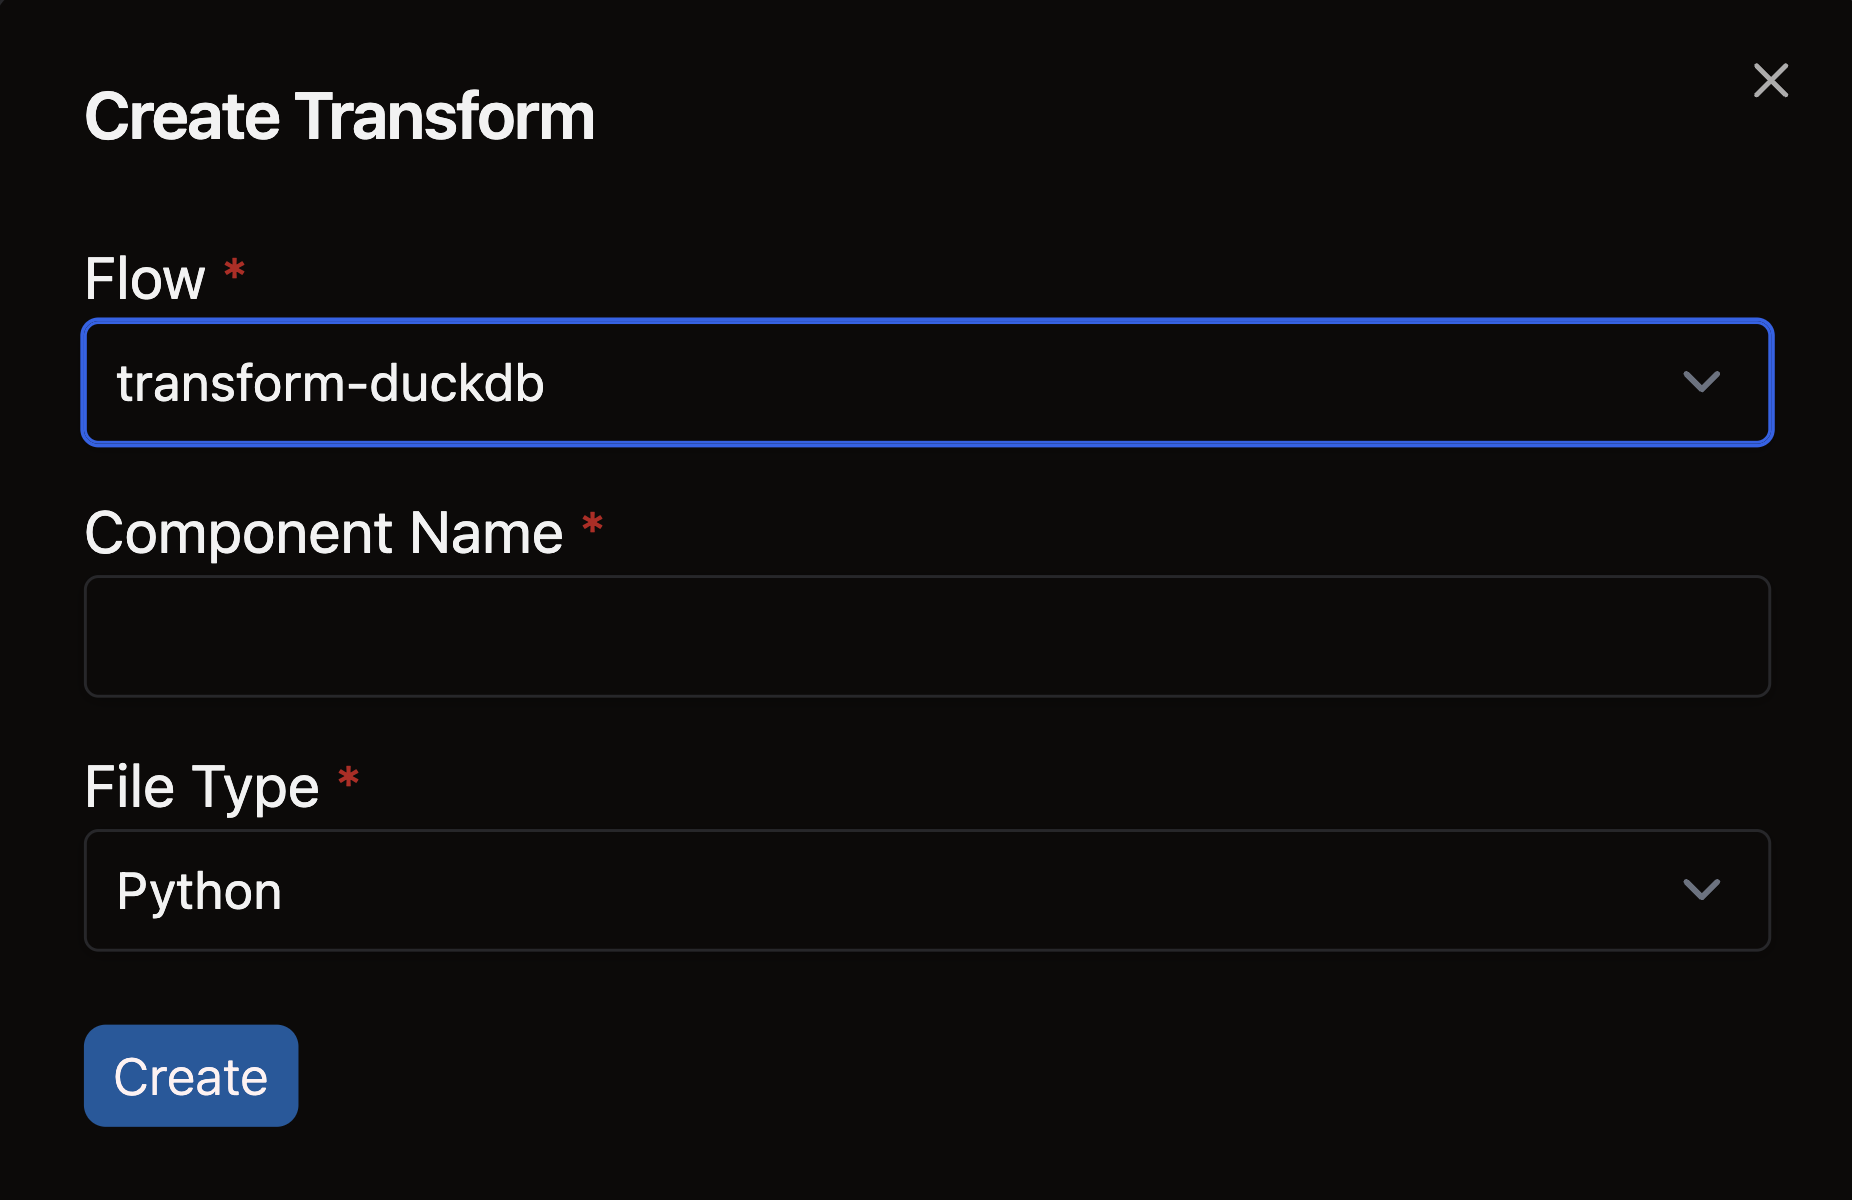
- Complete the form with these details:
- Select your Flow
- Enter a descriptive name for your Transform (e.g.,
sales_aggregation) - Choose the appropriate file type for your Transform logic
- Open the files panel in the top left corner
- Navigate to and select your desired Flow
- Right-click on the components directory and choose New file
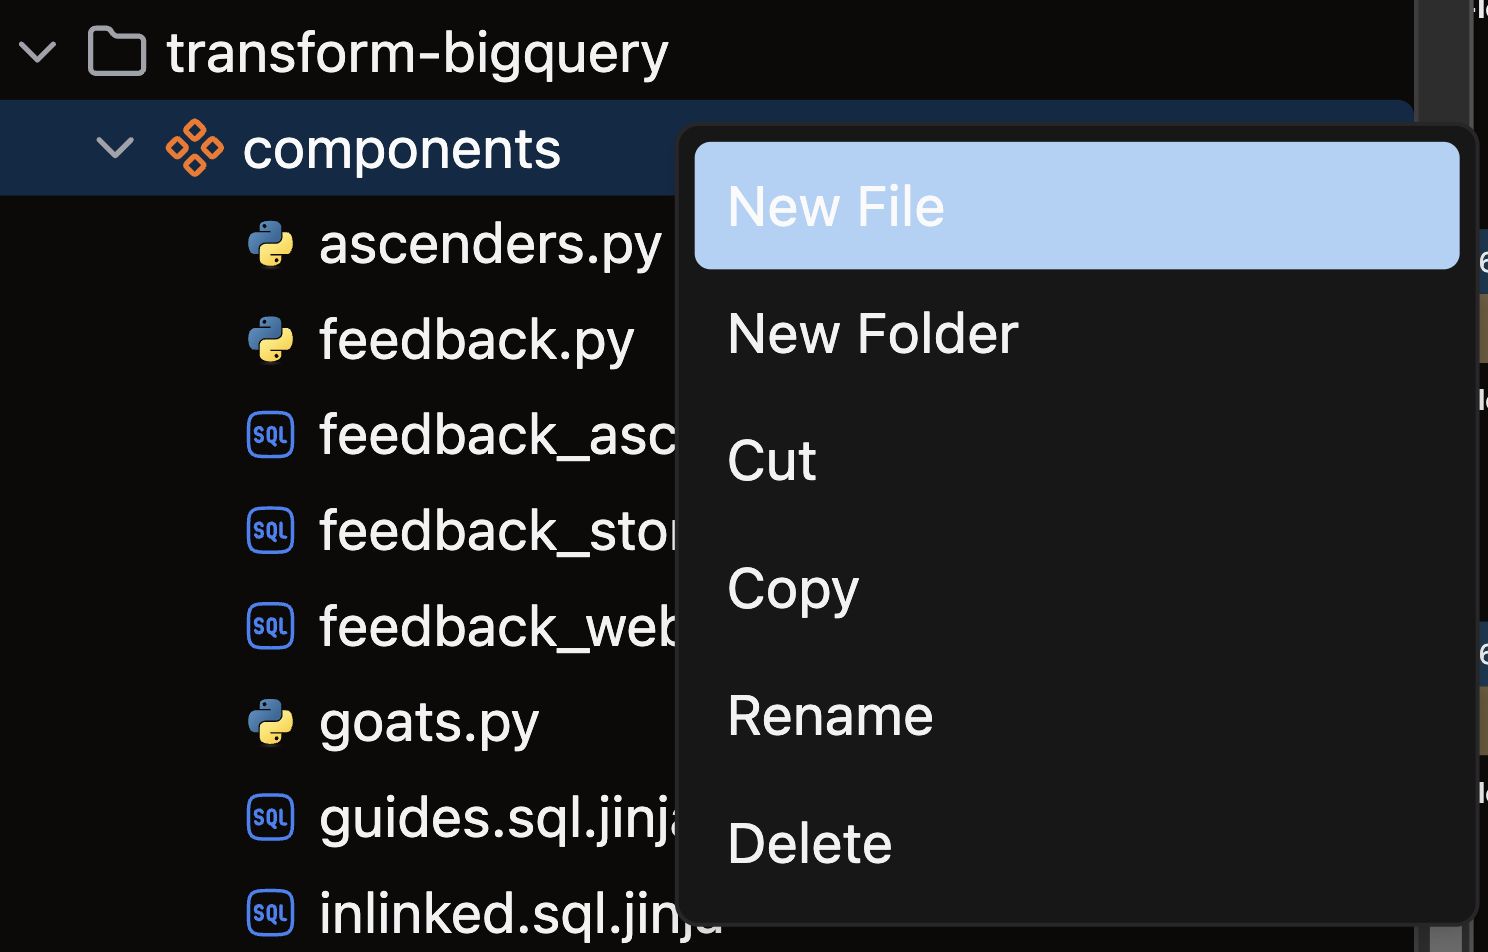
- Name your file with a descriptive name that reflects its purpose (e.g.,
sales_aggregation) - Choose the appropriate file extension based on your Transform type:
.pyfor Python Transforms.sqlfor SQL Transforms
Create your Python Transform
Smart Python Transforms allow you to process data partition-by-partition for more efficient data handling. There are two main approaches:
- Using upstream Partitions
- Using timestamps
Structure using upstream Partitions
-
Import necessary packages:
- Import Ascend resources like
transform,ref, and optionallytest - Import any required data processing libraries (like
ibisin this example)
- Import Ascend resources like
-
Apply the
@transform()decorator with:inputs: Include a primary input withreshape="map"to enable partition-wise processing- Configure additional inputs with
partition_bindingto establish relationships between partitions
-
Define your transform function:
- Create a function that processes each partition independently
- Utilize the context parameter for partition-specific information
-
Process and return data:
- Apply your transformation logic to each partition
- Return the processed data for each partition
Example
Structure using Timestamps
-
Import necessary packages:
- Import Ascend resources like
transform,ref, and optionallytest
- Import Ascend resources like
-
Apply the
@transform()decorator with:inputs: Include your input withreshape="map"for timestamp-based partitioning- Add optional tests to validate partition behavior
-
Define your transform function:
- Create a function that can handle time-series partitioned data
- Process each timestamp-based partition independently
-
Process and return data:
- Apply your transformation logic to each time-based partition
- Return the processed data with the same partition structure
Example
🎉 Congratulations! You've successfully created a Smart Python Transform in Ascend.