Use a dbt project
This feature is in Private Preview. Contact your Ascend representative to enable it.
Run your existing dbt project within Ascend using the dbt Module. Your dbt models appear as Components on the Flow Graph, integrated with Ascend's orchestration and lineage tracking.
This guide uses Snowflake, but the dbt Module works with any dbt-supported adapter.
When using a supported Ascend Data Plane (BigQuery, Databricks, MotherDuck, Snowflake), dbt models can be referenced downstream via ref() in other Ascend Components. dbt adapters that aren't supported Data Planes can run within Ascend, but their models cannot be referenced downstream.
Try the jaffle_shop example
The Ascend Community repository includes a ready-to-use dbt example based on the jaffle_shop project.
If you're using an Ascend-managed Repository, the jaffle_shop example is already available. If you're using your own Repository, you can:
- Copy the jaffle_shop example into your repo
- Skip to Use your own dbt project below
1. Update your Project root
Edit your existing Project or create a new one pointing to the jaffle_shop example:
- Navigate to Instance settings → Projects
- Edit an existing Project or click Add Project
- Set Project root to
projects/dbt/jaffle_shop/.ascend - Click Save
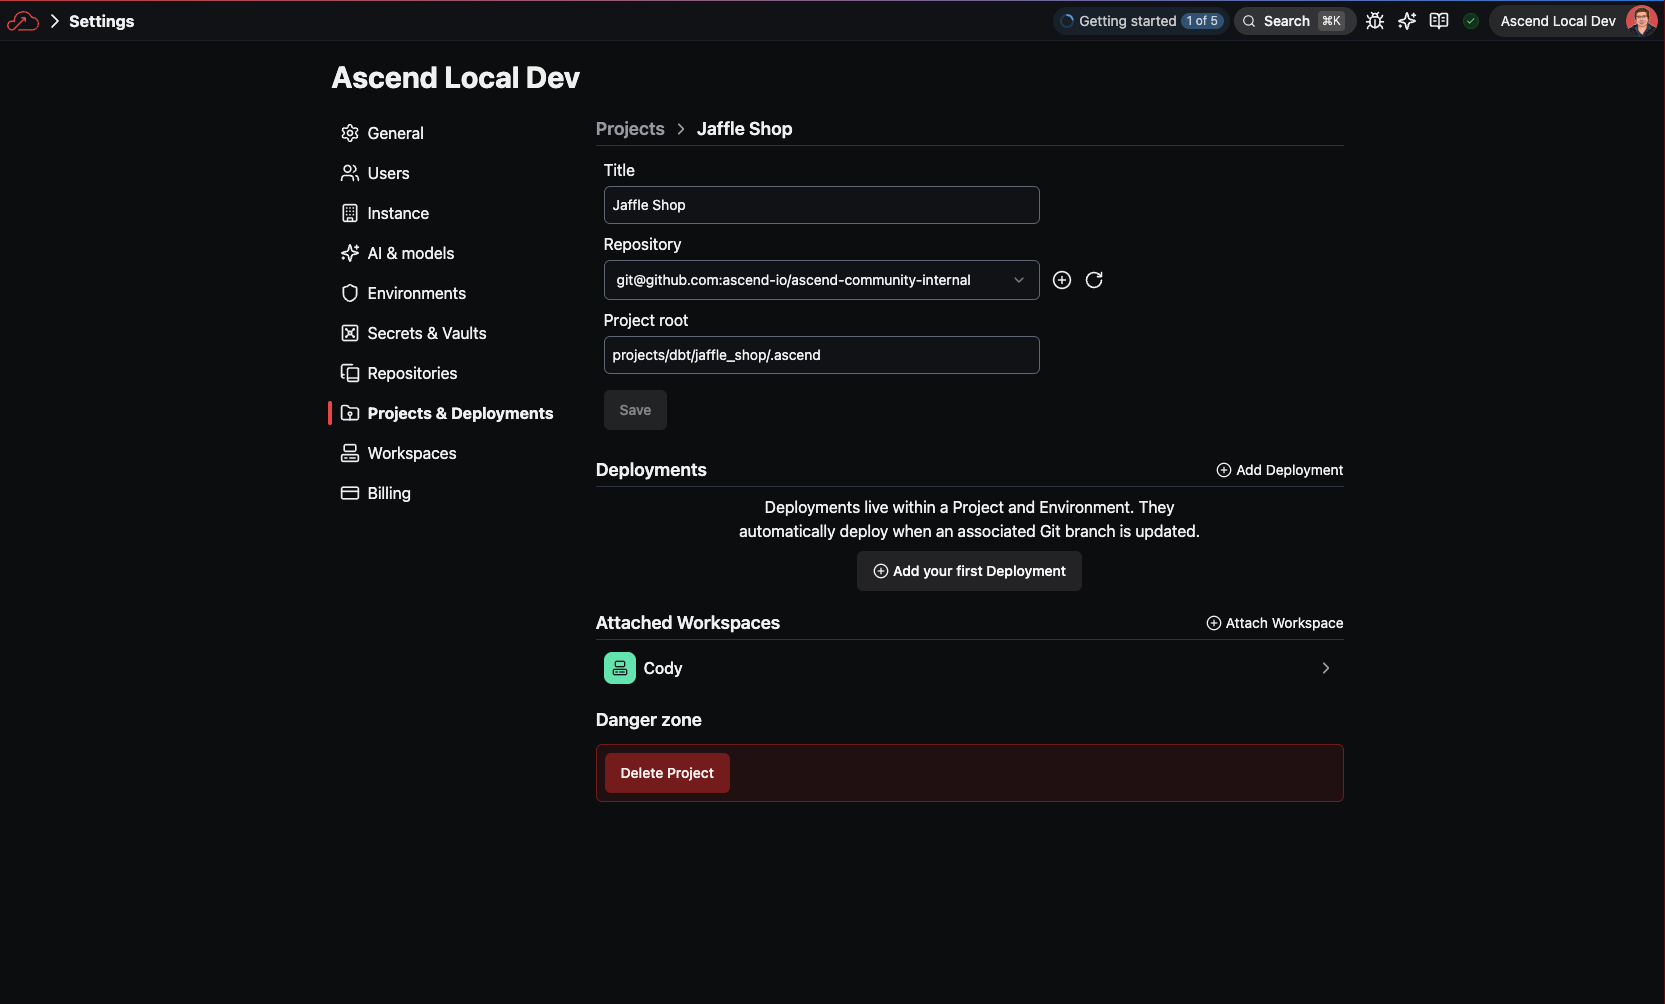
Setting the Project root to .ascend tells Ascend where to find the ascend_project.yaml and Flow definitions. The dbt project files live in the parent directory.
2. Add your Snowflake credentials
The jaffle_shop example expects a SNOWFLAKE_PRIVATE_KEY secret in your Environment Vault. If you haven't set up Snowflake with Ascend yet, see the Snowflake quickstart.
- Navigate to Instance settings → Environments
- Select your Environment and open the Vault tab
- Add a secret named
SNOWFLAKE_PRIVATE_KEYwith your Snowflake private key - Click Save
You'll also need to update the Snowflake parameters in ascend_project.yaml to match your account. You can do this in a Workspace after opening the Project.
3. Open in a Workspace
- Create or open a Workspace using the jaffle_shop Project
- Open the dbt Flow from the Files panel
- Build the Flow to see your dbt models as Components
On the Super Graph, the dbt Flow appears alongside other Flows in your Instance:

On the Flow Graph, you can see the individual dbt models as Components:

Each dbt model, seed, and snapshot appears as a Component with lineage connections showing dependencies.
How it works
The jaffle_shop example demonstrates the minimal scaffolding needed to run dbt in Ascend.
Project structure
The .ascend/ folder is the Ascend Project root. The dbt project files (dbt_project.yml, profiles.yml, models/, etc.) live in the parent directory.
dbt Module Component
The Module Component tells Ascend how to run your dbt project:
component:
  module:
    module_id: dbt
    config:
      project_dir: ..
      target: ${parameters.dbt.target:-prod}
      env_vars:
        DBT_ENV_SNOWFLAKE_ACCOUNT: "${parameters.snowflake.account}"
        DBT_ENV_SNOWFLAKE_USER: "${parameters.snowflake.user}"
        DBT_ENV_SECRET_SNOWFLAKE_PRIVATE_KEY: "${vaults.environment.SNOWFLAKE_PRIVATE_KEY}"
        DBT_ENV_SNOWFLAKE_ROLE: "${parameters.snowflake.role}"
        DBT_ENV_SNOWFLAKE_DATABASE: "${parameters.snowflake.database}"
        DBT_ENV_SNOWFLAKE_WAREHOUSE: "${parameters.snowflake.warehouse}"
        DBT_ENV_SNOWFLAKE_SCHEMA: "${parameters.snowflake.schema}"
| Option | Description |
|---|---|
project_dir | Path to dbt project root, relative to Component file |
target | dbt target from profiles.yml |
env_vars | Environment variables passed to dbt at runtime |
profiles.yml with environment variables
The dbt profiles.yml uses environment variables for credentials. Ascend passes these from the Module Component's env_vars config:
default:
  target: prod
  outputs:
    prod:
      type: snowflake
      account: "{{env_var('DBT_ENV_SNOWFLAKE_ACCOUNT')}}"
      user: "{{env_var('DBT_ENV_SNOWFLAKE_USER')}}"
      private_key: "{{env_var('DBT_ENV_SECRET_SNOWFLAKE_PRIVATE_KEY')}}"
      role: "{{env_var('DBT_ENV_SNOWFLAKE_ROLE')}}"
      database: "{{env_var('DBT_ENV_SNOWFLAKE_DATABASE')}}"
      warehouse: "{{env_var('DBT_ENV_SNOWFLAKE_WAREHOUSE')}}"
      schema: "{{env_var('DBT_ENV_SNOWFLAKE_SCHEMA')}}"
Project parameters
Parameters in ascend_project.yaml provide values that flow through to the Module Component:
project:
  name: jaffle_shop
  parameters:
    dbt:
      target: prod
    snowflake:
      account: <YOUR_SNOWFLAKE_ACCOUNT>
      user: <YOUR_SNOWFLAKE_USER>
      role: <YOUR_SNOWFLAKE_ROLE>
      warehouse: <YOUR_SNOWFLAKE_WAREHOUSE>
      database: <YOUR_SNOWFLAKE_DATABASE>
      schema: <YOUR_SNOWFLAKE_SCHEMA>
Sensitive values like SNOWFLAKE_PRIVATE_KEY are stored in the Environment Vault and referenced via ${vaults.environment.SNOWFLAKE_PRIVATE_KEY}.
Use your own dbt project
To run your own dbt project in Ascend, create an .ascend/ directory alongside your dbt files with the following structure:
your_dbt_project/
├── .ascend/
│   ├── ascend_project.yaml
│   ├── connections/
│   │   └── data_plane_snowflake.yaml
│   └── flows/
│       └── dbt/
│           ├── dbt.yaml
│           └── components/
│               └── my_dbt_module.yaml
├── dbt_project.yml
├── profiles.yml
└── models/
1. Create the Project configuration
2. Create a Data Plane Connection
connection:
  snowflake:
    account: ${parameters.snowflake.account}
    user: ${parameters.snowflake.user}
    private_key: ${vaults.environment.SNOWFLAKE_PRIVATE_KEY}
    role: ${parameters.snowflake.role}
    warehouse: ${parameters.snowflake.warehouse}
    database: ${parameters.snowflake.database}
    schema: ${parameters.snowflake.schema}
3. Create a Flow
flow:
  description: dbt project integration.
4. Create the dbt Module Component
component:
  module:
    module_id: dbt
    config:
      project_dir: ..
      target: ${parameters.dbt.target:-prod}
      env_vars:
        DBT_ENV_SNOWFLAKE_ACCOUNT: "${parameters.snowflake.account}"
        DBT_ENV_SNOWFLAKE_USER: "${parameters.snowflake.user}"
        DBT_ENV_SECRET_SNOWFLAKE_PRIVATE_KEY: "${vaults.environment.SNOWFLAKE_PRIVATE_KEY}"
        DBT_ENV_SNOWFLAKE_ROLE: "${parameters.snowflake.role}"
        DBT_ENV_SNOWFLAKE_DATABASE: "${parameters.snowflake.database}"
        DBT_ENV_SNOWFLAKE_WAREHOUSE: "${parameters.snowflake.warehouse}"
        DBT_ENV_SNOWFLAKE_SCHEMA: "${parameters.snowflake.schema}"
The project_dir: .. path is relative to the .ascend/ Project root, so .. resolves to the parent directory where your dbt files live.
5. Update profiles.yml
Modify your dbt profiles.yml to use environment variables:
default:
  target: prod
  outputs:
    prod:
      type: snowflake
      account: "{{env_var('DBT_ENV_SNOWFLAKE_ACCOUNT')}}"
      user: "{{env_var('DBT_ENV_SNOWFLAKE_USER')}}"
      private_key: "{{env_var('DBT_ENV_SECRET_SNOWFLAKE_PRIVATE_KEY')}}"
      role: "{{env_var('DBT_ENV_SNOWFLAKE_ROLE')}}"
      database: "{{env_var('DBT_ENV_SNOWFLAKE_DATABASE')}}"
      warehouse: "{{env_var('DBT_ENV_SNOWFLAKE_WAREHOUSE')}}"
      schema: "{{env_var('DBT_ENV_SNOWFLAKE_SCHEMA')}}"
6. Configure Ascend
- Add your
SNOWFLAKE_PRIVATE_KEYto your Environment Vault - Set your Project root to
path/to/your_dbt_project/.ascend - Open a Workspace and build the Flow
Next steps
- Learn about Modules in Ascend
- Configure Automations to schedule dbt runs
- Set up Environment Vaults for credential management