Build & run your first Flow
Overview
Your Ascend Instance comes pre-configured with everything you need to start building data pipelines: a Repository, the Otto's Expeditions Project, a Workspace, Connections, and more.
This quickstart guide focuses on the essentials of delightful Ascend development. You'll learn how to:
- Create a Flow (data pipeline)
- Build a Read Component with data quality tests
- Create a Transform Component to process your data
- Implement a Task for custom operations
- Execute your Flow in both a Workspace for development and a Deployment for production
Project
Ascend provides multiple Projects out of the box. The simplest approach is using the Default Project, which lets you explore Ascend immediately without any setup.
For a more comprehensive experience, you can optionally switch to the Otto's Expeditions Project through your Workspace settings to see advanced features.
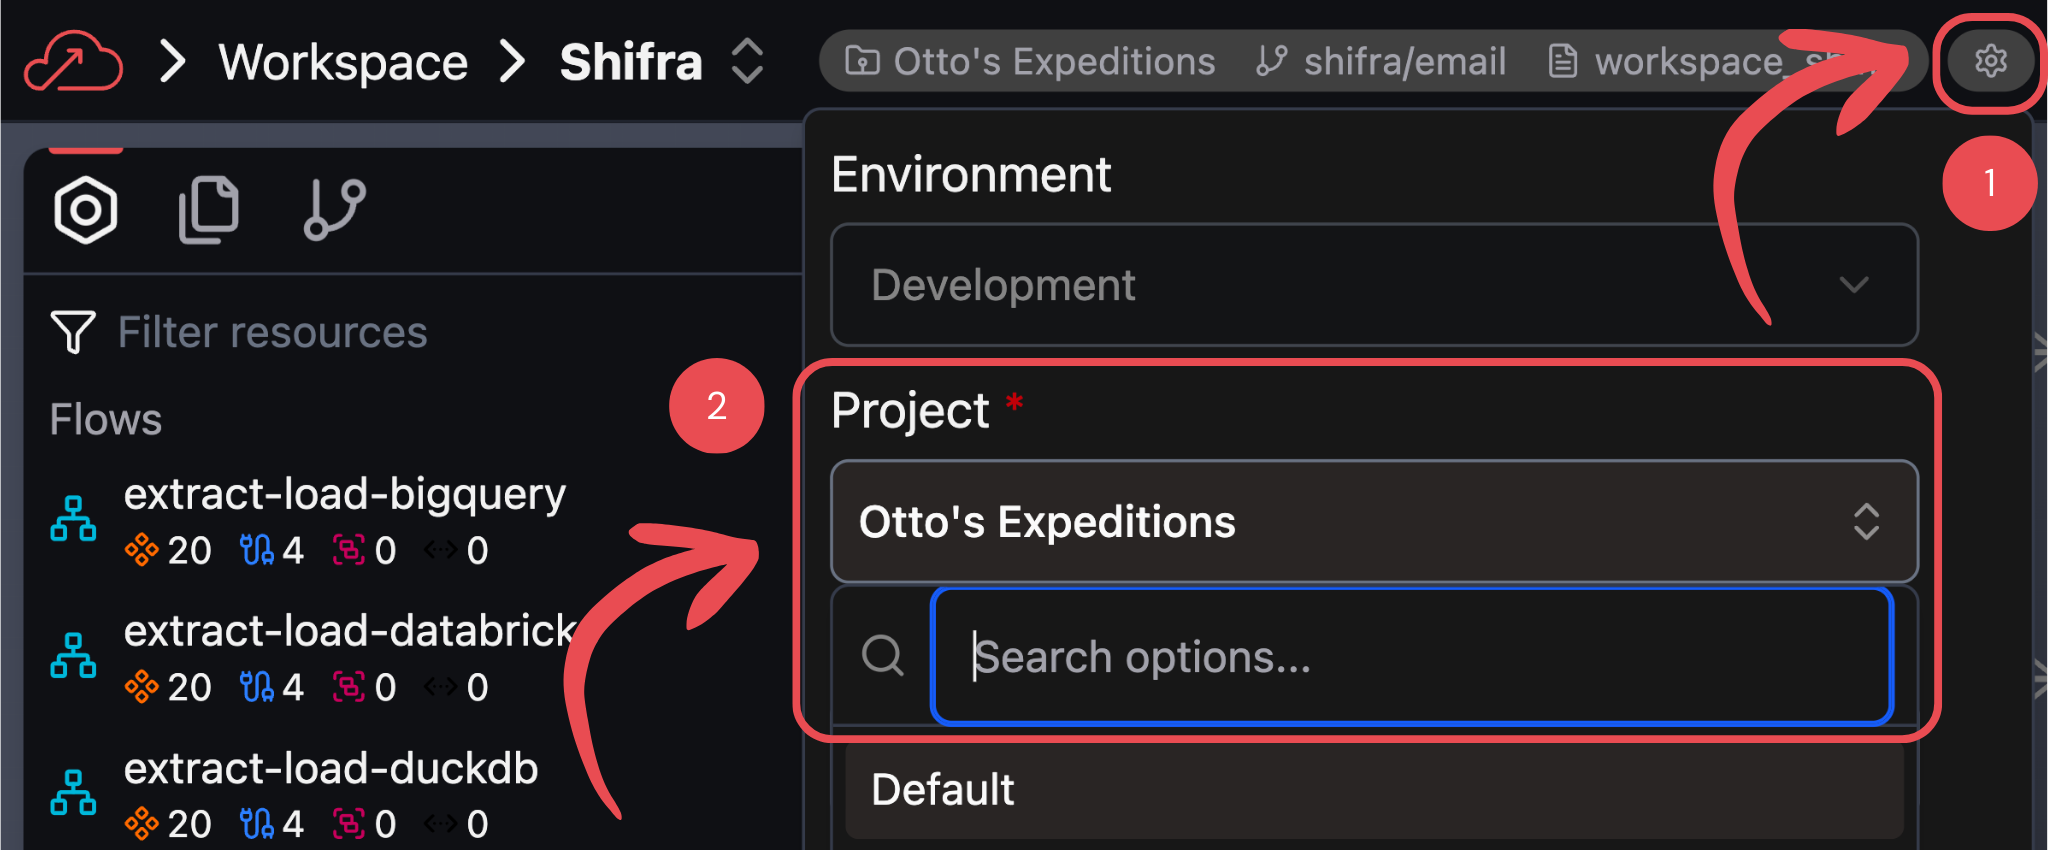
This quickstart works with either the Default or Otto's Expeditions Project.
Alternatively, customize the Project configuration for your existing data infrastructure and specific requirements.
Create a Flow
A Flow is the foundation of your data pipeline. Let's create one to organize your Components:
- Form
- Files panel
-
Right-click anywhere in the Super Graph (the overview of all Flows in your Project) and select Create Flow
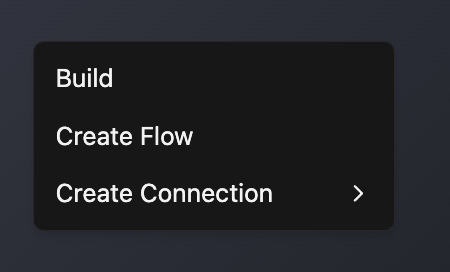
-
Fill out the form with the Flow name
developer-quickstart. Other fields are optional
-
Click Save to create your Flow
- Right-click the flows folder and select New file
- Name your file
developer-quickstart.yaml - Copy the following configuration into your new file:
flow: {}
Create a Read Component
Throughout this quickstart, we'll be recreating Components from Otto's Expeditions, where Otto the data pipeline goat creates unforgettable mountain adventures. Let's start by building a Read Component that pulls route closure data from an existing Local File Connection.
Typically, you would create a Connection before building Components, but we'll be leveraging an existing Local File Connection.
- UI
- Files panel
-
Navigate to your
developer-quickstartFlow using the build panel or by double-clicking its node in the Super Graph -
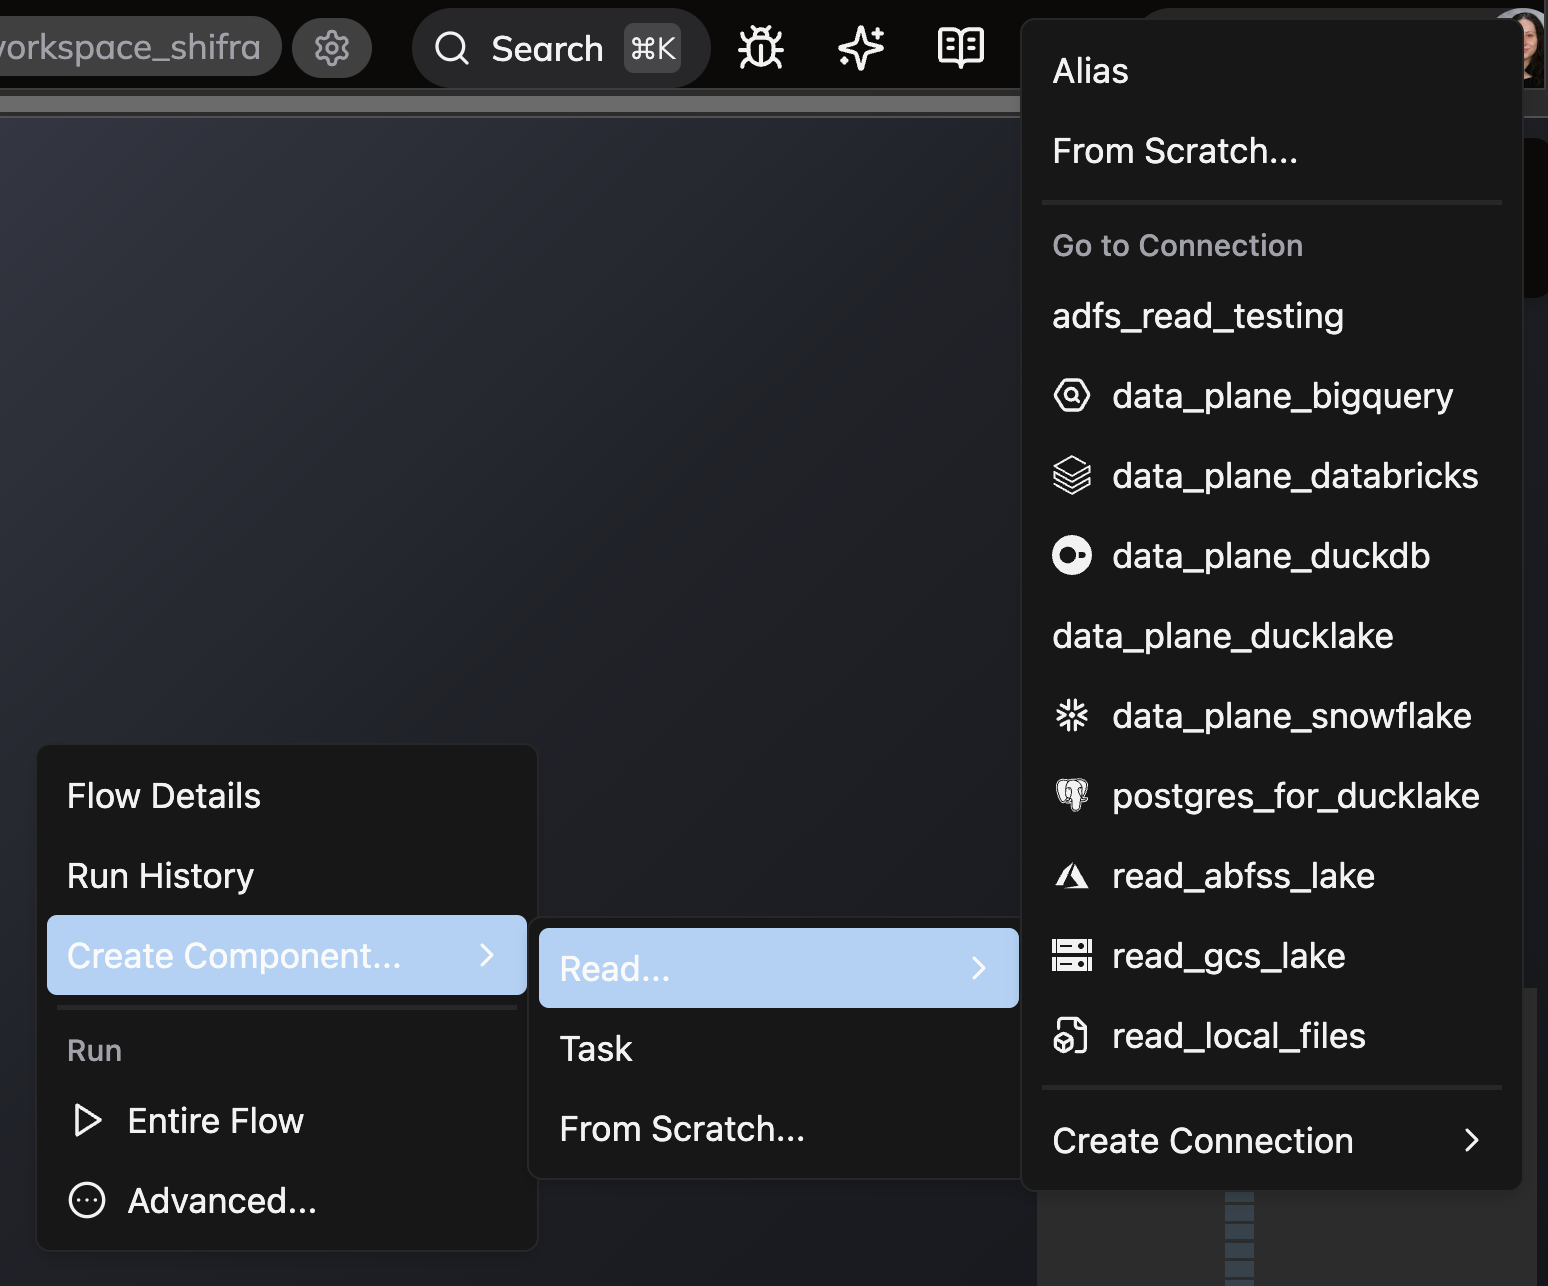
Right-click anywhere in the Flow Graph background (the graph showing your current Flow's Components)
-
Hover over Create Component, then Read, and choose From Scratch
-
Name your Component
read_route_closuresand ensure YAML is selected as the file type -
Copy the following configuration:
- In the Files panel, right-click the components folder inside your
developer-quickstartFlow and select New file - Name your file
read_route_closures.yaml - Copy the following configuration into your new file:
component:
  read:
    connection: read_local_files
    local_file:
      parser: auto
      path: route_closures.csv
Create a Transform
Next, let's create a Transform that uses our Read Component as input and cleans the column names in our data:
- In the Files panel, right-click the components folder inside your
developer-quickstartFlow and select New file - Name your file
route_closures.py - Copy the following code into your new file:
import ibis
import ottos_expeditions.lib.transform as T
from ascend.application.context import ComponentExecutionContext
from ascend.resources import ref, transform


@transform(inputs=[ref("read_route_closures")])
def route_closures(read_route_closures: ibis.Table, context: ComponentExecutionContext) -> ibis.Table:
    route_closures = T.clean(read_route_closures)
    return route_closures
The custom cleaning function used here is shared code from the ottos_expeditions/lib folder.
Create a Task
Finally, let's create a Task that demonstrates Ascend's logging capabilities by logging each route that gets updated:
- UI
- Files panel
-
Right-click anywhere in the Flow Graph background (the graph showing your current Flow's Components)
-
Hover over Create Component, then choose Task

-
Name your Component
task_update_route_closures_calendarand ensure Python is selected as the file type -
Copy the following code:
- In the Files panel, right-click the components folder inside your
developer-quickstartFlow and select New file - Name your file
task_update_route_closures_calendar.py - Copy the following code into your new file:
Run your Flow in a Workspace
Now it's time to see your pipeline in action! Your completed Flow should display all three Components connected in sequence:

Click Run Flow in the build info panel in the top left, and select Run in the modal that appears.

Watch as Ascend processes your data through each Component - from reading the route closure data, to cleaning it with your Transform, to logging updates with your Task.
Workspaces are ideal for development, with editable code and Automations disabled. Deployments are ideal for production with read-only code and Automations enabled. Refer to our concept docs to learn more.
Run your Flow in a Deployment
Now, let's promote your code to the Production Deployment and run it in an isolated environment.
In a typical DataOps lifecycle, you would promote through Development and Staging before pushing to Production. However, because Developer Plan Instances have only one Deployment, we'll use a simplified process.
-
From your Workspace, navigate to the Source Control panel in the left sidebar and click Open Git Log & actions.

-
In the Git log window, select Merge to Deployment and choose production. Click Merge in the confirmation dialog to promote your code to the Production Deployment

-
From the Ascend homepage, locate the Production Deployment and click on it to open the Deployments Dashboard

-
In the Deployments Dashboard, select the
developer-quickstartFlow from the left sidebar
-
Click the Run Flow button in the top right corner to run your pipeline:

-
In the run configuration modal, click Run to start the execution
-
Monitor the execution progress using the Flow runs matrix, which displays the status of both the overall Flow and its individual Components:

🎉 Congratulations! You've successfully built and deployed your first Ascend Flow, complete with a Read Component, Transform, and Task!
Next steps
Ready to dive deeper? Here's what to explore next:
- 💭 Explore core Ascend concepts to build a deeper understanding of the platform
- 📊 Master DataOps best practices for robust production workflows
- 🧪 Add data quality tests to validate and monitor your data pipelines
- ⚙️ Learn more about Deployments to promote your pipelines from development to production