Set up Databricks with Ascend
Overview
In this quickstart guide, you'll learn how to use Databricks as your Data Plane in Ascend.
This guide will take you through the following steps:
- Create a Databricks service principal
- Create a Databricks warehouse
- Set up Data Plane catalog and schema
- Create Databricks compute
- Securely store your Databricks secret
- Configure your Ascend Workspace & Project with your Databricks details
- Run an Ascend Flow and view the resulting tables in Databricks
Prerequisites
- Ascend Instance
- Databricks workspace with Unity Catalog enabled
- Databricks CLI installed on your terminal (
brew tap databricks/tap && brew install databricksusing Homebrew) - jq installed on your terminal (
brew install jqusing Homebrew) - Familiarity with the role of the Data Plane in Ascend
While you can complete the setup steps below using the Databricks UI, we recommend using the CLI for automation and repeatability.
Set up the Databricks CLI
If you've already followed an Ascend Databricks setup guide, your Databricks CLI is configured and you can skip this section. Just verify your default profile points to the correct Databricks workspace.
First, check if the Databricks CLI is configured:
DATABRICKS_WORKSPACE_URL=$(databricks auth env | jq -r .env.DATABRICKS_HOST)

if [[ "$DATABRICKS_WORKSPACE_URL" ]]; then
  echo "Using Databricks workspace:\n$DATABRICKS_WORKSPACE_URL"
fi
If the CLI isn't configured yet, set your Databricks workspace URL:
DATABRICKS_WORKSPACE_URL=<your-databricks-workspace-url>
Open your Databricks workspace:
open $DATABRICKS_WORKSPACE_URL
Create a Personal Access Token (PAT) in the Databricks UI, then configure the CLI:
databricks configure --host $DATABRICKS_WORKSPACE_URL
Enter your PAT when prompted.
The Databricks CLI uses profiles to manage working with multiple Databricks workspaces.
Verify Unity Catalog metastore
Confirm your Databricks workspace has a Unity Catalog metastore assigned:
databricks metastores current
If you see a metastore_id, workspace_id, and default_catalog_name in the output, you're ready to proceed. If no metastore is assigned, follow one of our Databricks setup guides first.
Create service principal
Create a Databricks service principal for the Default Environment on your Ascend Instance:
ENV_DEFAULT_SP_APP_ID=$(databricks service-principals create \
    --display-name "ascend-env-default-sp" \
    | jq -r '.applicationId')
echo $ENV_DEFAULT_SP_APP_ID
Create SQL warehouse
Create a Databricks SQL warehouse for the Default Environment:
WH_ID_DEFAULT=$(databricks warehouses create \
    --cluster-size "2X-Small" \
    --auto-stop-mins 5 \
    --min-num-clusters 1 \
    --max-num-clusters 1 \
    --enable-photon \
    --enable-serverless-compute \
    --no-wait \
    --name "ASCEND_DEVELOPMENT_WAREHOUSE" \
    | jq -r '.id')
echo $WH_ID_DEFAULT
Set up Data Plane catalog and schema
Verify the current metastore:
SQL="select current_metastore()"
databricks api post /api/2.0/sql/statements --json \
    '{"warehouse_id": "'"$WH_ID_DEFAULT"'", "statement": "'"$SQL"'"}'
Define the catalog and schema that your Default Data Plane will use:
ASCEND_DEFAULT_CATALOG="ascend_data_plane_default"
ASCEND_DEFAULT_SCHEMA="default"
Create the Unity Catalog:
SQL="CREATE CATALOG IF NOT EXISTS $ASCEND_DEFAULT_CATALOG"
databricks api post /api/2.0/sql/statements --json \
    '{"warehouse_id": "'"$WH_ID_DEFAULT"'", "statement": "'"$SQL"'"}'
Create the schema within the catalog:
SQL="CREATE SCHEMA IF NOT EXISTS $ASCEND_DEFAULT_CATALOG.$ASCEND_DEFAULT_SCHEMA"
databricks api post /api/2.0/sql/statements --json \
    '{"warehouse_id": "'"$WH_ID_DEFAULT"'", "statement": "'"$SQL"'"}'
Grant the Default service principal access to the catalog:
SQL="GRANT ALL PRIVILEGES ON CATALOG $ASCEND_DEFAULT_CATALOG TO \`$ENV_DEFAULT_SP_APP_ID\`"
databricks api post /api/2.0/sql/statements --json \
    '{"warehouse_id": "'"$WH_ID_DEFAULT"'", "statement": "'"$SQL"'"}'
Grant the Default service principal access to the schema:
SQL="GRANT ALL PRIVILEGES ON SCHEMA $ASCEND_DEFAULT_CATALOG.$ASCEND_DEFAULT_SCHEMA TO \`$ENV_DEFAULT_SP_APP_ID\`"
databricks api post /api/2.0/sql/statements --json \
    '{"warehouse_id": "'"$WH_ID_DEFAULT"'", "statement": "'"$SQL"'"}'
Create compute
Now create a Databricks cluster for your Default Data Plane.
For more customization options, consider creating the all-purpose cluster in the Databricks UI. You can then copy the JSON configuration for reuse in the CLI or automation scripts.
Select the appropriate node type for your Databricks cloud provider:
- AWS
- Azure
- GCP
NODE_TYPE_ID="m5.large"
NODE_TYPE_ID="Standard_D4ds_v5"
NODE_TYPE_ID="n1-standard-4"
Create the cluster for the Ascend Default Environment:
Grant service principals compute access
If you don't have permission to manage compute access in your Databricks workspace, ask your Databricks administrator to grant the service principals access to these resources.
databricks permissions set sql/warehouses $WH_ID_DEFAULT \
    --json "{
        \"access_control_list\": [
            {
                \"service_principal_name\": \"$ENV_DEFAULT_SP_APP_ID\",
                \"permission_level\": \"CAN_USE\"
            }
        ]
    }"

DEFAULT_CLUSTER=$(databricks clusters list | grep "ASCEND_DEFAULTUCTION_CLUSTER" | awk '{print $1}')
databricks api patch /api/2.0/permissions/clusters/$DEFAULT_CLUSTER --json '{"access_control_list": [{"service_principal_name": "'"$ENV_DEFAULT_SP_APP_ID"'", "permission_level": "CAN_ATTACH_TO"}]}'
Create and store your Databricks secret
Securely store your Databricks credentials in Ascend's Environment Vault:
- In the Databricks UI, go to Settings > Identity and access > Service principals
- Select the
ascend-env-default-spservice principal - Go to Secrets and click Generate secret
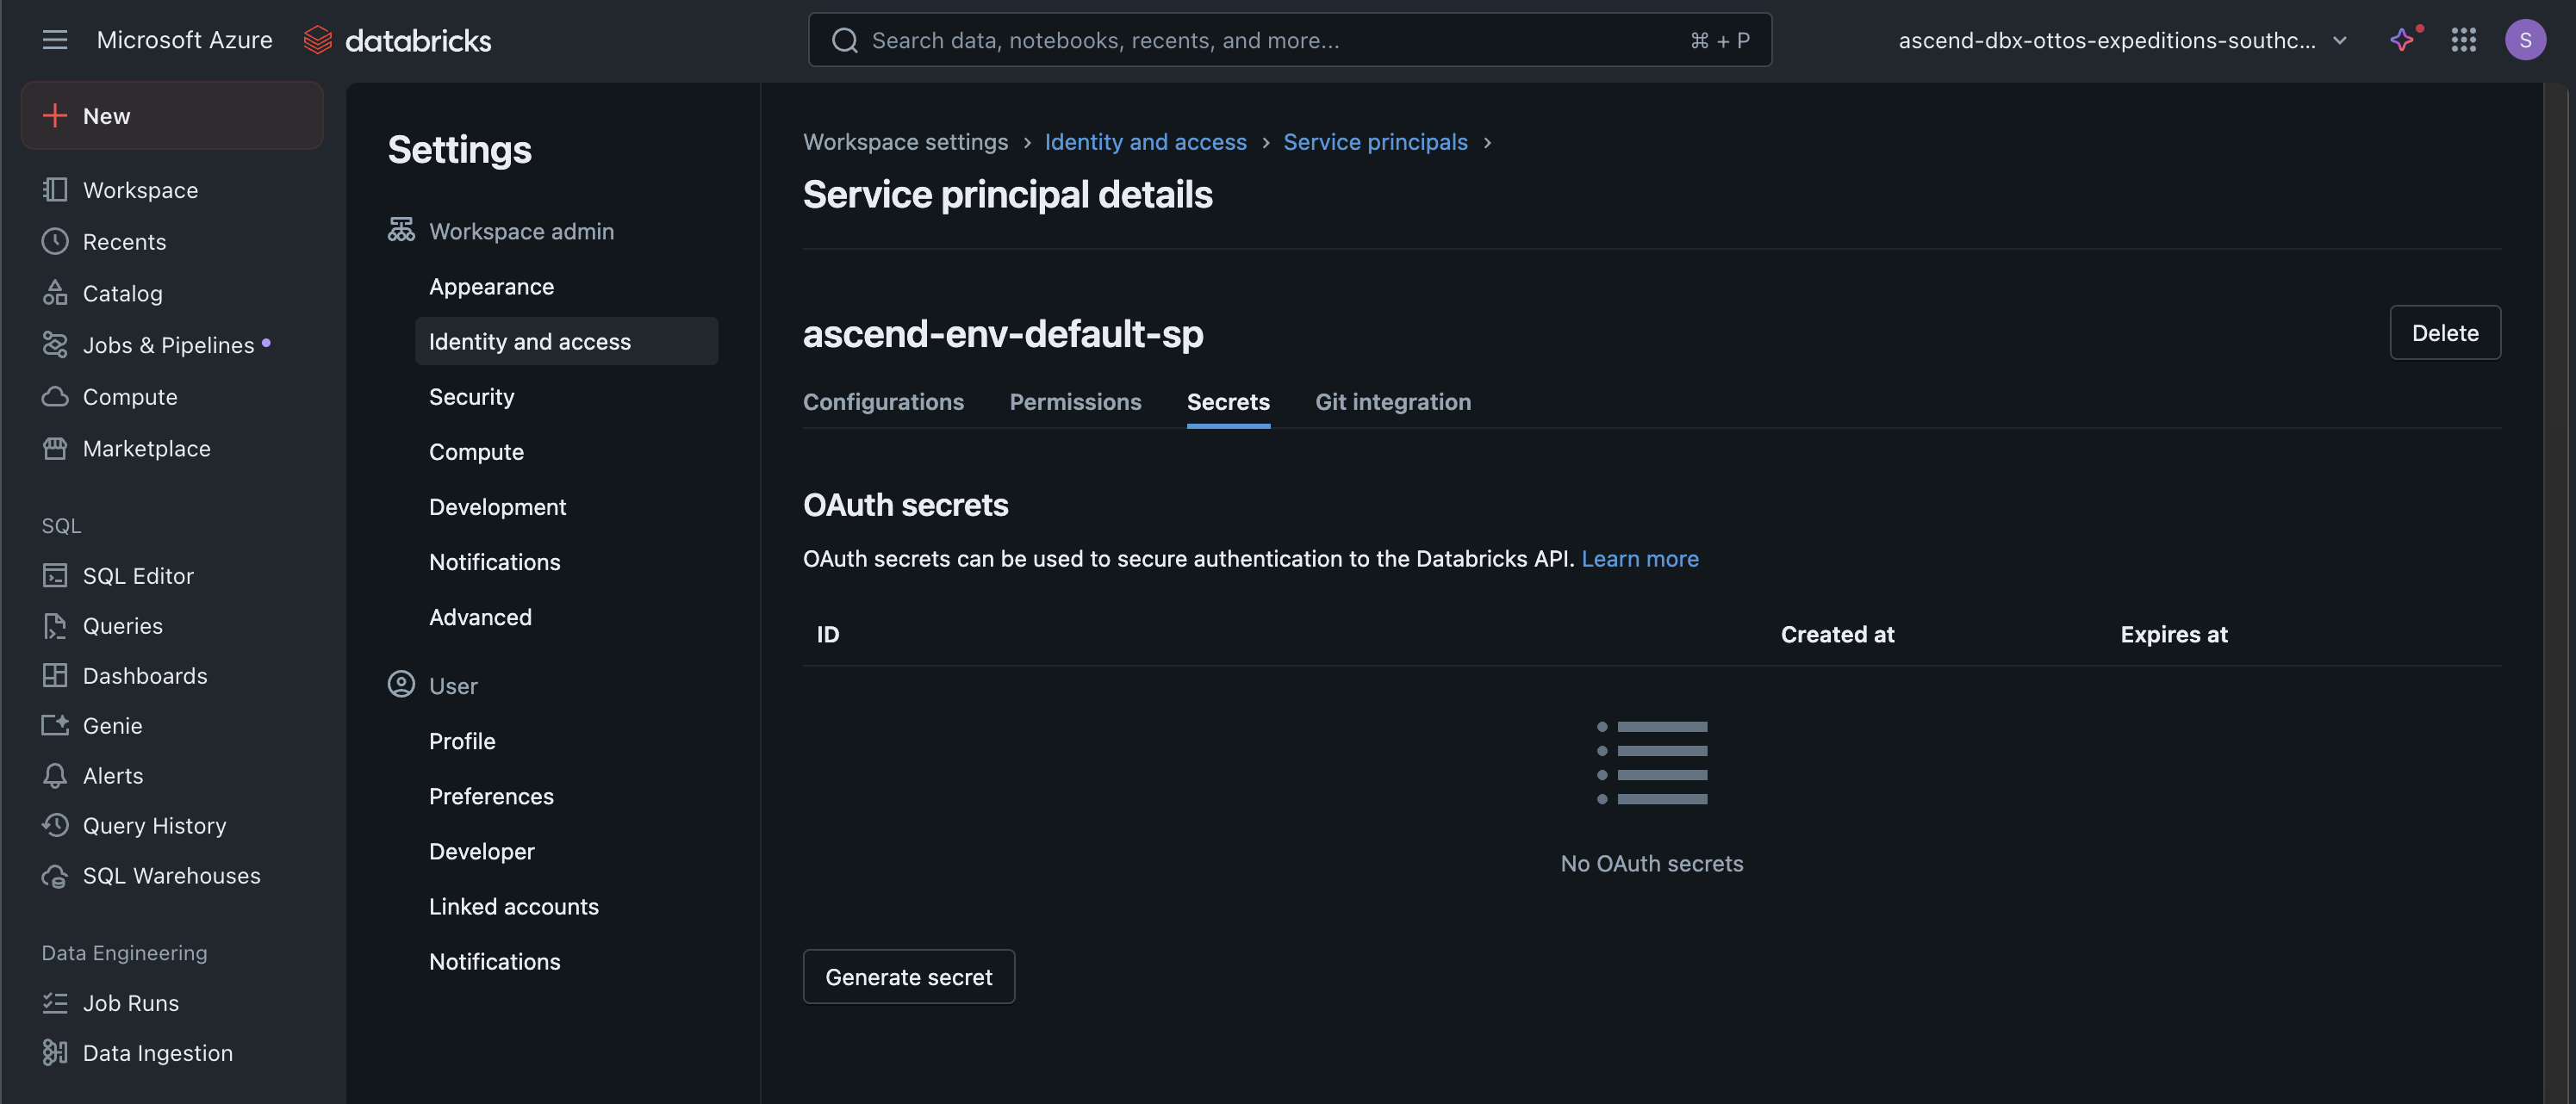
- Choose an appropriate lifetime for your security requirements and click Generate
- Copy the generated secret value
- In your Ascend Instance, click your profile picture (top-right) and select Settings
- Go to Secrets & Vaults
- Select the Default Environment Vault
- Click Add secret
- Enter
DATABRICKS_SECRETas the name and paste your secret in the Value field - Click Create
Configure your Workspace & Project
Alternatively, you can keep the out-of-the-box Project configuration and create a new Databricks Data Plane Connection instead. This allows you to use the existing setup and proceed directly to running the sales Flow.
Configure your Default Ascend Project to use the Databricks-specific template:
-
In the top-right corner of your Ascend Instance, click on your profile picture and select Settings
-
Go to Projects & Deployments and select the Default Project
-
Change the Project root to
projects/default/databricks -
Click Save to apply your changes
-
Navigate back to your Ascend Workspace via the homepage or with
Cmd+Ksearch navigation -
Open the Files panel and locate
ascend_project.yamltoward the bottom of the file tree. -
Add your Databricks parameters to the configuration:
    databricks:
    workspace_url: <YOUR_WORKSPACE_URL>
    client_id: <YOUR_CLIENT_ID>
    cluster_id: <YOUR_CLUSTER_ID>
    cluster_http_path: <YOUR_CLUSTER_HTTP_PATH>
    warehouse_http_path: <YOUR_WAREHOUSE_HTTP_PATH>
    catalog: <YOUR_CATALOG>
schema: DEFAULTtipIf you used the CLI for setup, run these commands to retrieve all your configuration parameters at once:
Run commands
-
Paste these parameters into
ascend_project.yamland useCmd + S/Ctrl + Sto save your changes.
Run the sales Flow
- In the Super Graph view of your Ascend Workspace, double-click the
salesFlow to open the Flow Graph view, which shows all Components in thesalesFlow - In the build info panel on the top left, click Run Flow and watch all Components in your Flow execute from left to right
View Ascend tables in Databricks
- Open the Databricks console and click Catalog in the left panel
- Expand the
ascend_data_plane_defaultcatalog - Expand the
defaultschema - Select the
read_sales_websitetable - Click the Sample Data tab to view your data
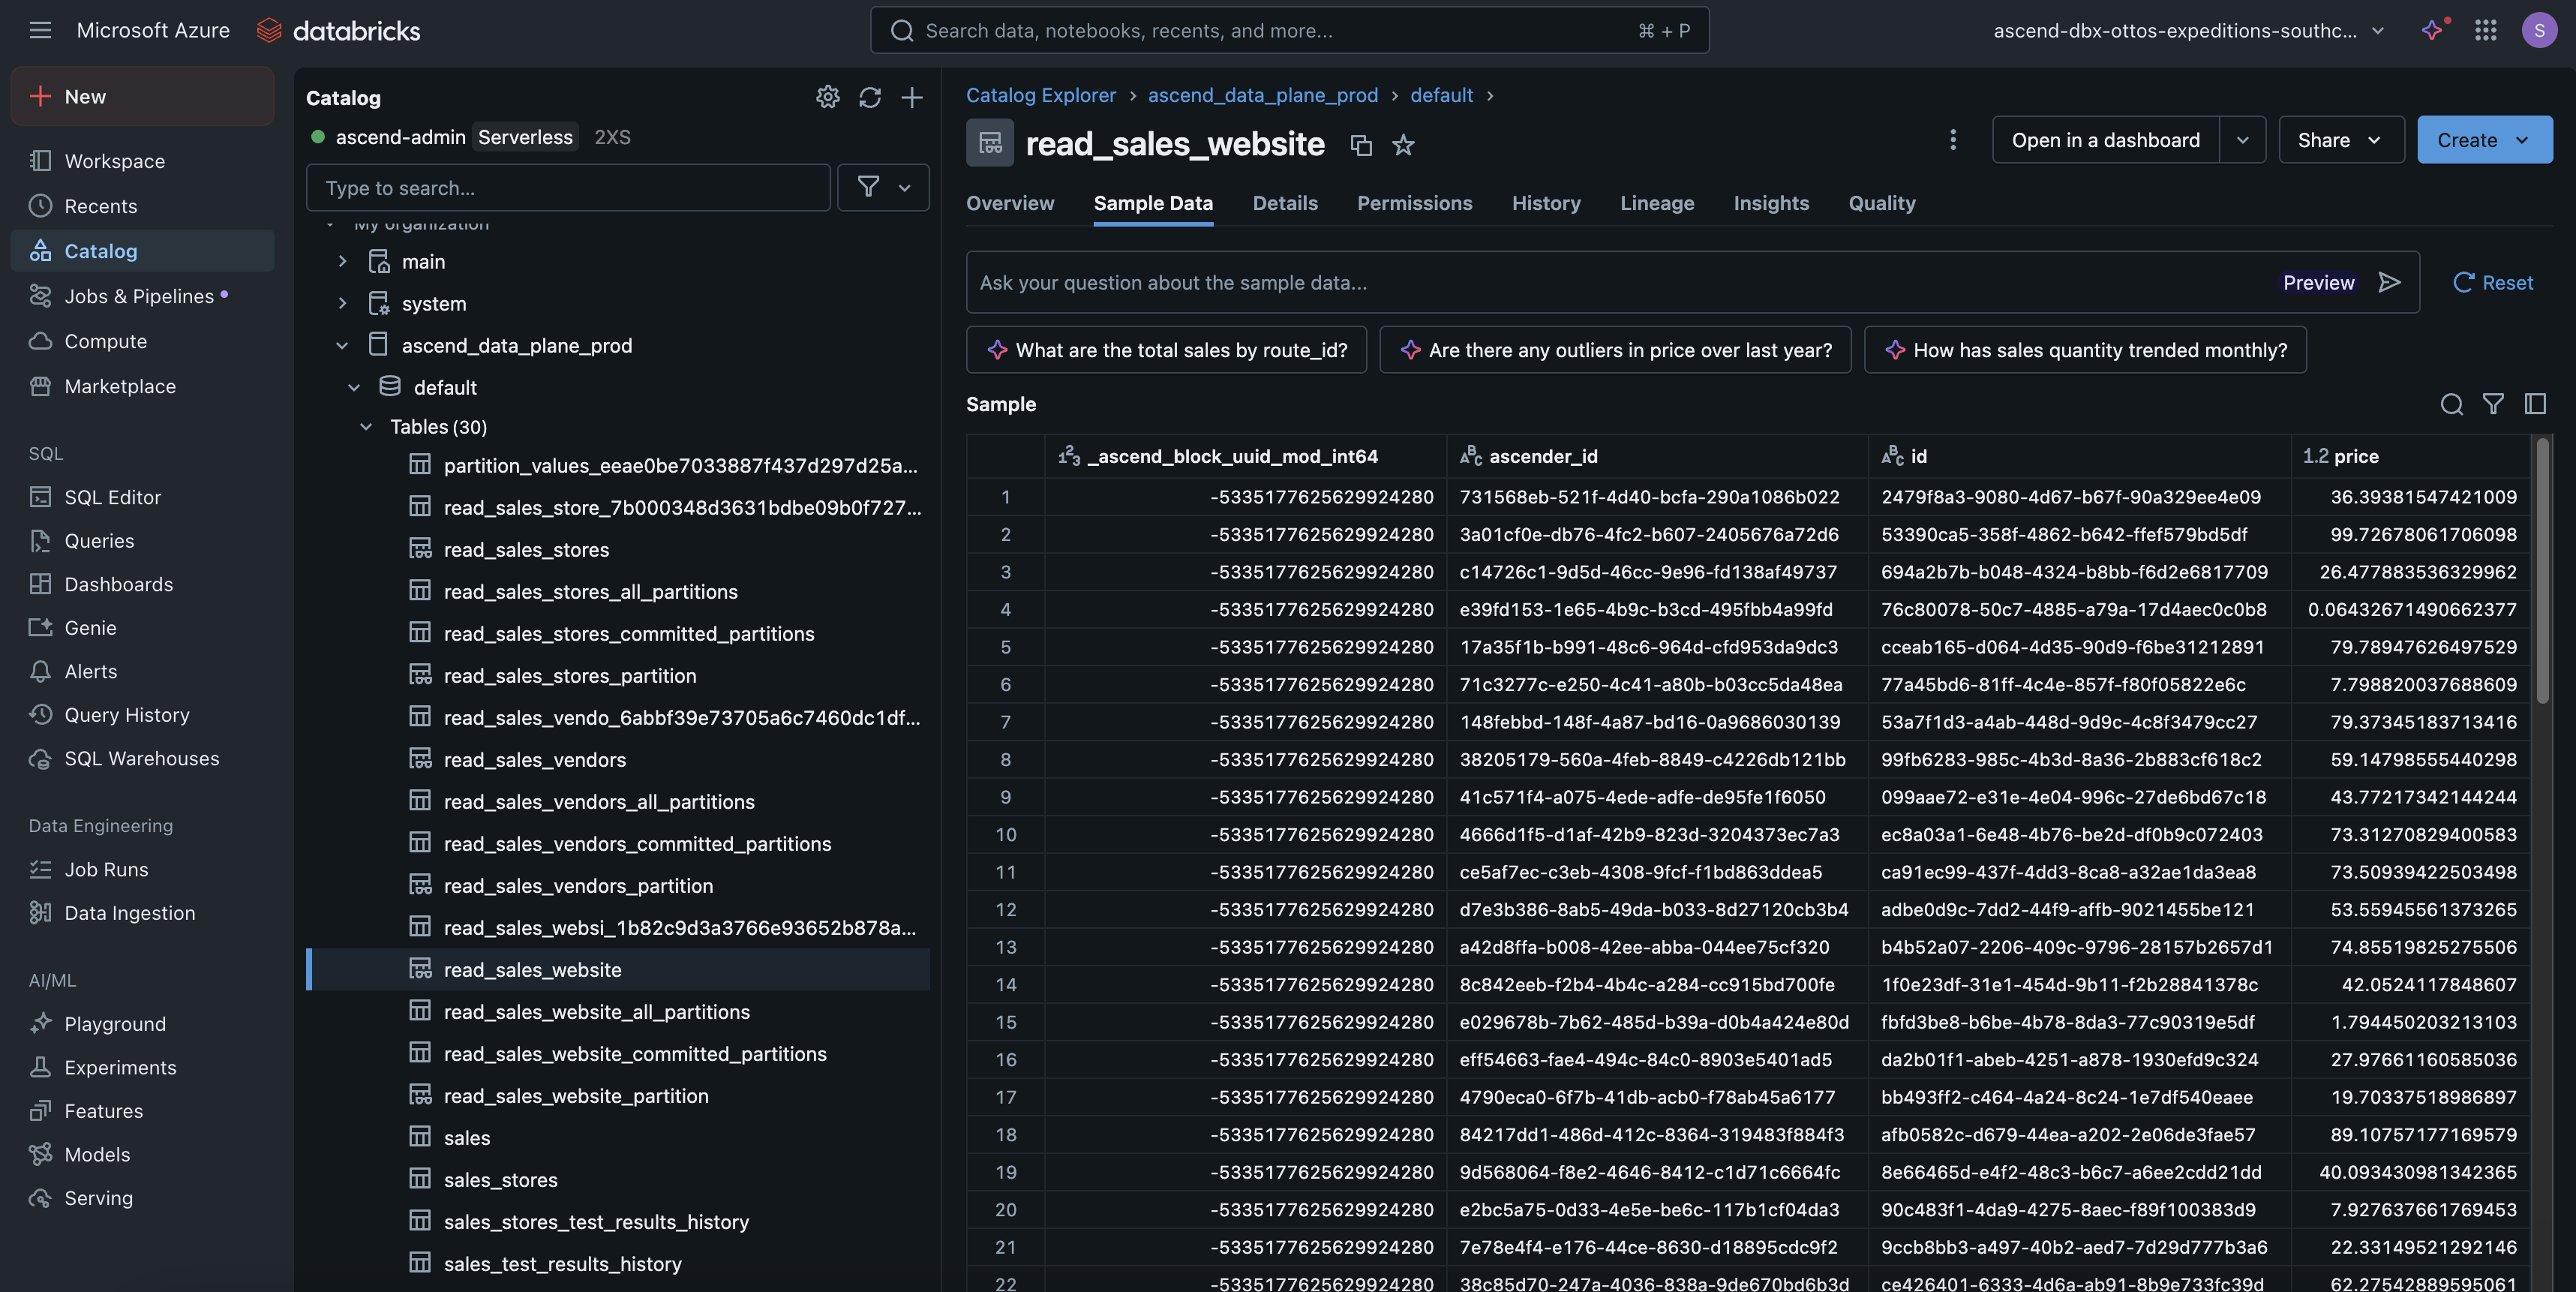
If you're logged in with a personal Databricks account, you may need to grant yourself access to view the data.
Grant personal access
USER_EMAIL="YOUR_USER_EMAIL"

SQL="GRANT SELECT ON CATALOG ascend_data_plane_default TO \`${USER_EMAIL}\`"
databricks api post /api/2.0/sql/statements --json \
    '{"warehouse_id": "'"$WH_ID_DEFAULT"'", "statement": "'"$SQL"'"}'
This demonstrates Data Plane persistence in action! With this setup, you can push your compute and storage down to the Databricks Data Plane for efficient data processing.
🎉 Congratulations! You've successfully configured Databricks as your Data Plane and run your first Flow!
Next steps
👩🏻💻 Follow the developer quickstart to build your own Flow in Ascend