Data engineering best practices in Ascend
Ascend empowers data engineers to implement software development lifecycle (SDLC) best practices to automate their data pipelines. Ascend is highly configurable to meet the scalability needs at any data volumes across any data engineering team size. This guide outlines best practices that work well for most organizations. Customize as needed!
Development and deployment workflow
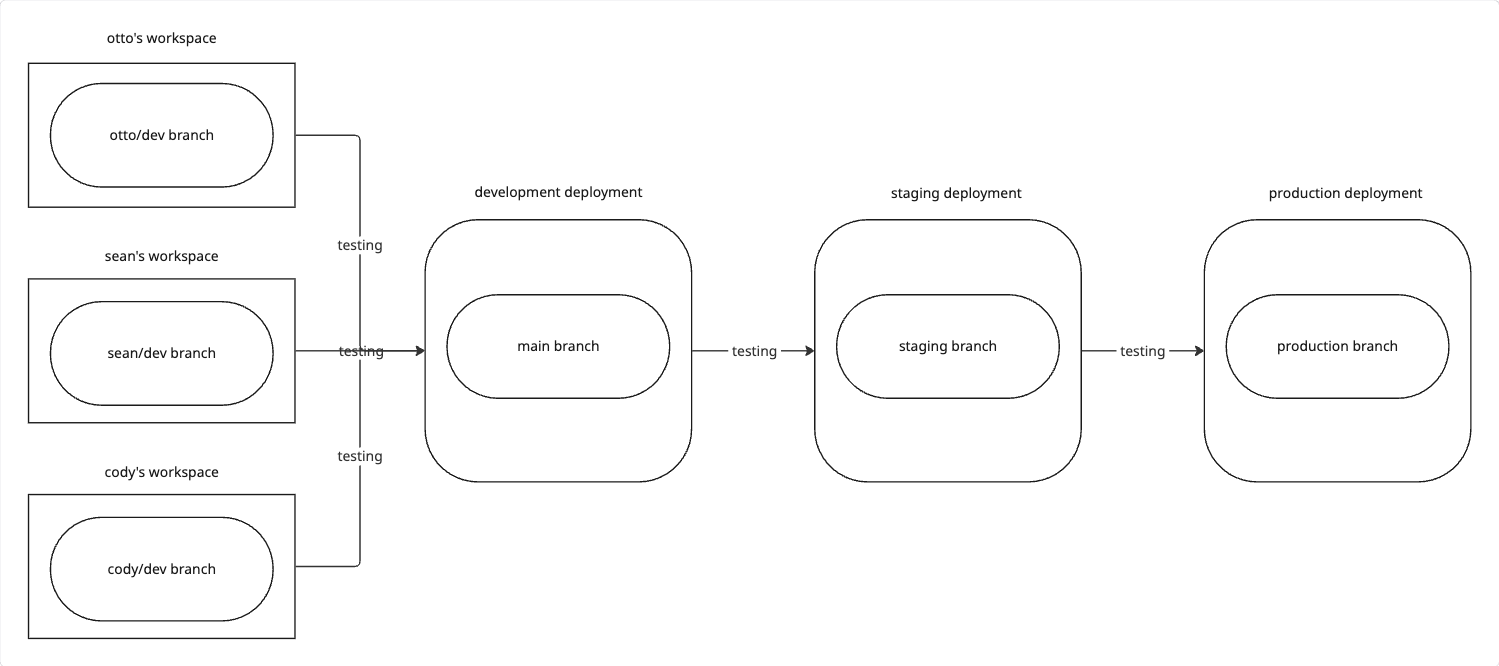
In Ascend, developers build in a Workspace for a given data Project. Once their code is ready, they merge their changes into the default (usually main) Git branch. If you follow our best practices, this automatically updates the Project to its Deployment in the Development Environment for continuous integration testing.
From there, the default branch can be promoted to the Staging and Production Deployments by merging into their respective branches. You can configure Development and Staging to work on smaller sampled datasets for faster iteration and lower costs through Parameters.
In your Ascend Instance, you'll typically have:
- one or more Projects
- defined as a Repository + path to a project directory within the repository
- collections (as directories of files) of Connections, Flows, Automations, Profiles, and more
- three Environments
- Development: for users' Workspaces and the Project's Development Deployment
- Staging: for the Project's Staging Deployment
- Production: for the Project's Production Deployment
- one Deployment per Project per Environment
- typically named
[Project] ([Environment]), e.g.Otto's Expeditions (Production) - one Git branch typically named
[environment], e.g.production- We recommend omitting a
developmentbranch in favor of your default branch (usuallymain), enabling continuous integration testing in your Development Deployment
- We recommend omitting a
- typically named
- one Workspace per developer (using the Development Environment)
- typically named
[Developer name], e.g.Cody,Sean,Shifra - one Workspace can be used to work across different Projects, Profiles, and branches
- many Git branches typically named
[developer_name]/[thing_being_developed] - multiple Workspaces needed if a developer requires access to the Staging or Production Environments
- typically named
- one Profile for each Workspace and Deployment
- typically named
workspace_[developer_name].yamlanddeployment_[environment].yaml - consider keeping a template profile for new developers named
workspace_template.yaml
- typically named
Resource setup
Repository management
We recommend starting with a single repository (monorepo) named ascend-projects. Public project templates are provided for supported Data Planes to get you started following the best practices outlined below. If you don't have a Git provider, we recommend GitHub as it's common and easy to get started with. GitLab, Bitbucket, Azure DevOps, and any other Git provider that offers SSH key pair authentication can be used with Ascend.
Project management
Ascend Projects are specified as a Repository + path to a project directory within the repository. Typically, projects are placed in the root of the repository or a subdirectory.
An example repository structure:
ascend-projects
├── projectA
├── projectB
└── projectC
Environments and security boundaries
The Ascend Instance is the top-level security boundary. Most organizations will only have one Data Plane (such as Snowflake, BigQuery, or Databricks). The Ascend Instance Store requires data and compute. We recommend isolating the Ascend Instance Store's Data Plane. Only your organization's administrators and the Ascend Instance's identity should have access to the Ascend Instance Store.
Isolating data and compute will be specific to your Data Plane(s) and organization's requirements. For BigQuery, we'd recommend separate GCP projects, though fine-grained access control in a single project may be sufficient. In Snowflake, separate warehouses and databases are recommended but separate accounts are typically superfluous.
Typically, organizations will have three Ascend Environments:
- Development: for developers' Ascend Workspaces and continuous integration testing of your default (typically
main) branch - Staging: controlled testing environment that closely resembles production
- Production: the live environment where your data pipelines run
Each Environment should have isolated data and compute resources in the Data Plane, with secure users or roles that have access only to their designated resources. Every Environment, including the Instance itself, comes with a dedicated Ascend Vault for secrets management. While this enables secure separation of secrets between Environments, you can also integrate your own external vaults and control Environment access as needed.
Additional Environments can be created to meet specific organizational needs, such as separating protected health information (PHI) from non-PHI data. In such cases, append the data classification to the Environment name (e.g., Dev_PHI).
Git processes
The default and deployment branches should be protected.
An example branch list:
$ git branch
  cody/add-new-python-component
  cody/fix-cron-schedule
  cody/more-unit-testing
* main
  production
  staging
A developer will merge their changes into the default branch (main in the example above) through the Ascend UI or your Git provider's own process. This will trigger an update in the Development Deployment, reflecting the state of the default branch.
Once you're confident in the changes (or automatically through some process), you then merge the default branch into the staging branch, which also updates the Staging Deployment. Finally, you merge the staging branch into the production branch, which in turn updates the Production Deployment.
Ascend file naming conventions
Files are sorted alphabetically in the Ascend UI. Common types are often prefixed to group them together.
Connection naming best practices
When naming connection files, use descriptive identifiers that reflect the resource's purpose, such as billing_database.yaml or customer_data_lake.yaml. For connections that need different configurations across environments (Development/Staging/Production), it is strongly recommended to keep a single YAML file and parameterize the values within it. You can find examples of this approach across all three Data Planes in Otto's Expeditions.
Data plane connections
Name your Data Plane connection files like data_plane_[type].yaml.
data_plane_bigquery.yaml
data_plane_databricks.yaml
data_plane_snowflake.yaml
Use additional postfix descriptors as needed.
Most cases of using separate files are covered by using Parameters in your Data Plane configuration file. You should only have multiple for a given Data Plane if you are using separate Data Plane instances within a single Environment.
data_plane_databricks_eastus.yaml
data_plane_databricks_westus2.yaml
Data connections
Name your data connection files like [read|write]_[type]_[description].yaml. Use additional postfix descriptors as needed.
read_gcs_raw.yaml
read_abfss_raw.yaml
write_gcs_processed.yaml
Profiles
Name your developer profiles like workspace_[developer_name].yaml and deployment profiles like deployment_[environment].yaml. Consider keeping a template profile for new developers named workspace_template.yaml.
An example list of profiles:
deployment_development.yaml
deployment_production.yaml
deployment_staging.yaml
workspace_cody.yaml
workspace_sean.yaml
workspace_shifra.yaml
workspace_template.yaml
Managing parameters
Parameters are inherited through the hierarchy of Project > Profile > Flow > Flow Run > Component.
We recommend setting Parameters at the highest level possible. For instance, if all Workspaces and Deployments will use the same resource URL, set that URL in the Project's Parameters.
DataOps
DataOps combines best practices from data engineering and software development to streamline the entire lifecycle through production deployment.
Deployment Environments
Establish three primary deployment environments for each project:
- Development: For initial feature development and testing
- Individual workspaces merge changes to the
mainbranch which deploys to the Development Environment - Both individual workspaces and Development environment use small data volumes for rapid iteration
- No PHI/PII data - all sensitive data is anonymized
- Individual workspaces merge changes to the
- Staging: For pre-production validation
- Contains larger data volumes and may include PHI/PII data
- Used to verify functionality in conditions similar to production
- Production: For live operation
- Contains complete datasets including sensitive data
- Serves customer-facing implementations with full security controls
These environments enable comprehensive observability and quality control throughout the development process.
- Follow our [how-to guide](how-to/setup/deployment) to set up a deployment environment
- Learn more about deployments in our concept guide
Naming conventions
- Deployment Environments: Name as "Development", "Staging", and "Production"
- Working branches: Use format
name/context(e.g.,otto/feature-name) - Workspaces: Name after the developer and link to their individual working branch
Promote to a Deployment Environment
-
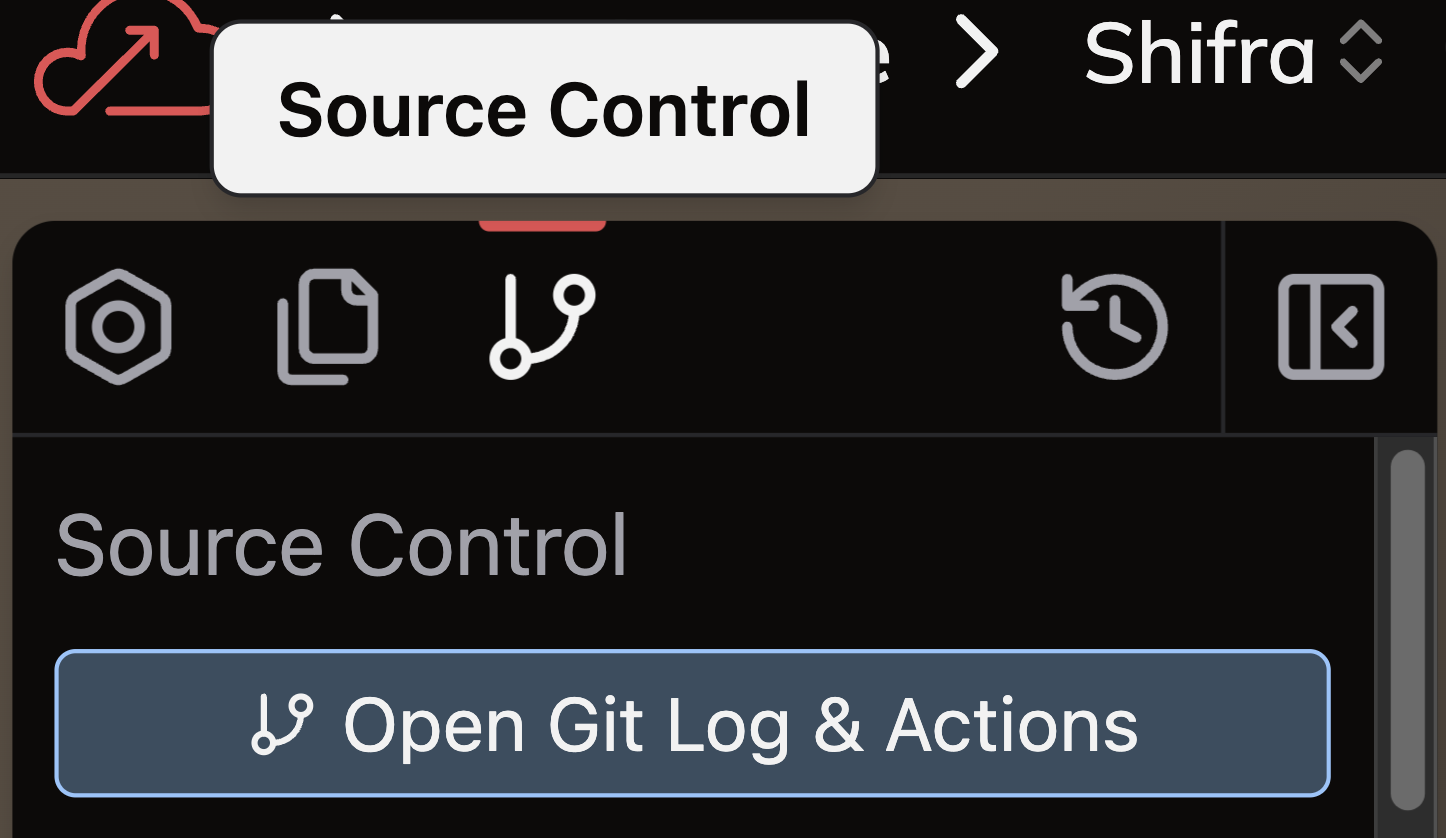
From the Super Graph or Flow Graph view, navigate to the Source control panel
-
Click Open Git Log & Actions to open the Git Log modal
-
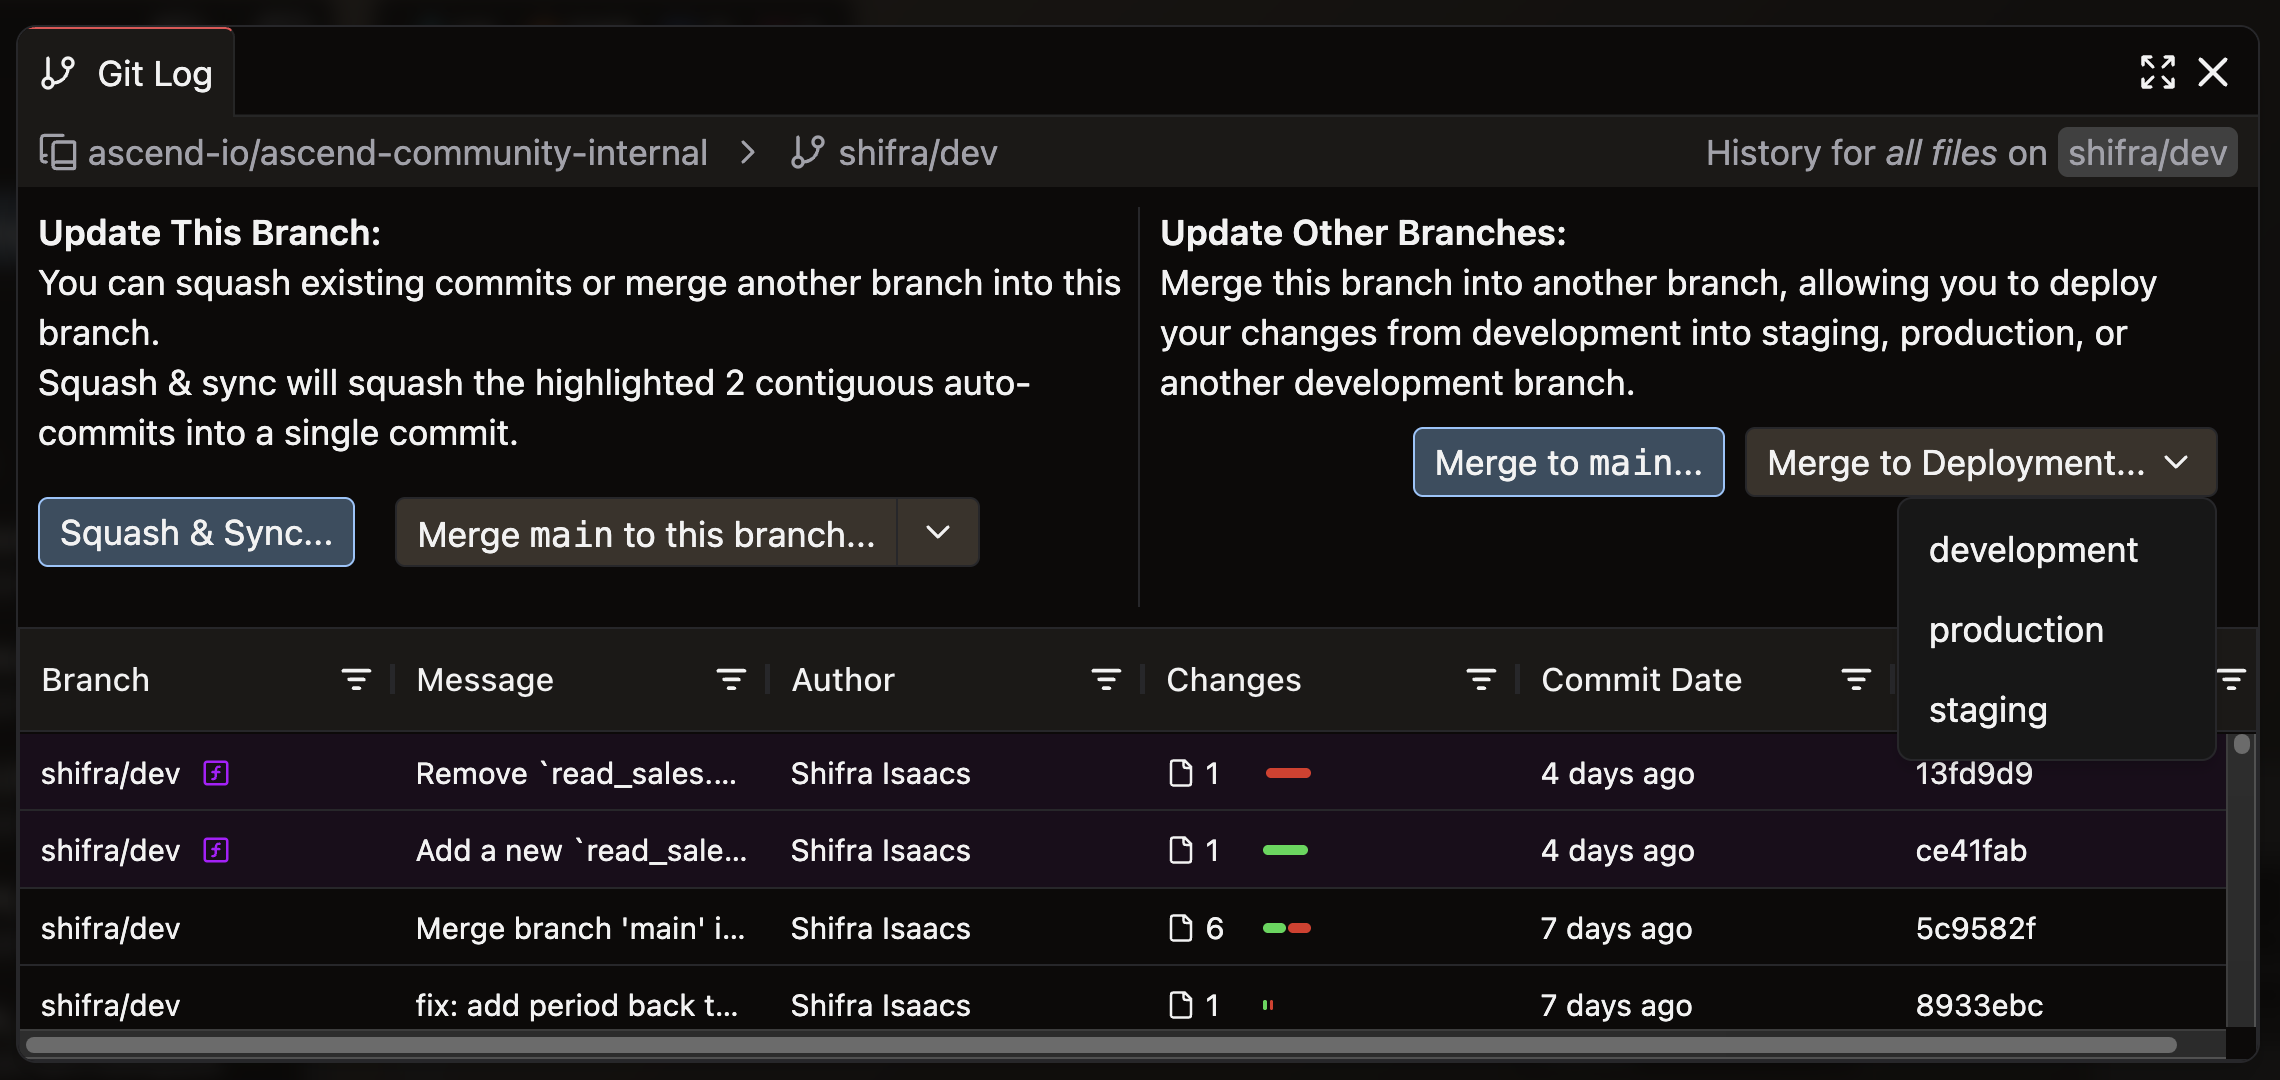
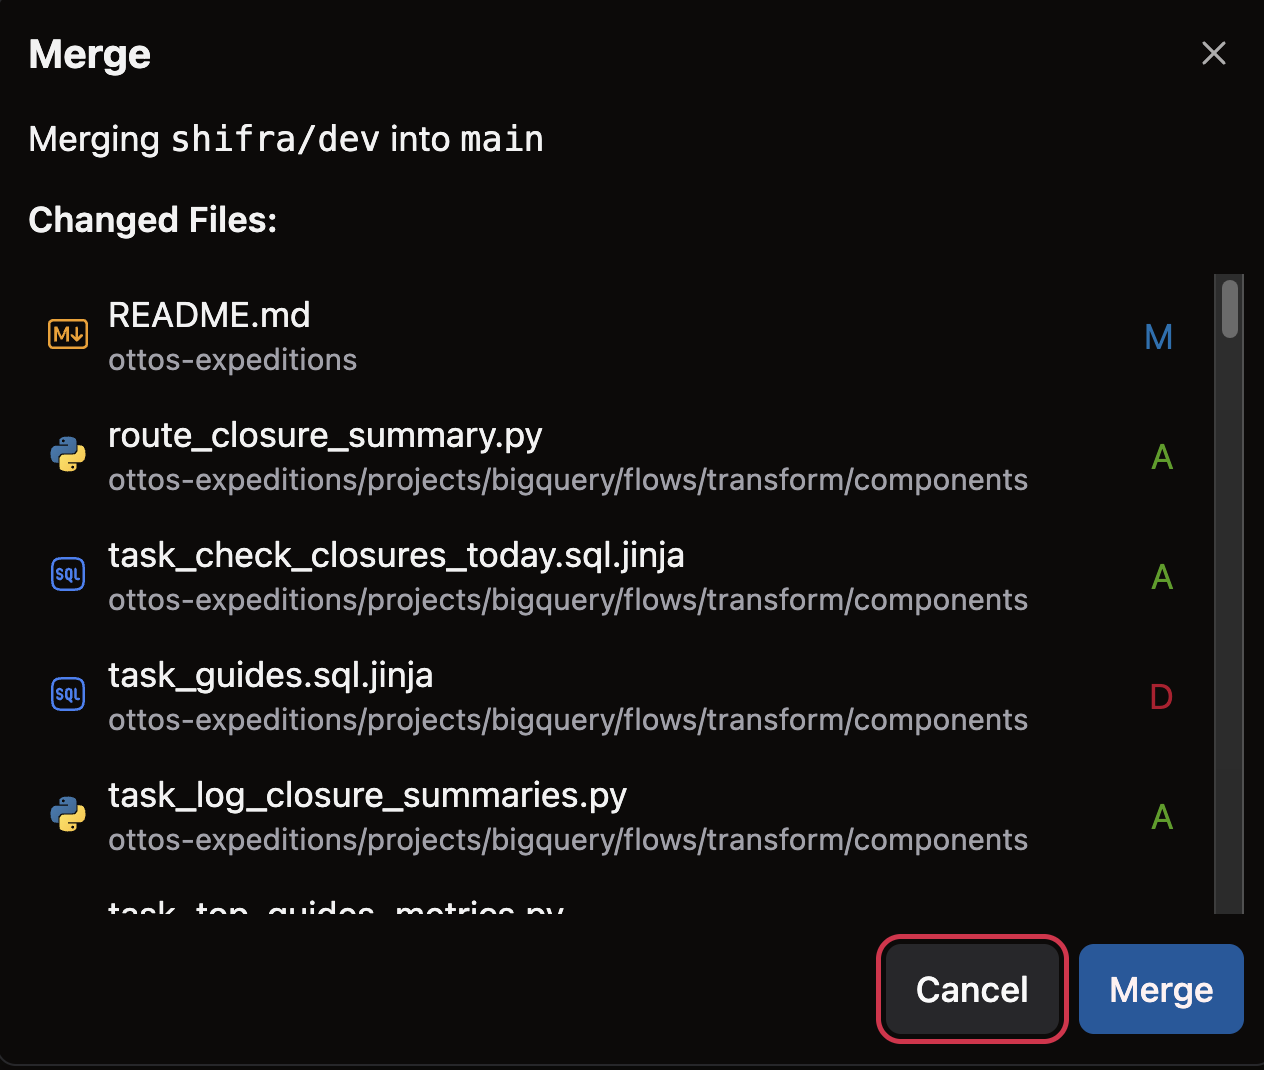
In the upper right of the Git Log modal, select Merge to Deployment and choose your target environment
- Note: Use the recommended Development, Staging, or Production Environments
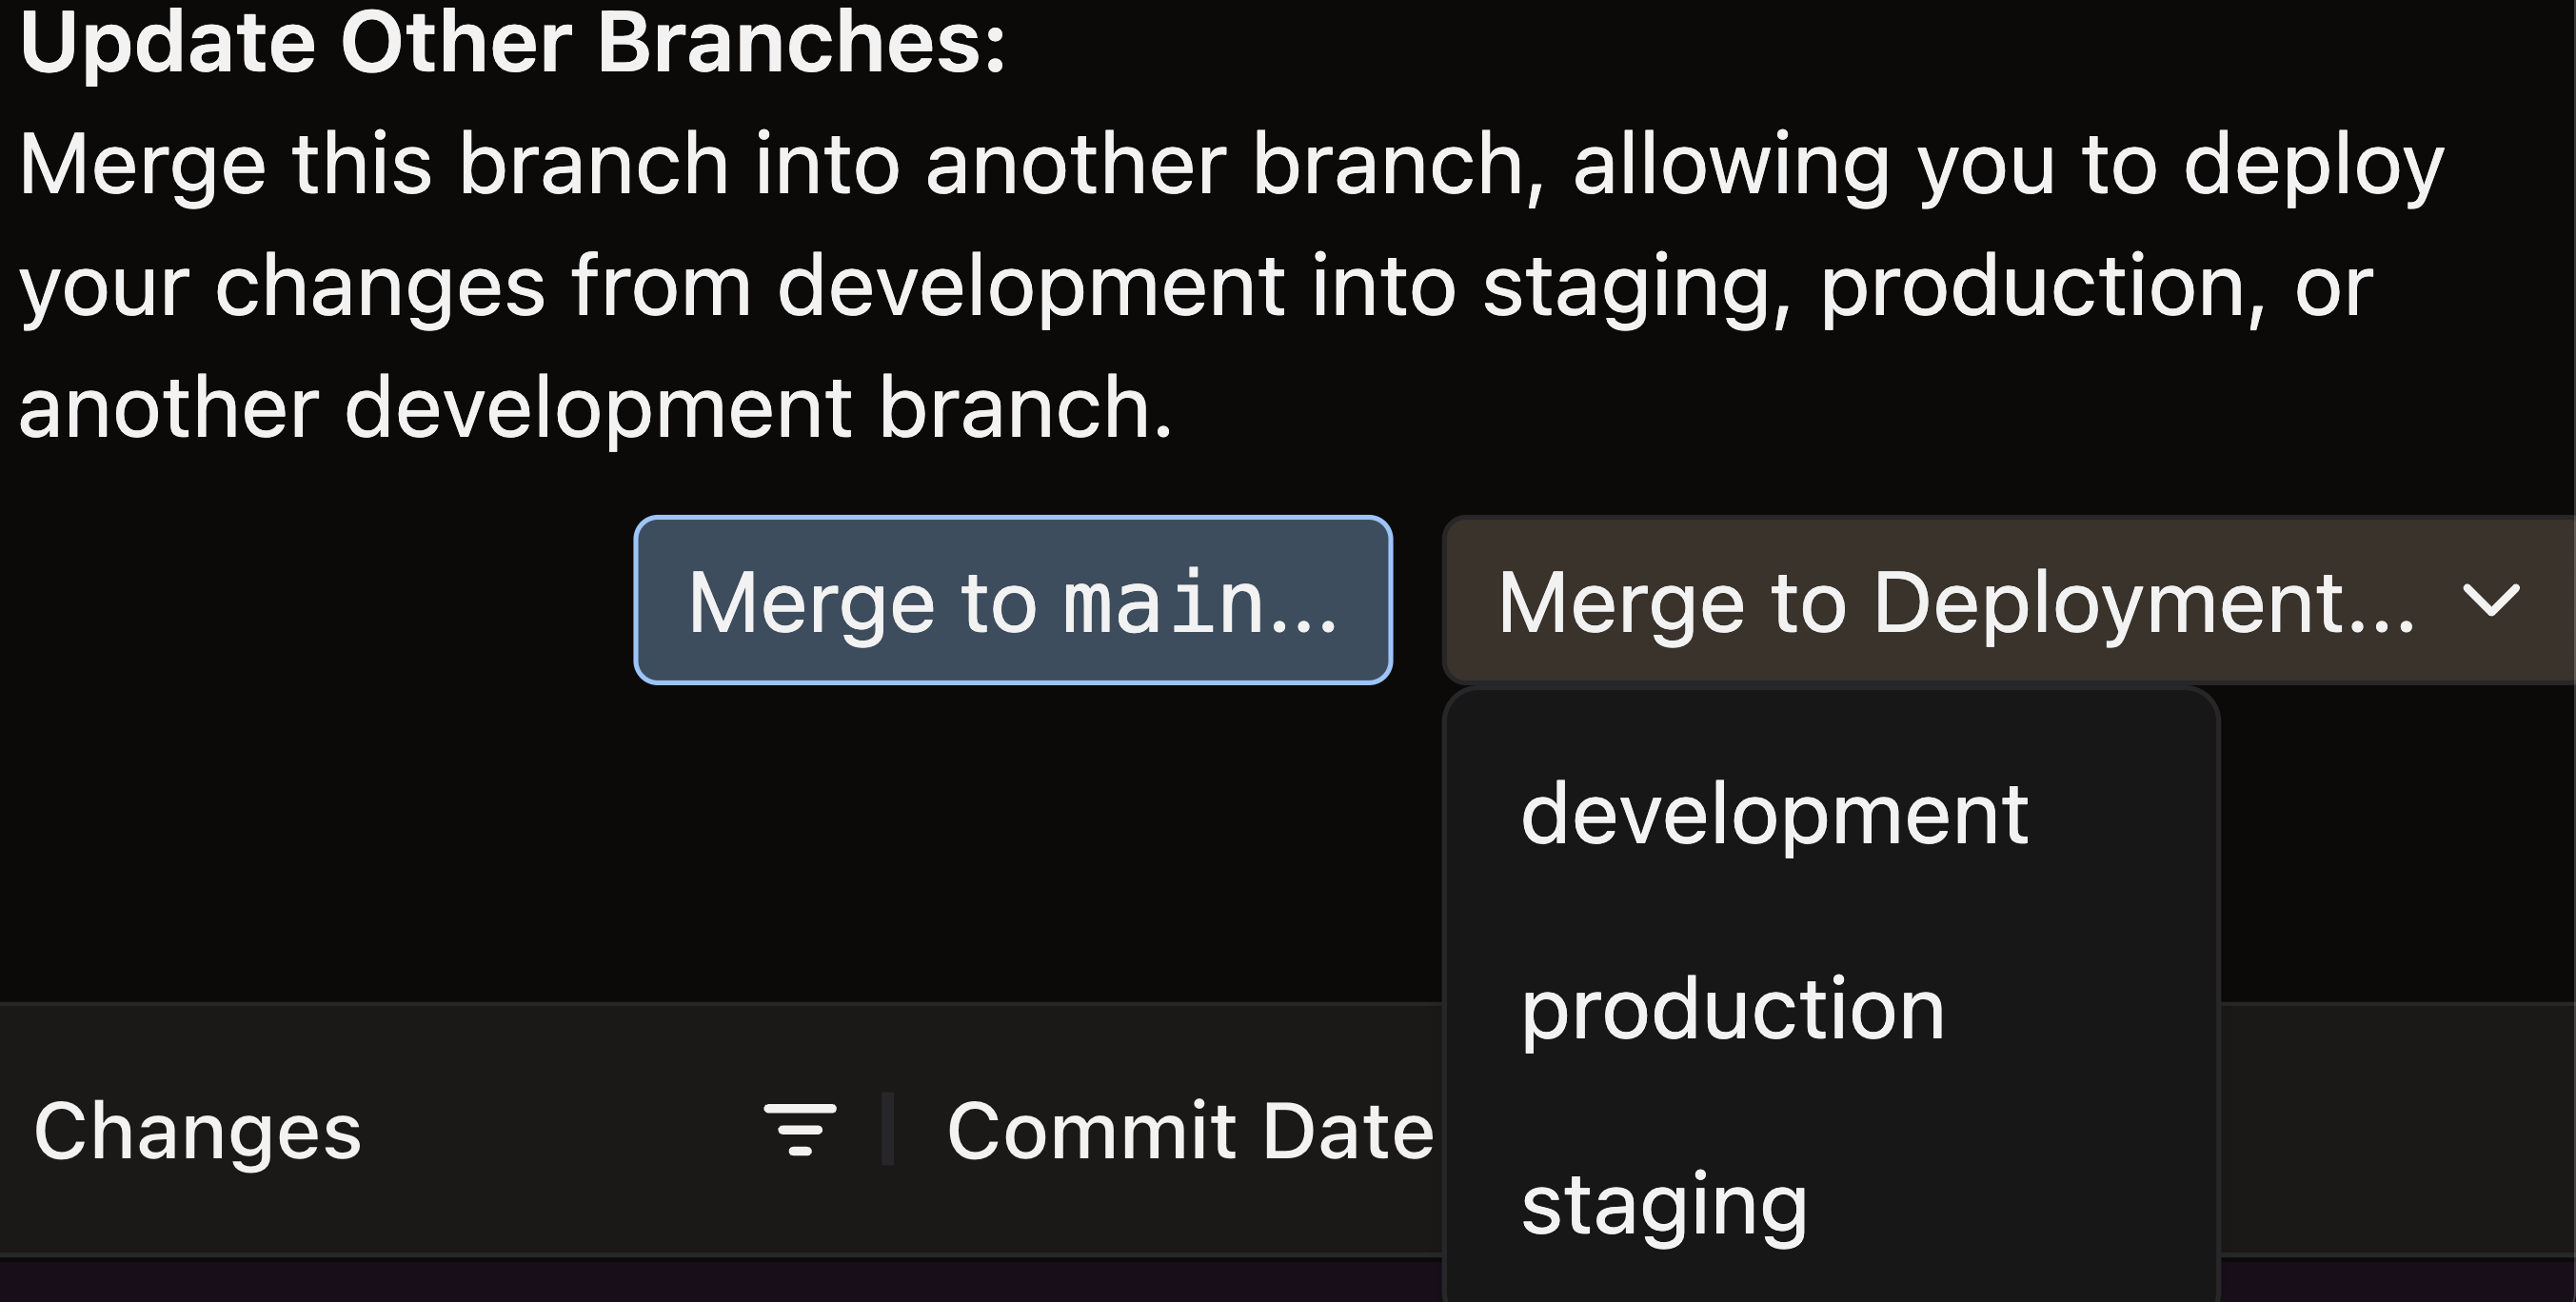
- Click Merge to confirm merging your current branch to the deployment branch
Development lifecycle example
Consider Otto, a data engineer at Otto's Expeditions:
- Otto develops in the
Ottoworkspace, which is connected to hisotto/devbranch - A team member reviews Otto's code before merging to the
mainbranch - Once merged to
main, Otto's code is automatically deployed to the Development environment - After thorough testing, a team member reviews and promotes the code to Staging
- Following final validation, the code undergoes a final review before promotion to Production
This rigorous testing and review process ensures high-quality Production code. If issues arise, Otto can easily compare environments at the component level to isolate and resolve problems.
Next steps
Learn specific best practices for each of the following Data Planes:
- BigQuery
- Databricks
- Snowflake
- Set up a Deployment
- 🎓 Ascend Certification Program - Build your Ascend skills in a structured environment