Bitbucket
Prerequisites
To complete this guide, ensure you have:
- A Bitbucket account
- A terminal with:
Set up variables
Define your Bitbucket workspace and repository:
Find your workspace slug in the Bitbucket URL: https://bitbucket.org/<workspace>/. It's usually your username or organization name.
BITBUCKET_WORKSPACE=""
BITBUCKET_REPOSITORY="ascend-community"
Select your Ascend data plane:
- BigQuery
- Databricks
- Snowflake
DATA_PLANE="bigquery"
DATA_PLANE="databricks"
DATA_PLANE="snowflake"
Otto's Expeditions supports multiple data planes. You can explore the demo using separate Projects for each or a single Project with multiple data planes. This guide focuses on a single data plane setup.
Copy Ascend Community code to your repository
- Create a New Repository (Recommended)
- Use an Existing Repository
Clone the public ascend-io/ascend-community GitHub repository:
git clone https://github.com/ascend-io/ascend-community.git $BITBUCKET_REPOSITORY
Navigate to the repository directory:
cd $BITBUCKET_REPOSITORY
Remove the existing .git directory:
rm -rf .git
Initialize a new Git repository:
git init
Create a commit:
git checkout -b main
git add .
git commit -m "copy code from ascend-io/ascend-community"
Create a new private repository in Bitbucket:
- Go to Bitbucket, click Create, and select Repository.
- Set the repository name to
ascend-community(to match$BITBUCKET_REPOSITORY). - Select No for both
Include a README?andInclude .gitignore, as these will be added later. - Ensure Private repository is selected. Use
mainfor the default branch. - Click Create repository.
Set up variables
Set the Project root:
PROJECT_ROOT="ottos-expeditions/projects/$DATA_PLANE"
Clone your existing repository:
git clone git@bitbucket.org:$BITBUCKET_WORKSPACE/$BITBUCKET_REPOSITORY.git
Navigate to the repository directory:
cd $BITBUCKET_REPOSITORY
Check your current Git branch and status:
git branch
git status
Clone the Ascend community code:
git clone https://github.com/ascend-io/ascend-community.git ascend-community
Copy the files to your repository:
cp -r ascend-community/* .
rm -rf ascend-community
Create a commit:
git add .
git commit -m "copy code from ascend-io/ascend-community"
git push
Set the Project root:
PROJECT_ROOT="ottos-expeditions/projects/$DATA_PLANE"
Enable SSH access to the Bitbucket repository
Ascend requires a private SSH key for Bitbucket repository access. Add the corresponding public SSH key as an access key in Bitbucket.
Set up variables
Choose a name for the SSH key:
SSH_KEY_NAME="ascend_ottos_expeditions"
Create a new SSH key on your local machine
Generate a new SSH key:
ssh-keygen -t ed25519 -N "" -f ~/.ssh/$SSH_KEY_NAME
Add the SSH public key as an access key to the repository
This section uses the pbcopy command, which is specific to macOS. If you're using a different OS, please use the appropriate command for your system to copy text to the clipboard.
- In Bitbucket, click the settings icon toward the top right > Personal Bitbucket settings.
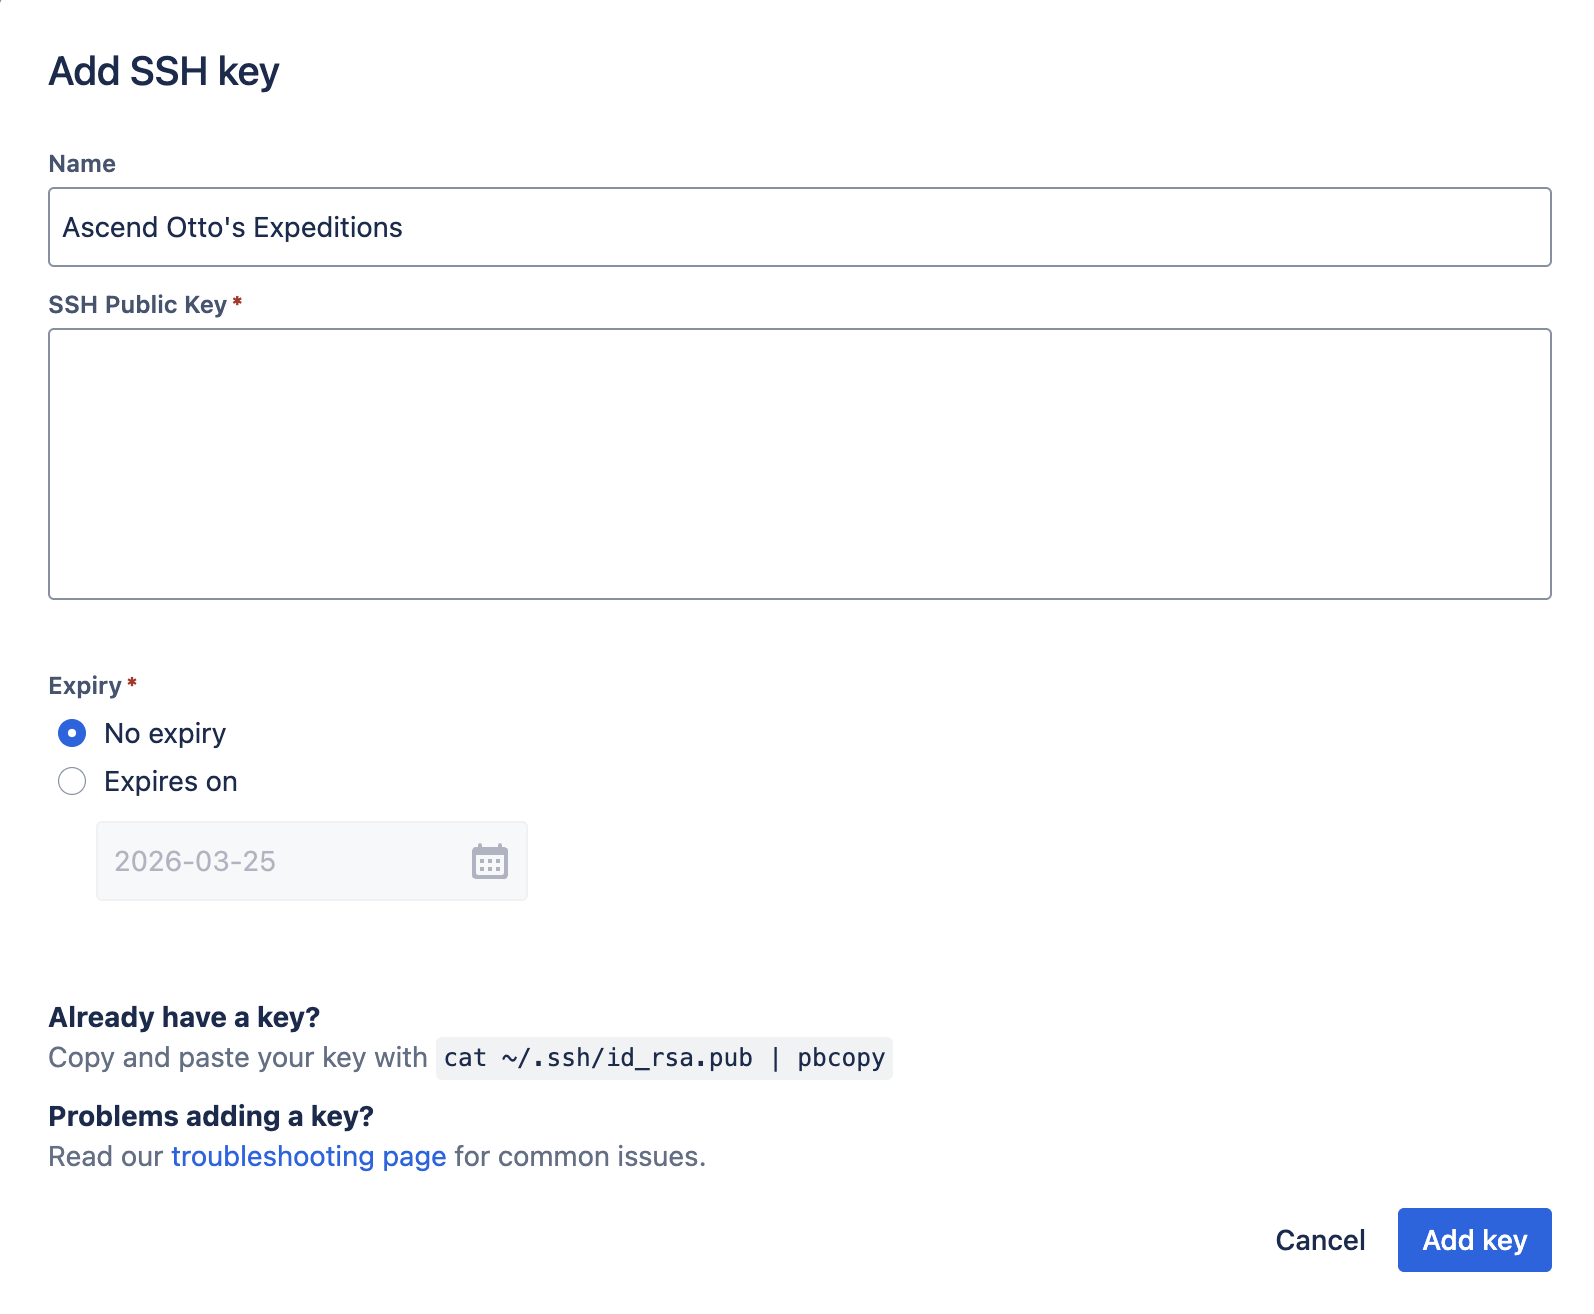
- Navigate to SSH keys and click Add key.
- Copy your public key and paste it into the
SSH public keyfield:
cat ~/.ssh/$SSH_KEY_NAME.pub | pbcopy
- Name: "Ascend Otto's Expeditions"
- Optionally, add an expiration date for security.
 Click Add key.

Add the SSH key in your overall Bitbucket settings, not at the individual repository level.
Add the remote and push the code
Run these commands:
git remote add origin git@bitbucket.org:$BITBUCKET_WORKSPACE/$BITBUCKET_REPOSITORY.git
git push -u origin main
If you encounter this SSH authentication error:
git@bitbucket.org: Permission denied (publickey).
fatal: Could not read from remote repository.
Update your SSH configuration file by following the Bitbucket host setup instructions in the Config section of this article.
If prompted for authentication, enter your Bitbucket username (found in Personal Bitbucket settings) and password. If you don't have a password, create a Bitbucket app password to use instead.
Create the Ascend Repository
In the Ascend UI, navigate to Settings > Repositories and click Add Repository.
This section uses | pbcopy to copy output to the clipboard on macOS. Adjust the command for other operating systems.
Copy the repository URI
Copy the repository URI:
echo "git@bitbucket.org:$BITBUCKET_WORKSPACE/$BITBUCKET_REPOSITORY.git" | pbcopy
Paste it into the Repository URI field in the Ascend UI.
Copy the SSH private key to clipboard
Copy the SSH private key:
cat ~/.ssh/$SSH_KEY_NAME | pbcopy
Paste it into the SSH Private Key field in the Ascend UI.
If you're manually copying the SSH private key, ensure you copy the entire key of the form:
-----BEGIN OPENSSH PRIVATE KEY-----
XXXXXXXXXXXXXXXXXXXXXXXXXXXXXXXXXXXXXXXXXXXXXXXXXXXXXXXXXXXXXXXXXXXXXX
XXXXXXXXXXXXXXXXXXXXXXXXXXXXXXXXXXXXXXXXXXXXXXXXXXXXXXXXXXXXXXXXXXXXXX
XXXXXXXXXXXXXXXXXXXXXXXXXXXXXXXXXXXXXXXXXXXXXXXXXXXXXXXXXXXXXXXXXXXXXX
XXXXXXXXXXXXXXXXXXXXXXXXXXXXXXXXXXXXXXXXXXXXXXXXXXXXXXXXXXXXXXXXXXXXXX
XXXXXXXXXXXXXXXXXXXXXXXXXXXXXXXXXXXXXXXXXXXXXXXXXXXXXXXX
-----END OPENSSH PRIVATE KEY-----
Including the -----BEGIN OPENSSH PRIVATE KEY----- and -----END OPENSSH PRIVATE KEY----- lines.
Click Check and Create.
Create the Ascend Project
In the Ascend UI, navigate to Settings > Projects and click Add Project.
Set the Title to "Otto's Expeditions" or your preferred name. For the Repository field, select the repository you added.
Copy the Project Root to your clipboard:
echo "$PROJECT_ROOT" | pbcopy
Paste it into the Project Root field in the Ascend UI. Click Save.
Click Save.
Next steps
🎉 Congratulations, you're ready to create an Ascend Workspace and start using Otto's Expeditions!