Set up a PostgreSQL database on Azure
This guide explains how to configure a PostgreSQL database on Azure for use with an Ascend Instance. See this Azure guide for additional details.
Prerequisites
- Azure account with permission to create Azure resources
Create a PostgreSQL instance on Azure
-
Navigate to the Azure portal
-
Search for and select Azure Database for PostgreSQL flexible servers
-
Click Create to create a new instance
-
Configure basic settings:
- Select your Subscription
- Choose a Resource Group
- Enter a Server Name (must be globally unique)
- Select your Region
-
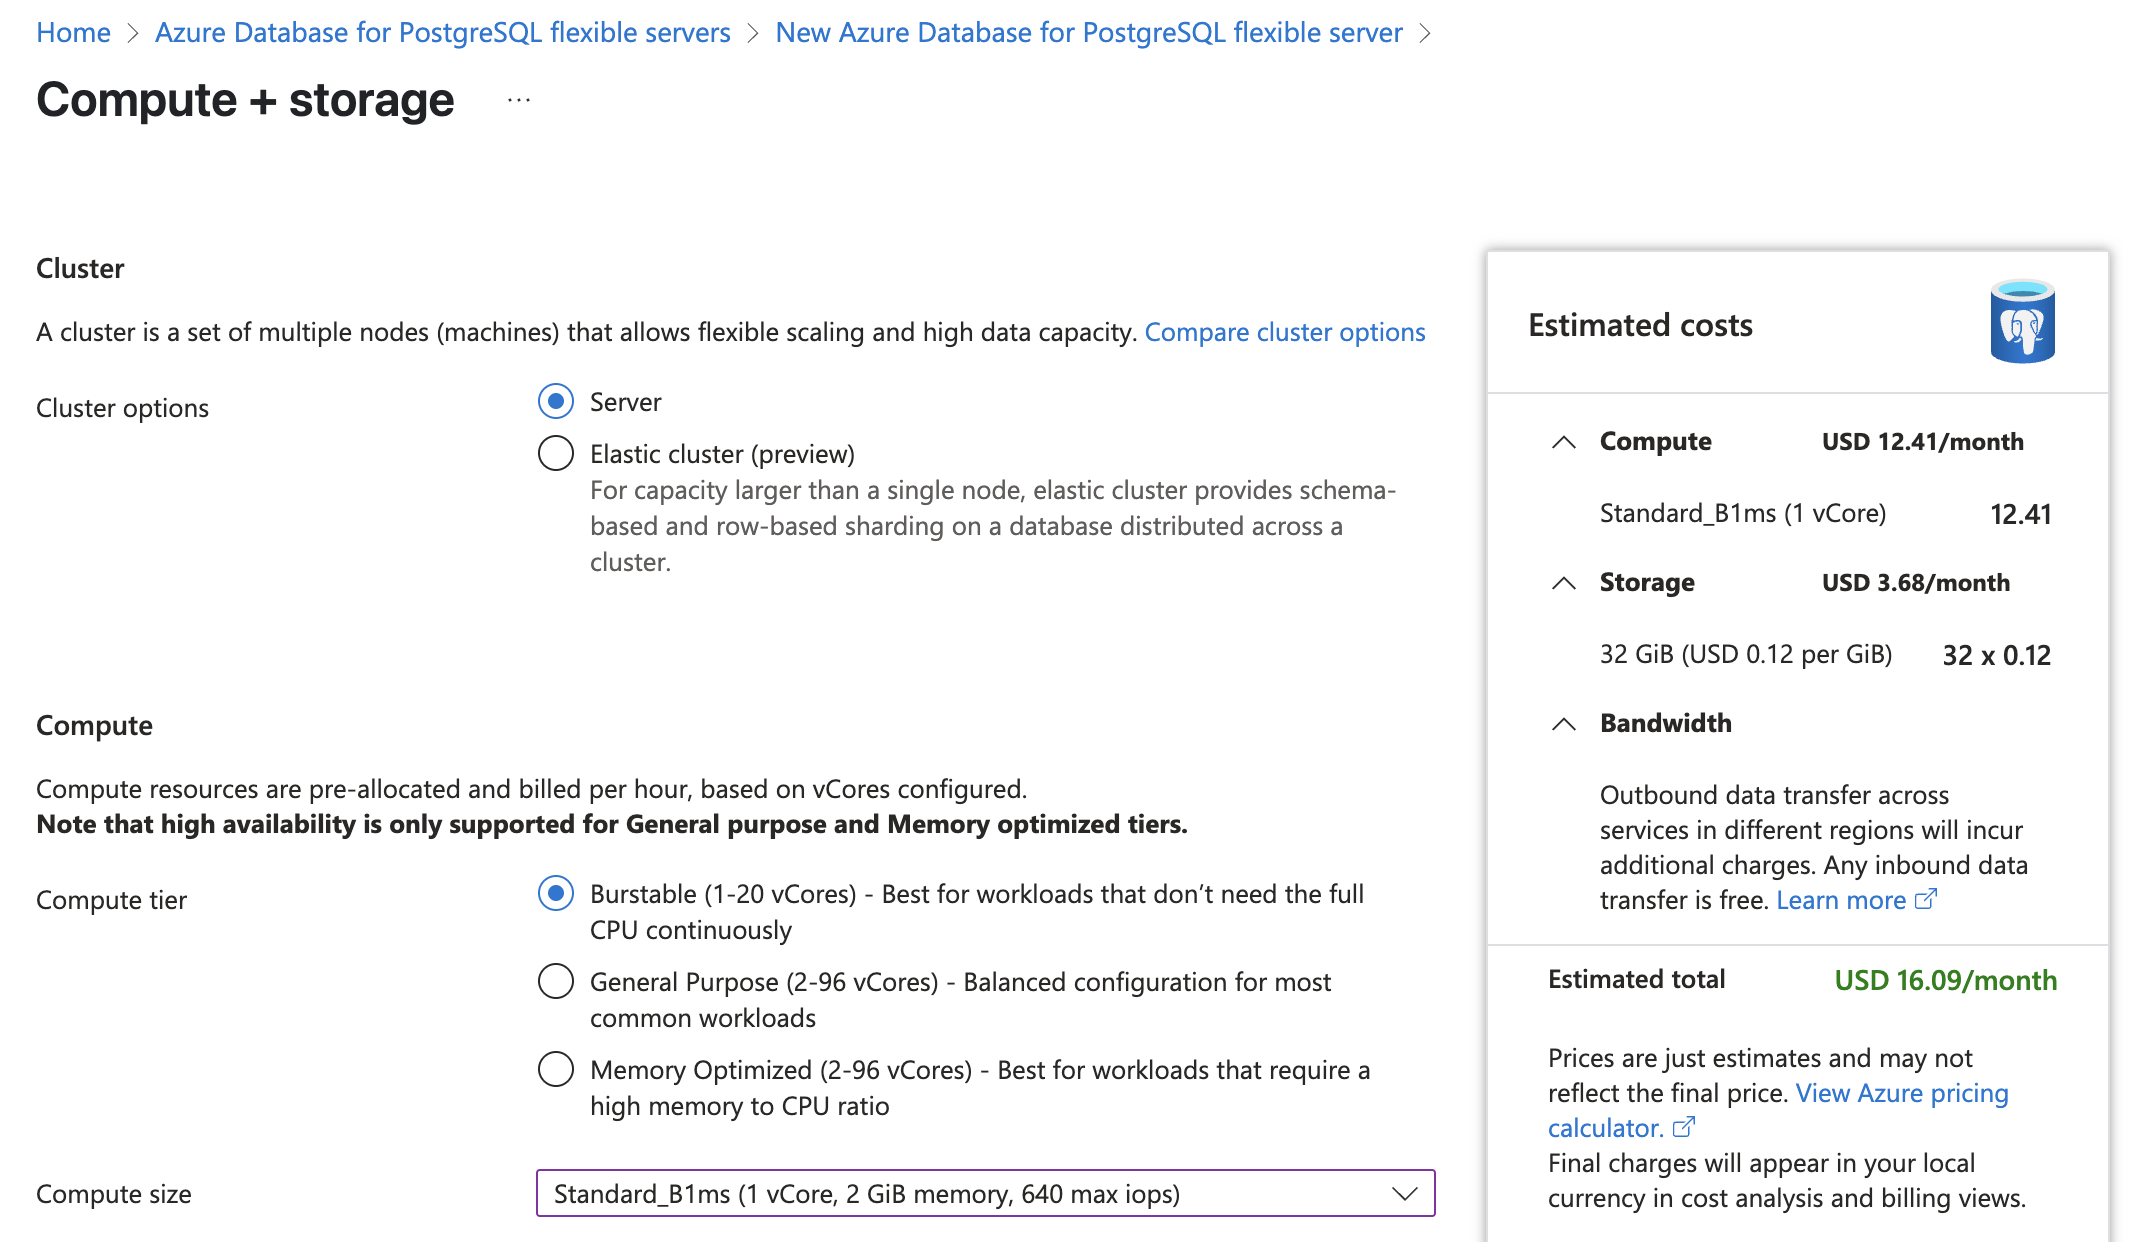
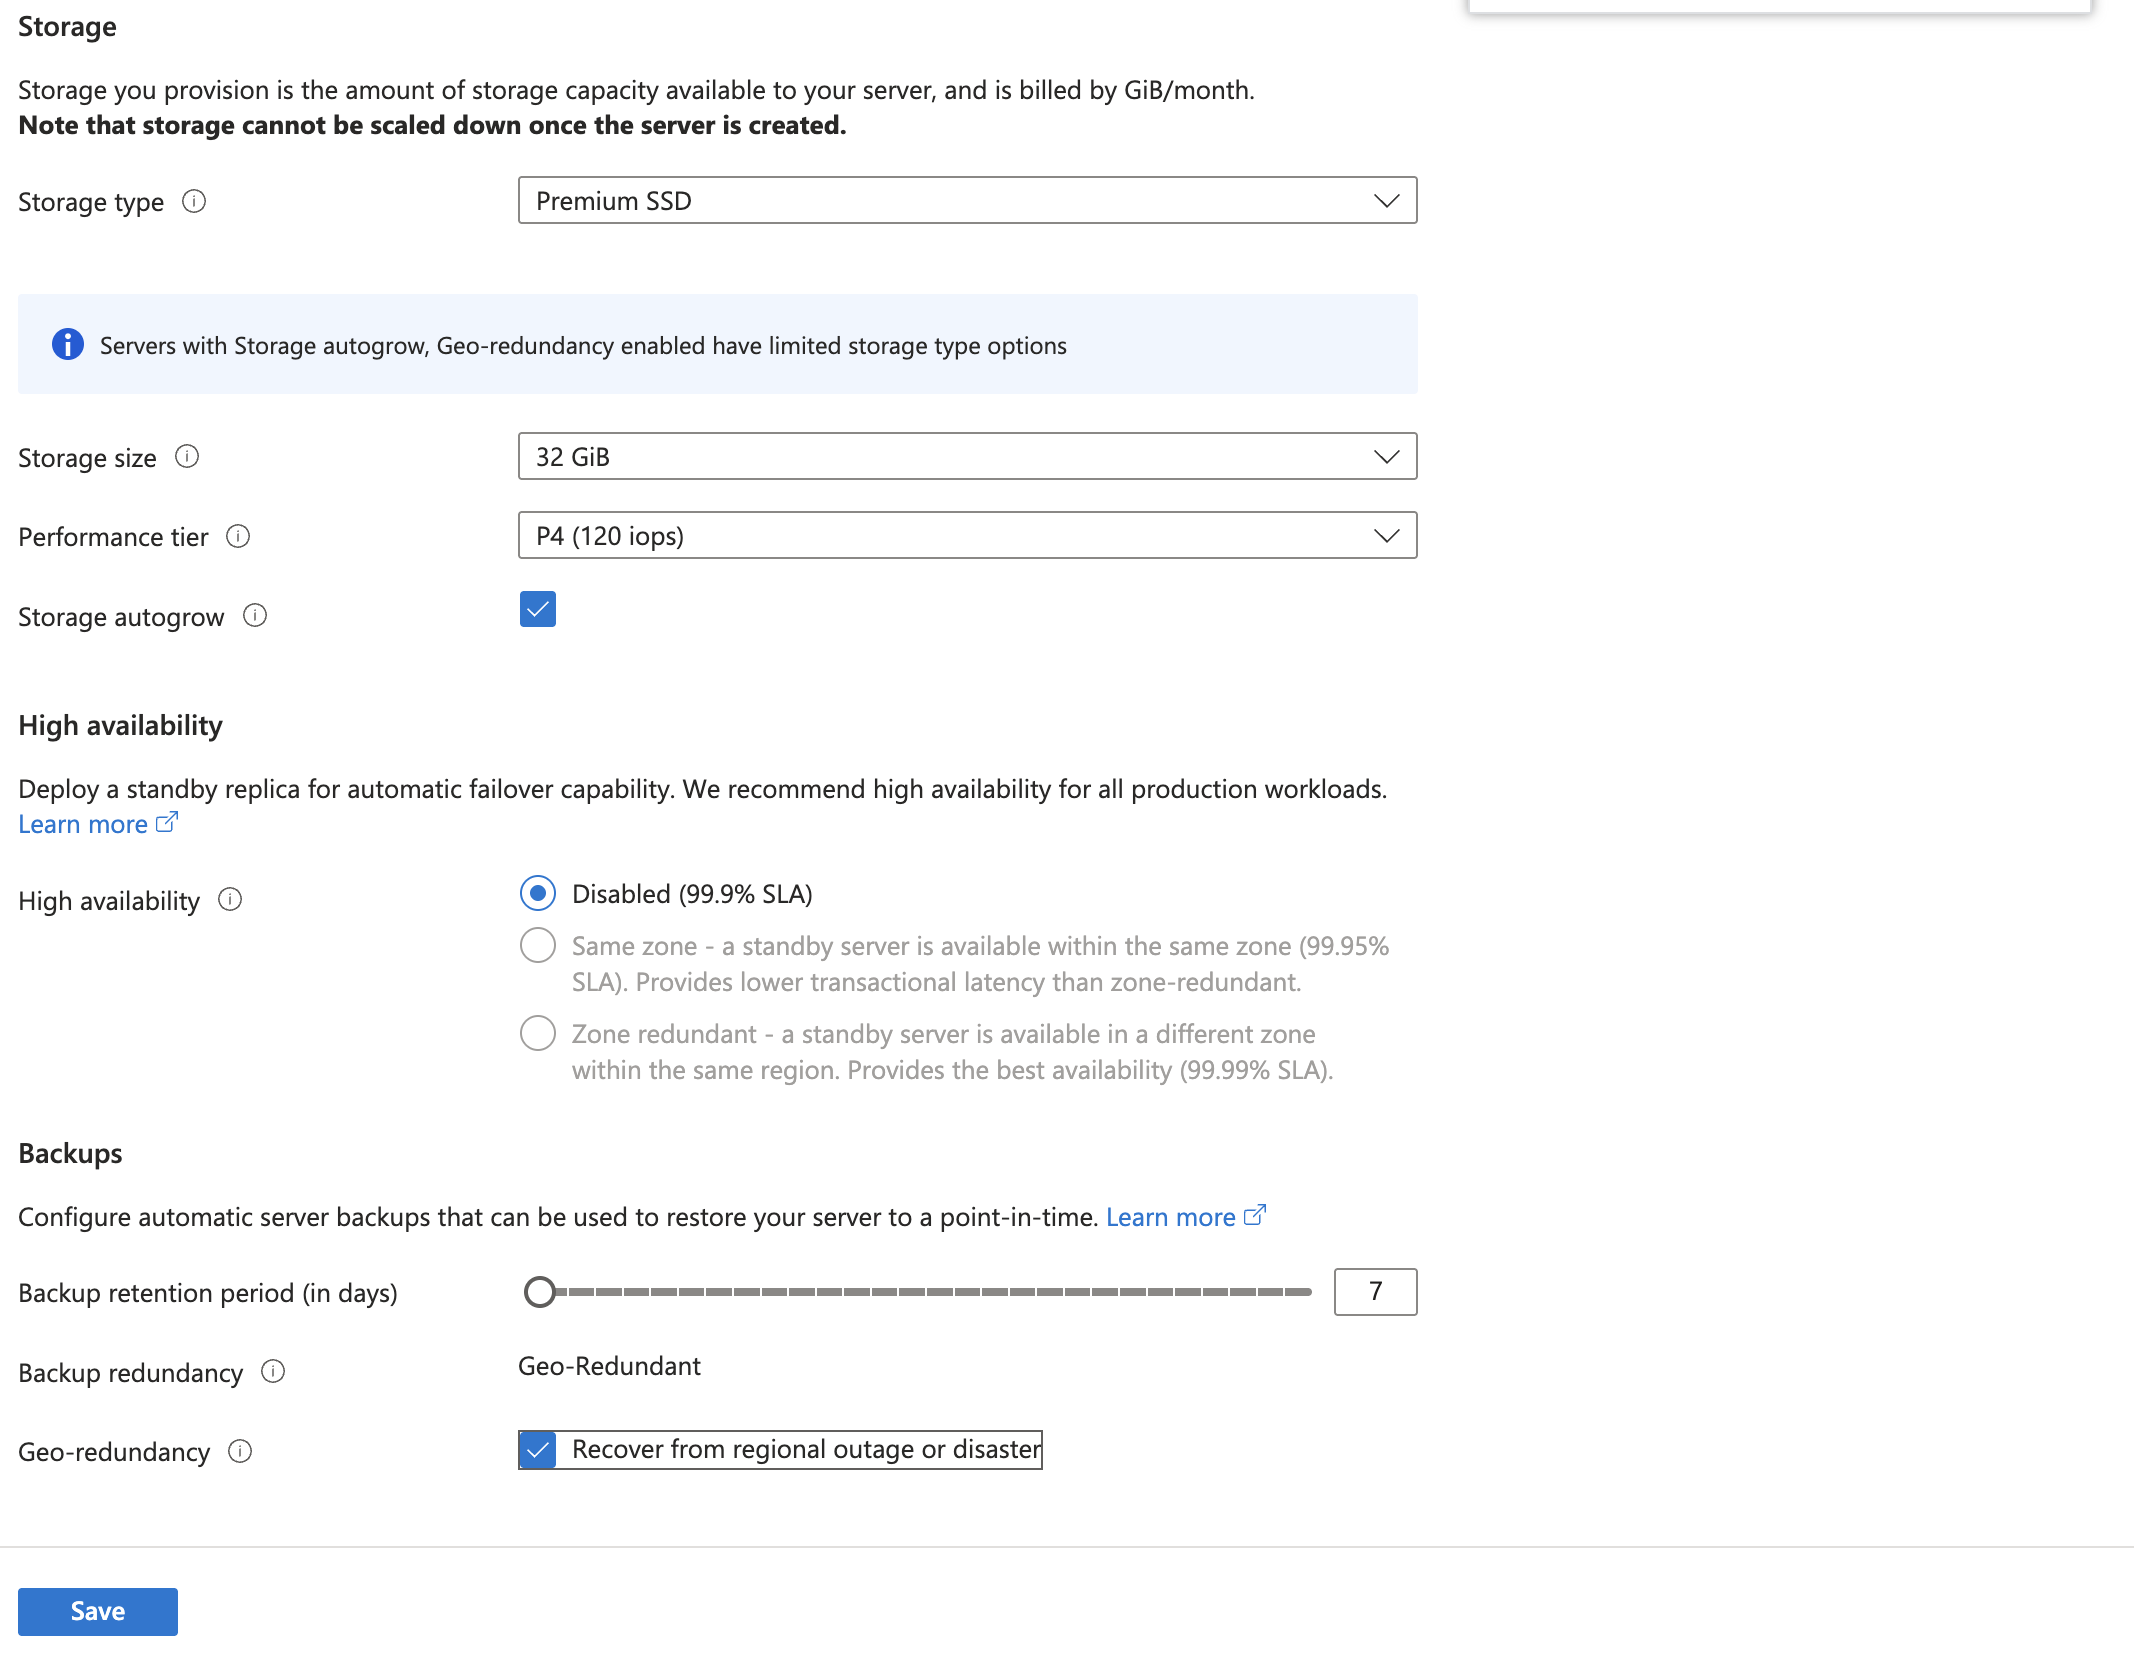
Click Configure Server to adjust compute size
This server receives minimal queries, so start with the smallest compute size, 32 GiB.
With self-hosted instances, you are responsible for the underlying infrastructure. Ensure you understand how to recover your database in case of data loss.
-
After saving, return to the creation screen
-
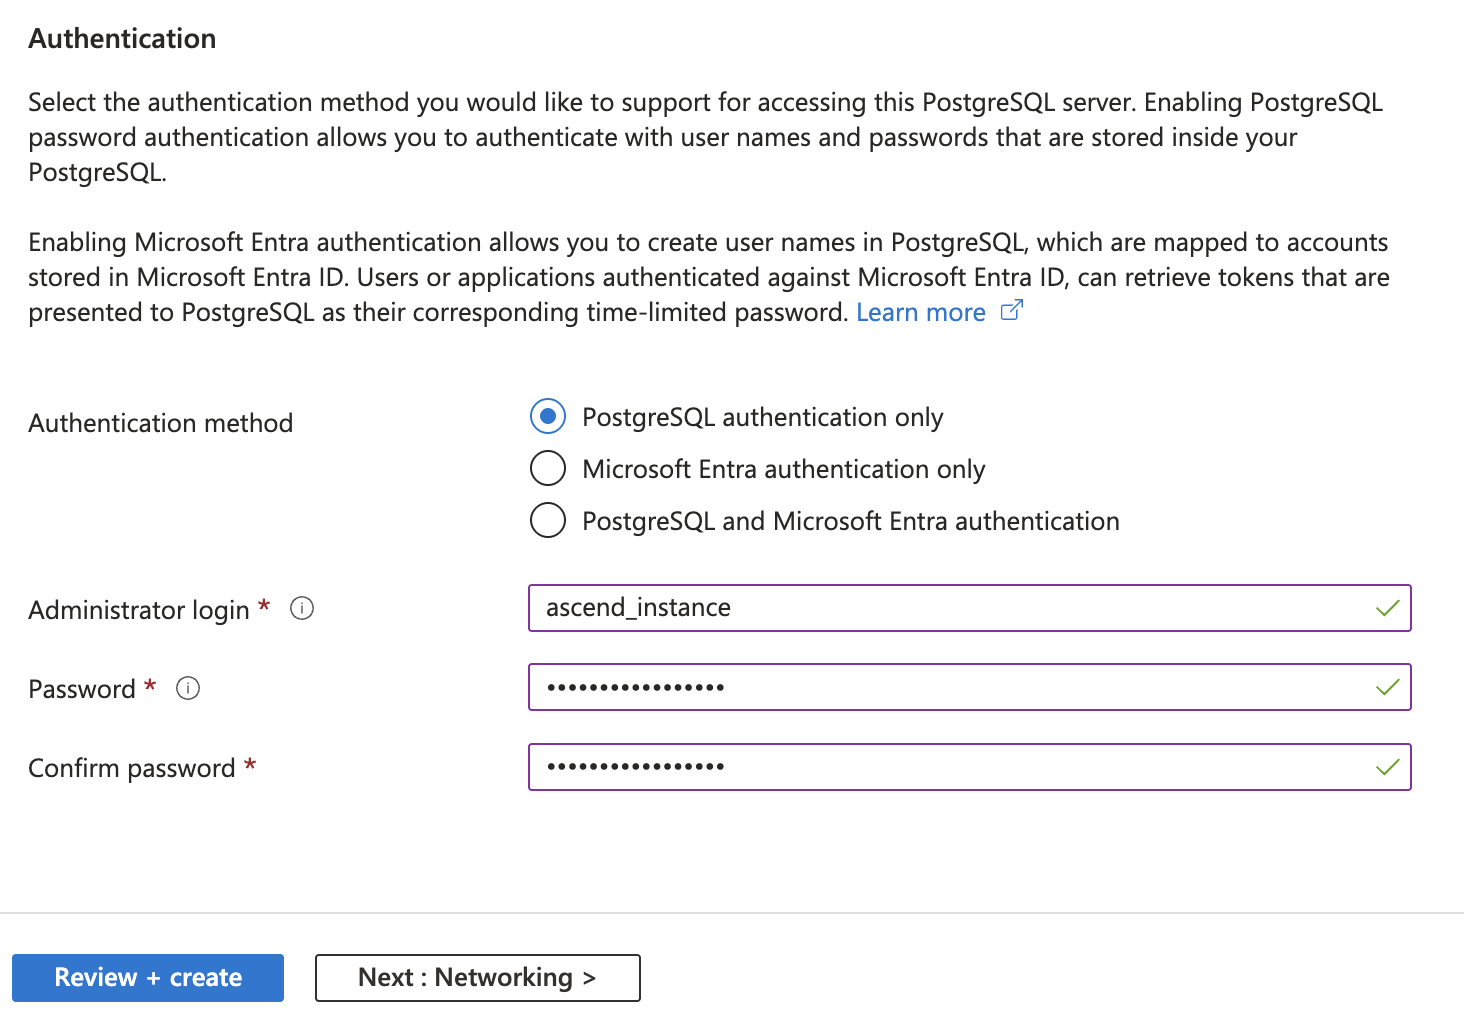
Update authentication settings:
- Set an admin login and password
- Record your password for later use in your Instance vault
-
Click Next to configure networking
-
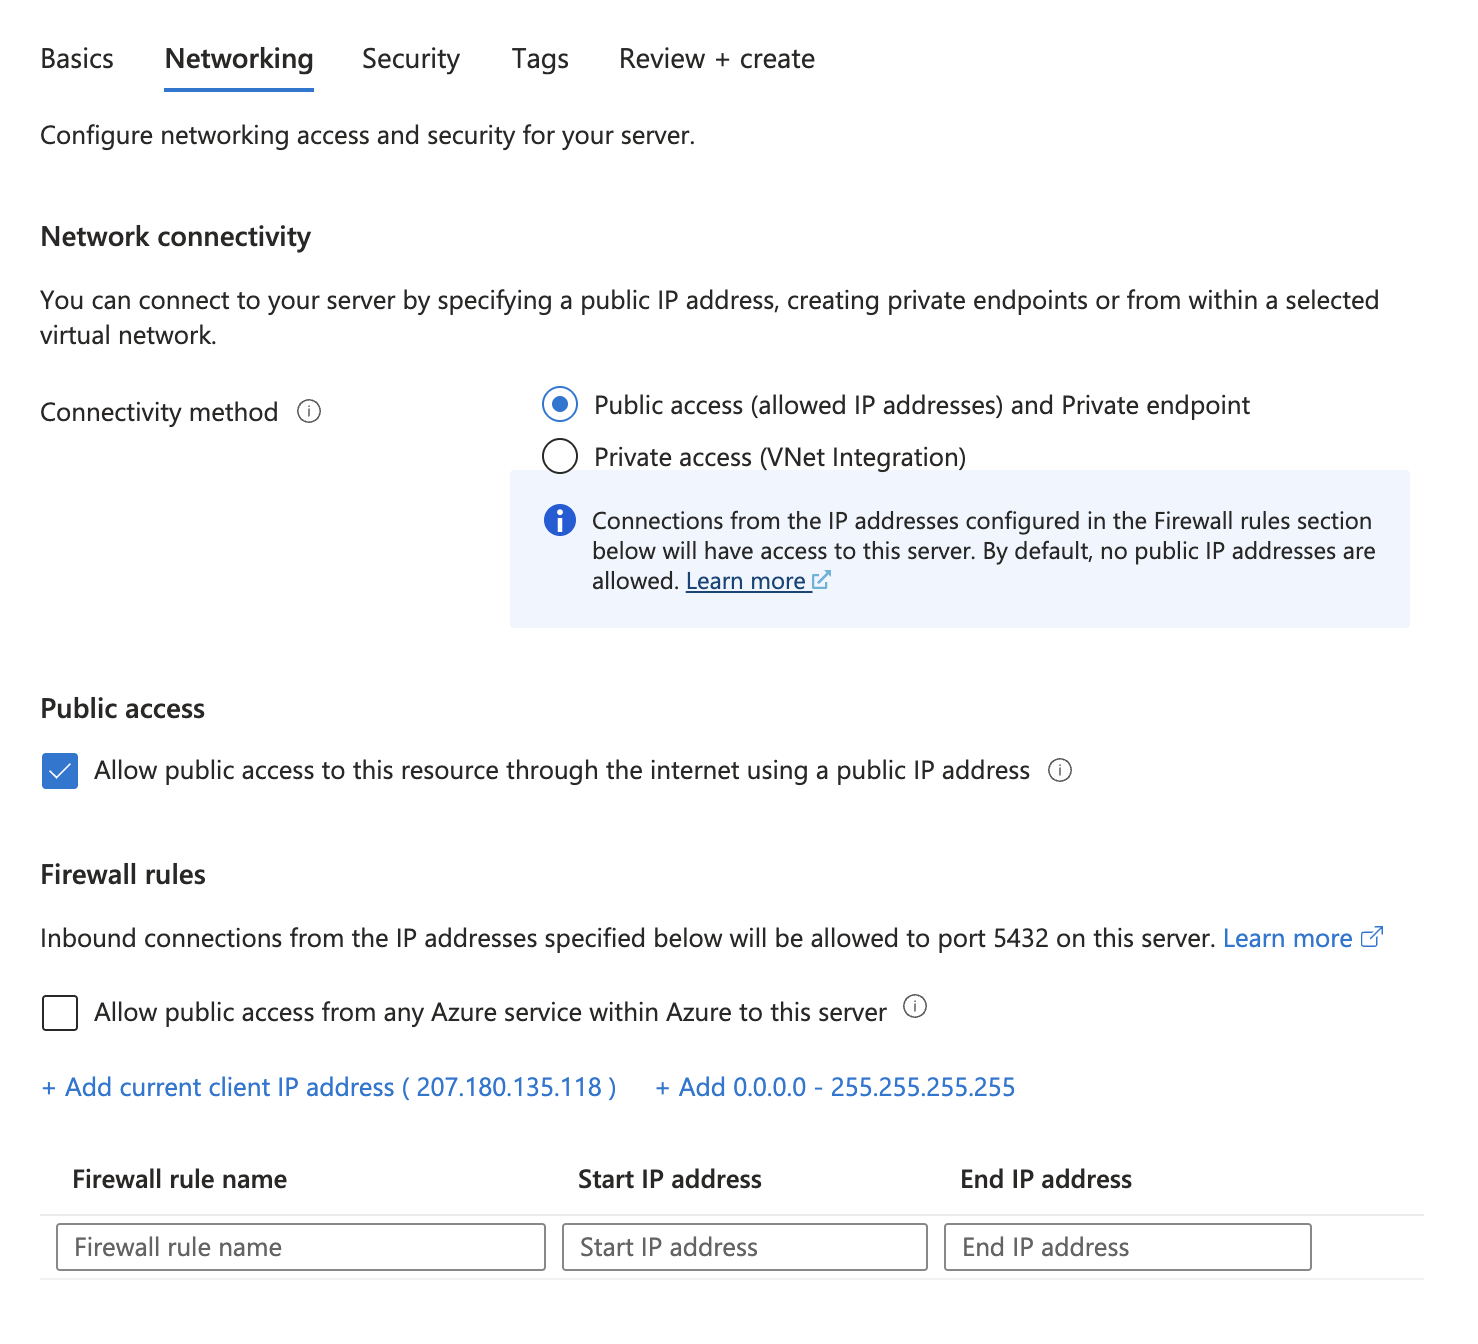
Set networking configuration to allow your self-hosted Instance to access this database:
- Option 1: Enable public access and add firewall rules for your AKS egress IPs
- Option 2: Set up private access via VNet Integration
-
Click Next to Security and leave default settings
-
Click Next to Tags and add any required tags
-
Review settings and click Create
For more details, reference the Azure documentation.
- Note your Endpoint after creation:
[server_name].postgres.database.azure.com
🎉 Congratulations! You've successfully set up a PostgreSQL Instance on Azure!
Next steps
Reach out to Ascend support to connect your Ascend Instance to PostgreSQL.