Set up a Snowflake Instance Store
This guide outlines the steps to set up an Ascend Instance Store with Snowflake.
Prerequisites
- Ascend Instance
- Snowflake account
- The ability to create Snowflake resources (may require elevated permissions for some steps)
- A Snowflake user with both SYSADMIN and SECURITYADMIN roles to run the setup scripts
Connect your Ascend Instance to Snowflake
You can leverage existing Snowflake resources, but if you're starting with a new Snowflake account, this section will guide you through the setup process step by step.
Follow along to use the provided scripts, which will automatically create the necessary resources for you.
You need to create a set of resources for the Ascend Instance Store. In Snowflake, you'll create the following:
- a User
- a Database
- a Schema
- a Warehouse
- a Role
If you don't manage the creation of new users and roles, reach out to your database administrator to create the Instance Store User and Role for you.
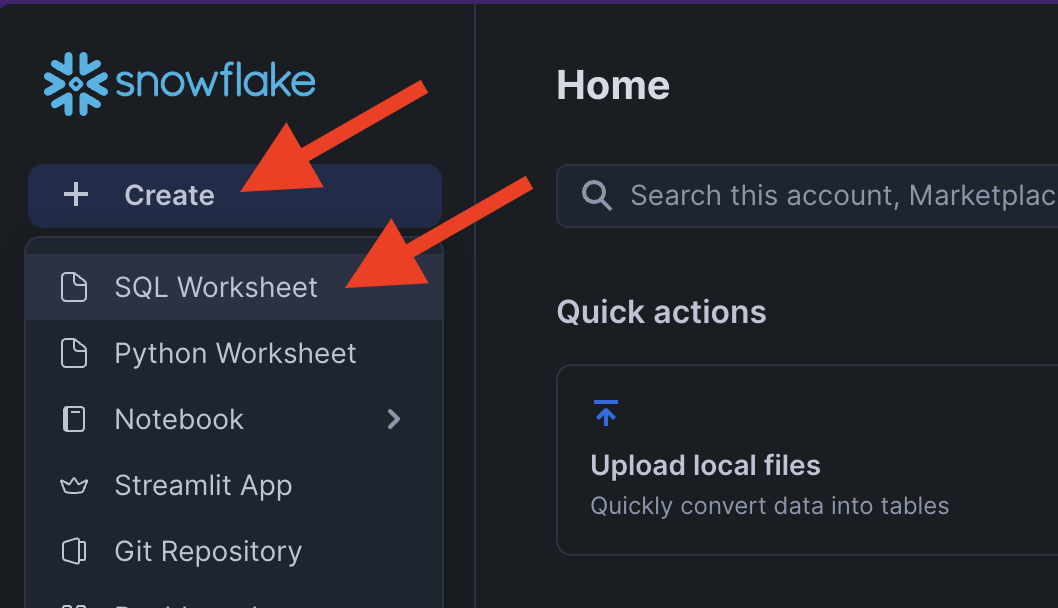
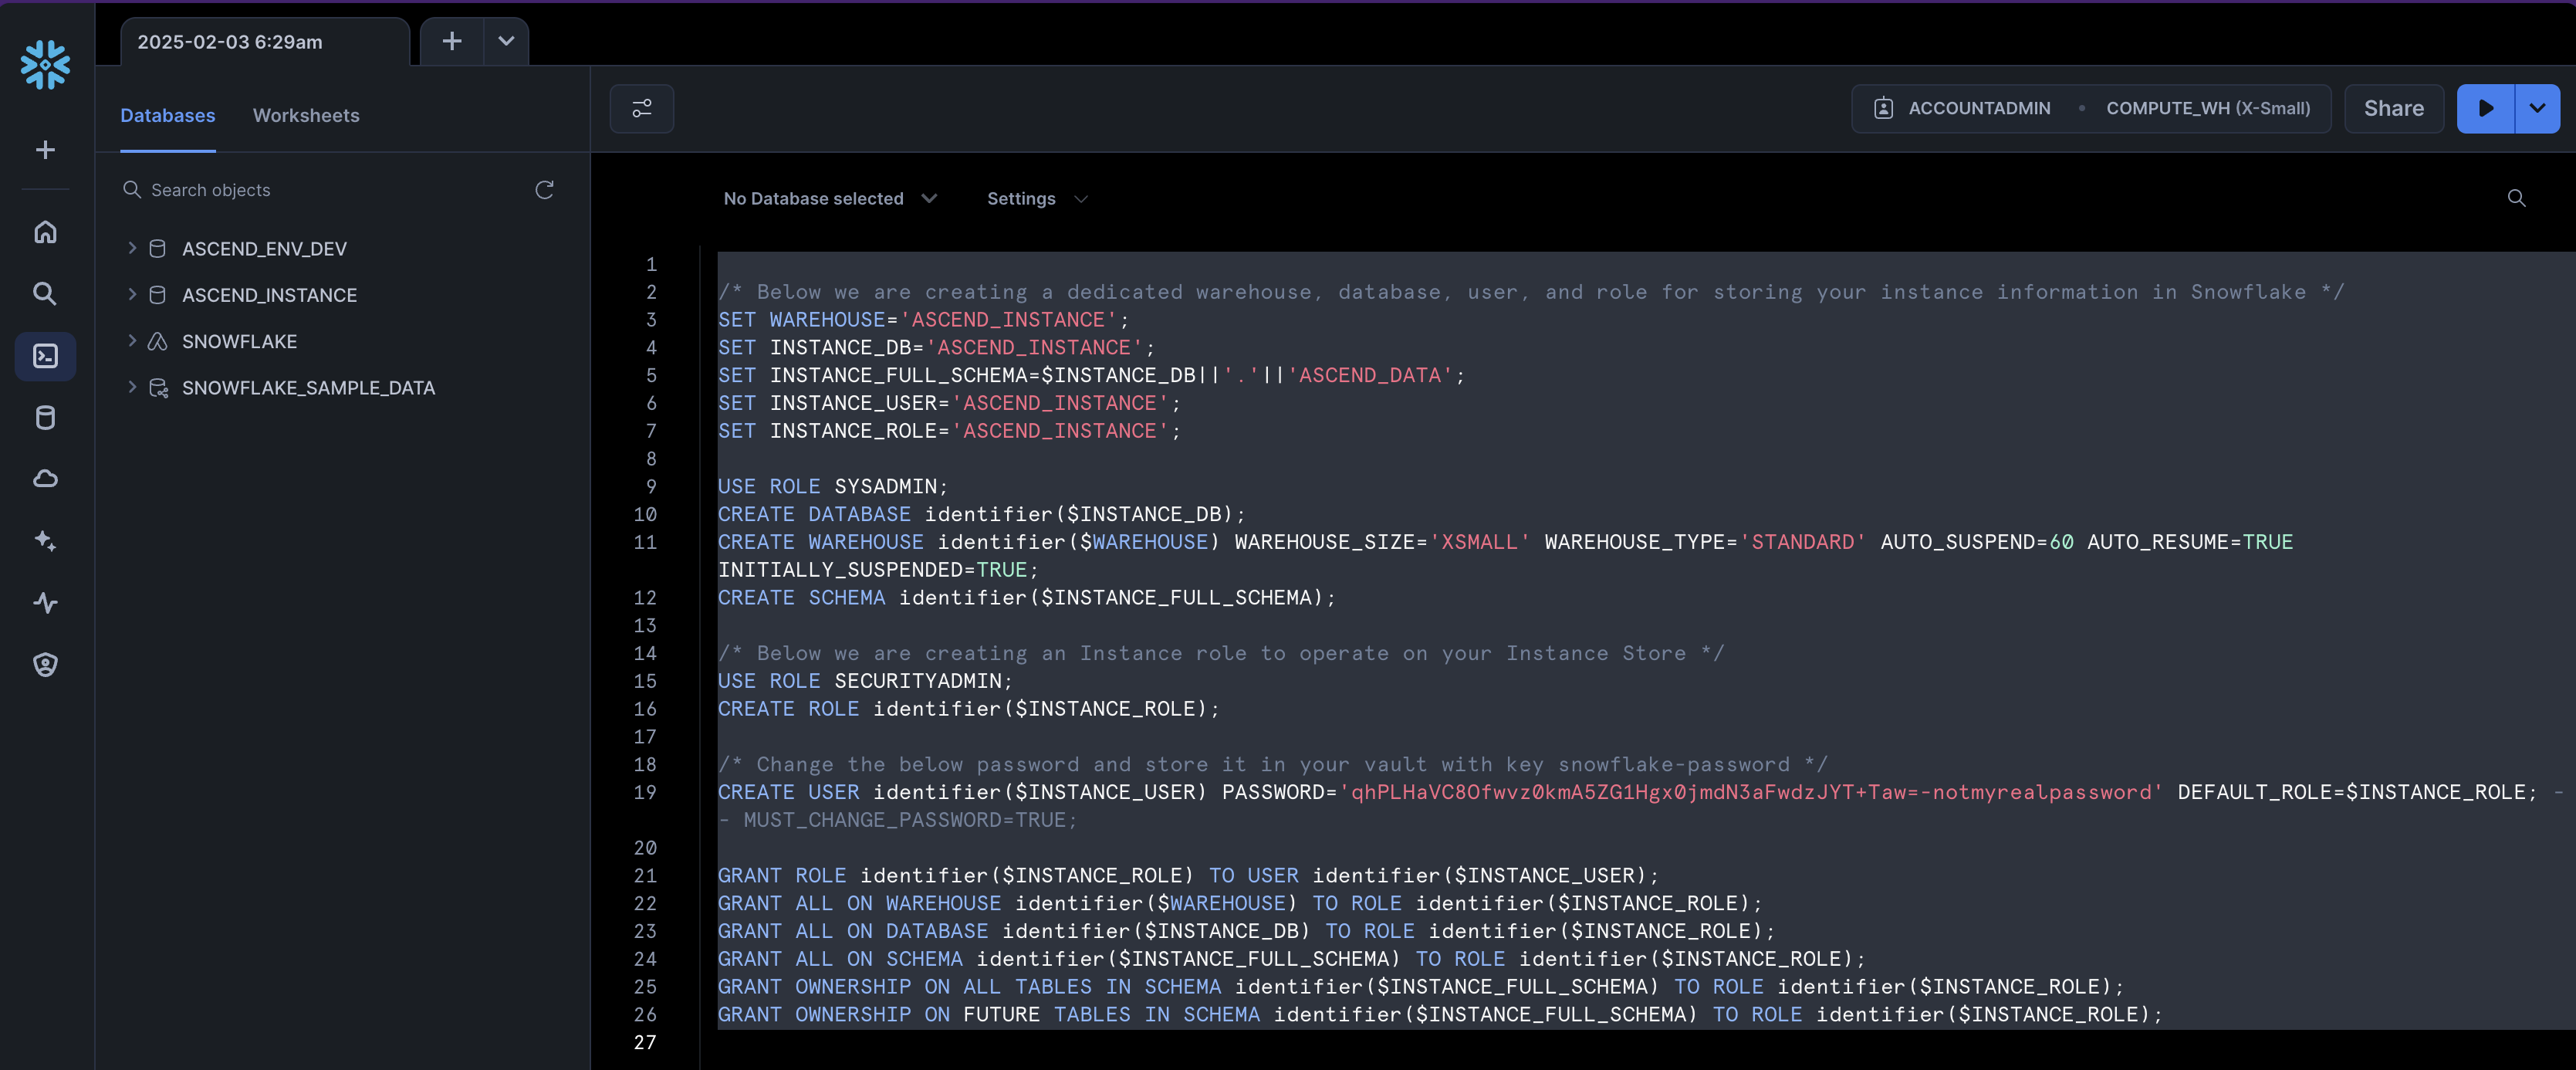
Start in the Snowflake UI and sign into the account you will use with Ascend. Click Create toward the top left of the screen and select SQL Worksheet. You'll run SQL commands to create the required Snowflake resources for Ascend.
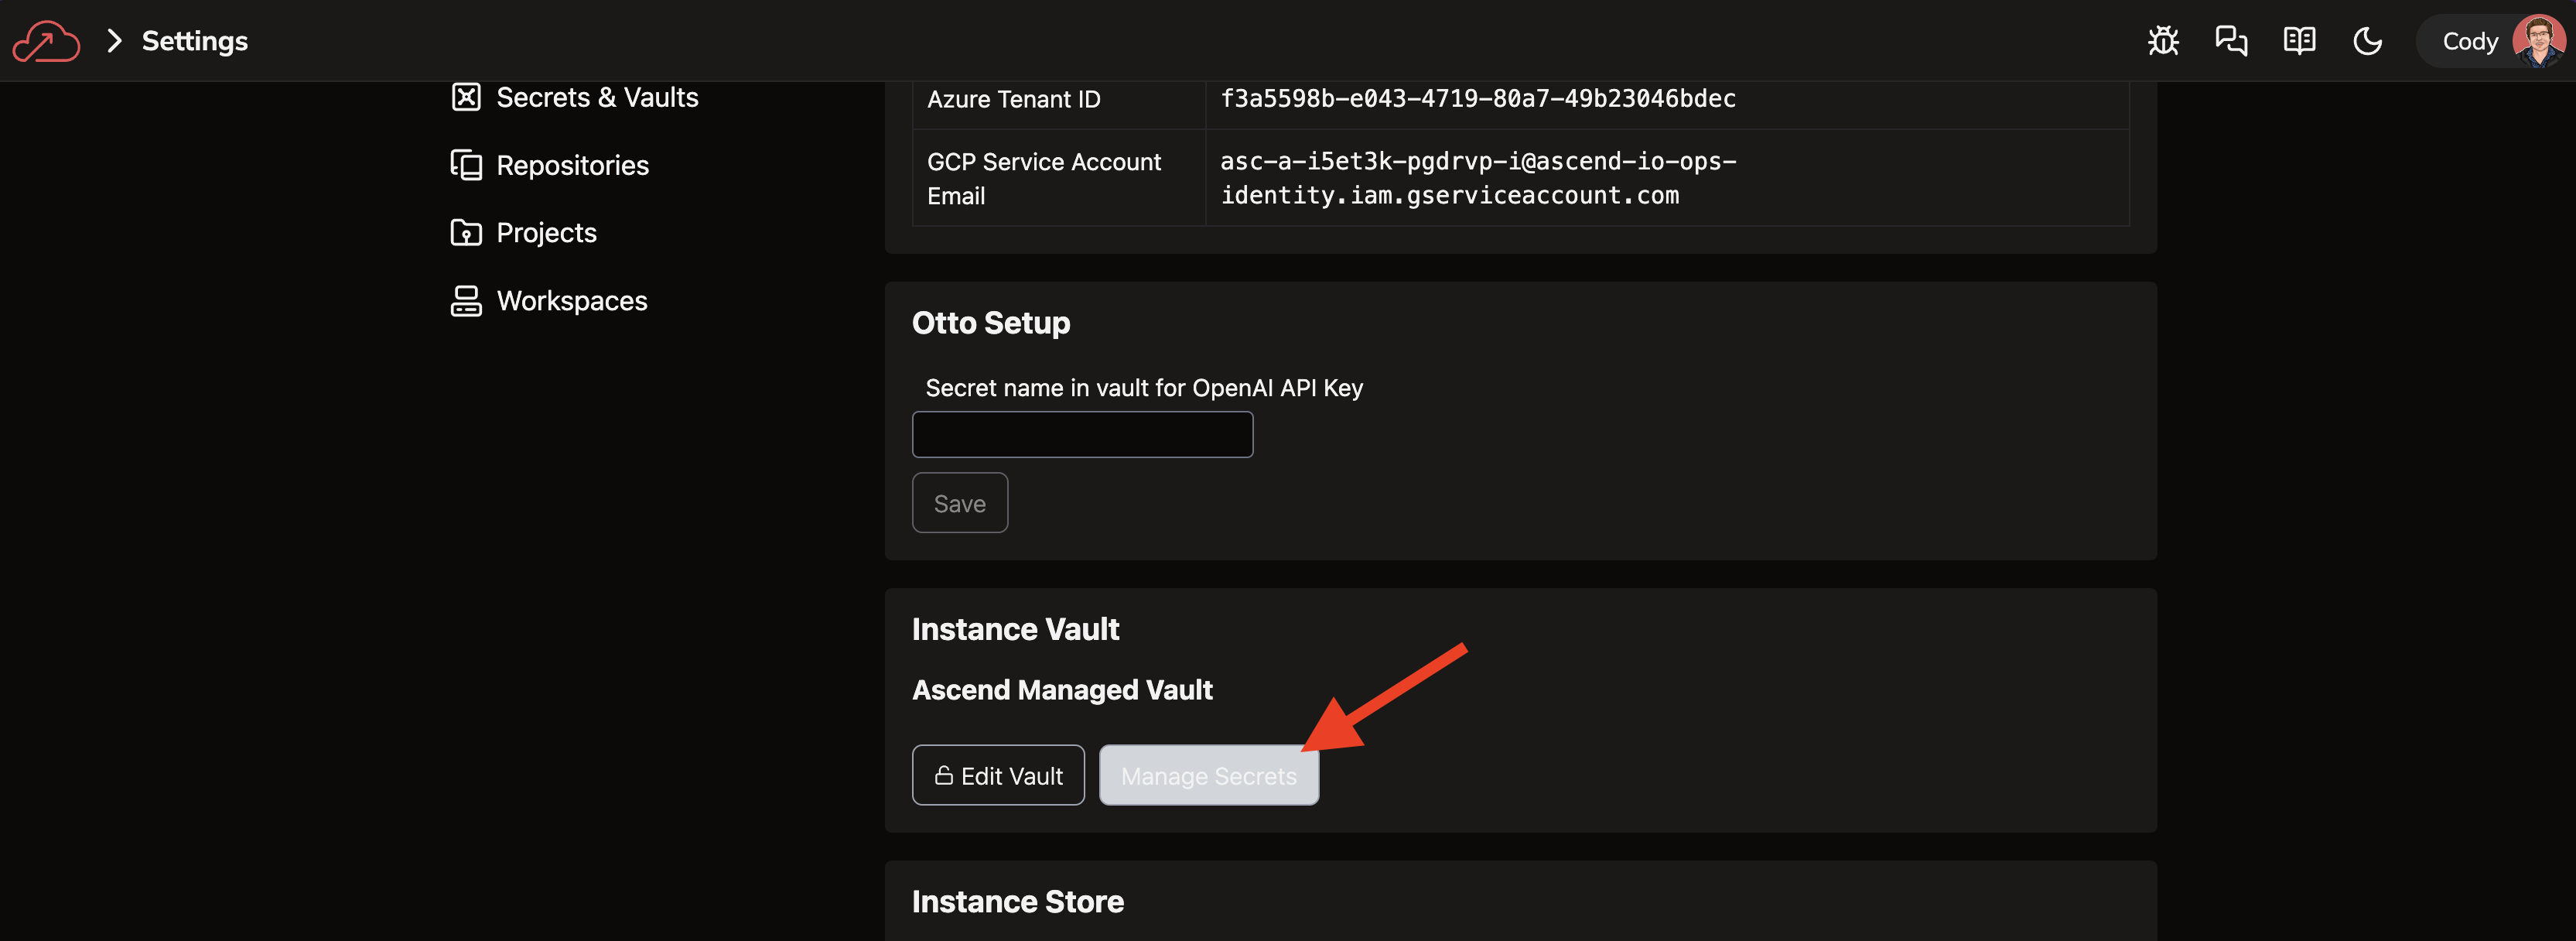
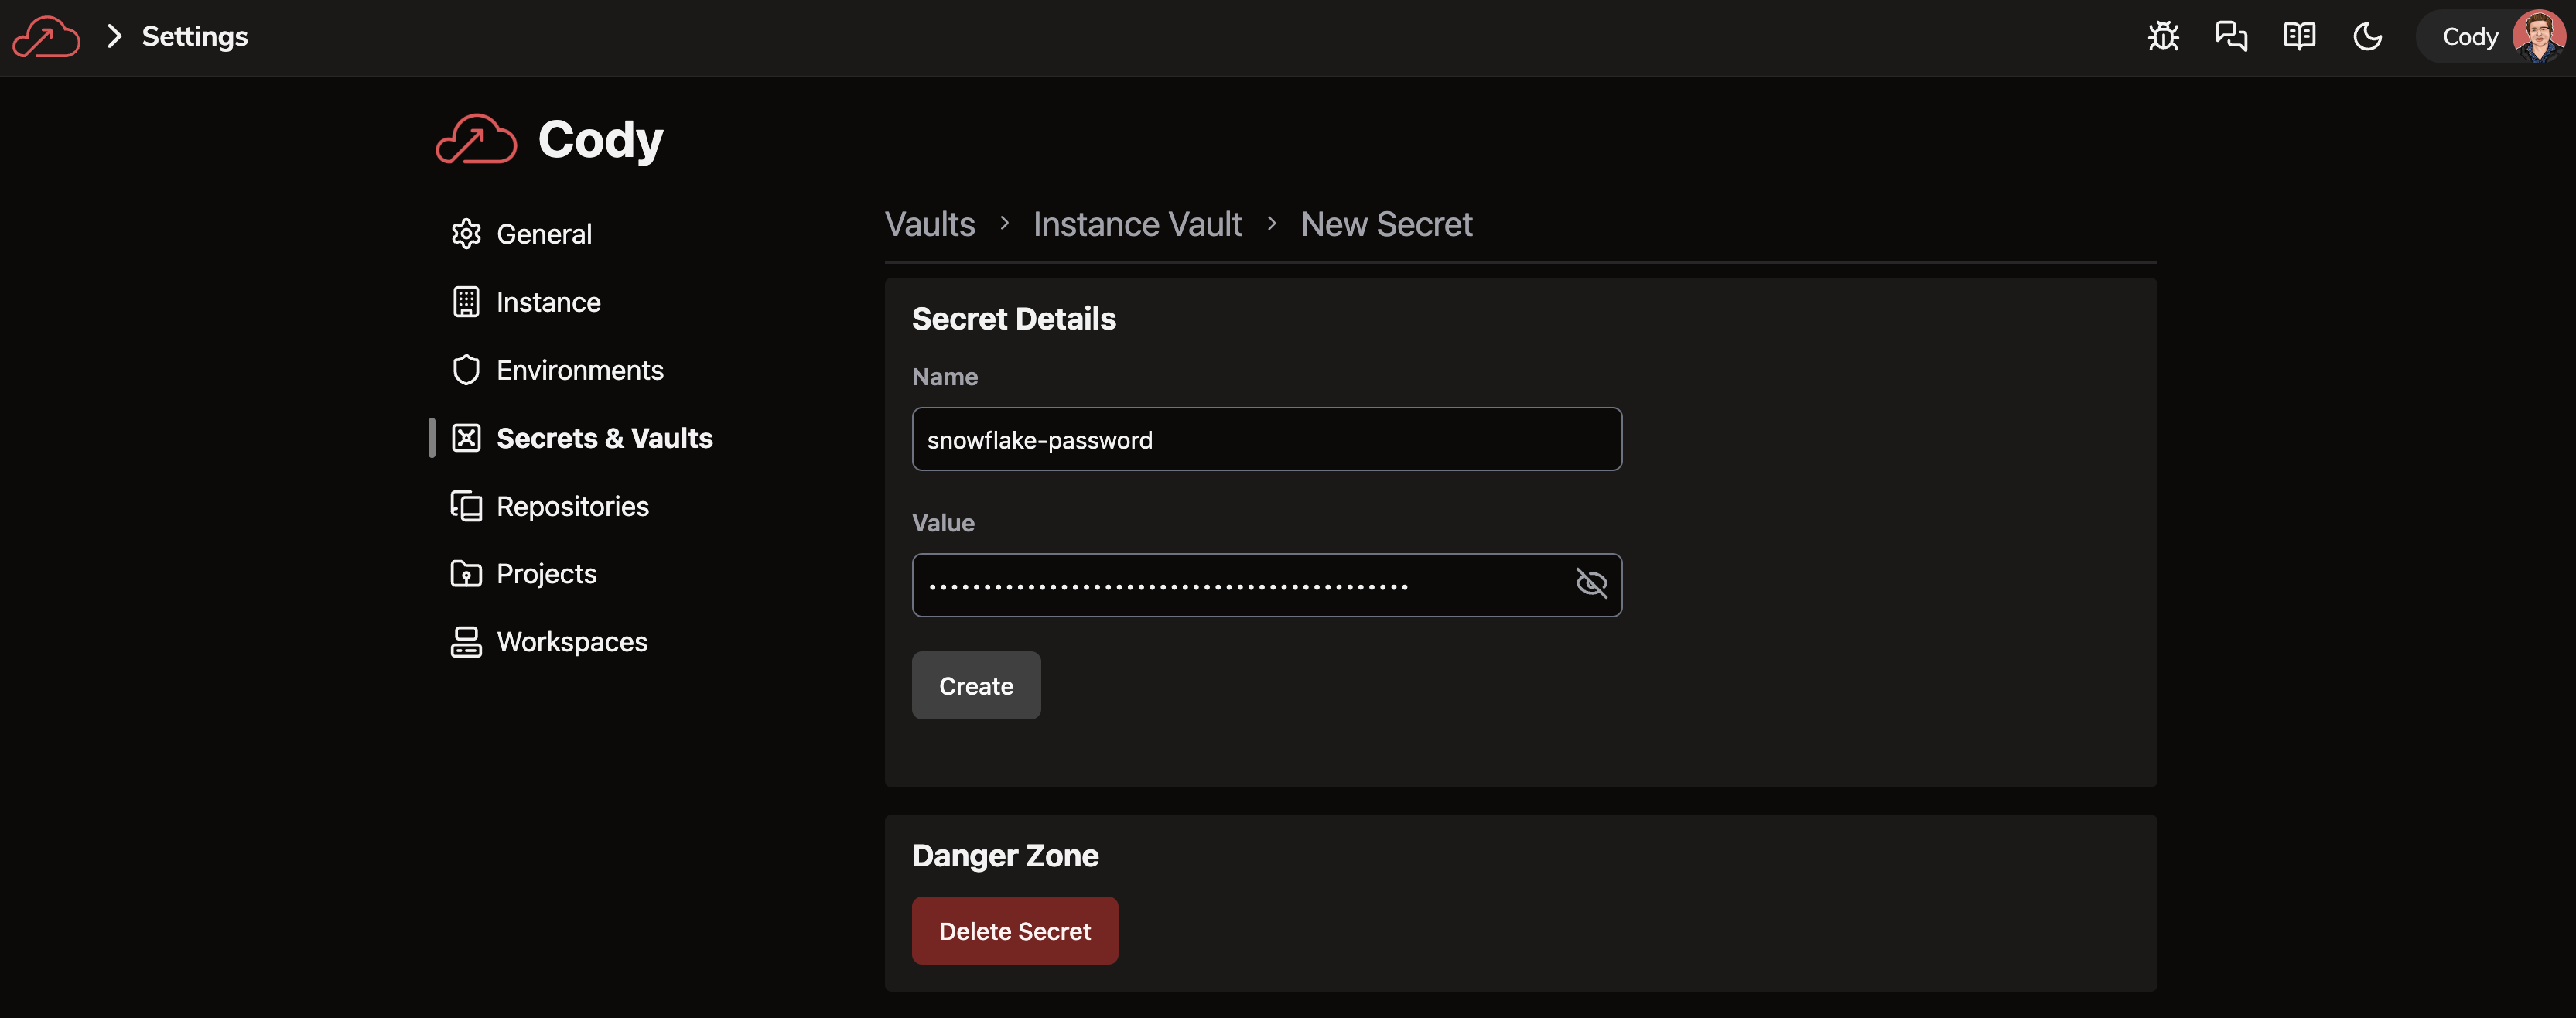
Now, navigate to the Ascend UI and click into Settings toward the top right of the screen. Navigate to the Instance settings. You'll need to store the password for the Snowflake user in the Instance Vault to allow Ascend to access Snowflake resources. Click Manage Secrets under the Instance Vault section and add a secret with the Snowflake user password.
For this quickstart, we'll use the secret name snowflake-password, although you can feel free to use any name you like.
Store the password you use here in order to set up Snowflake as an Ascend Data Plane.
Use a password manager to generate a secure password. On MacOS (or Linux) you can use openssl to generate a random password in your terminal as follows:
openssl rand -base64 32
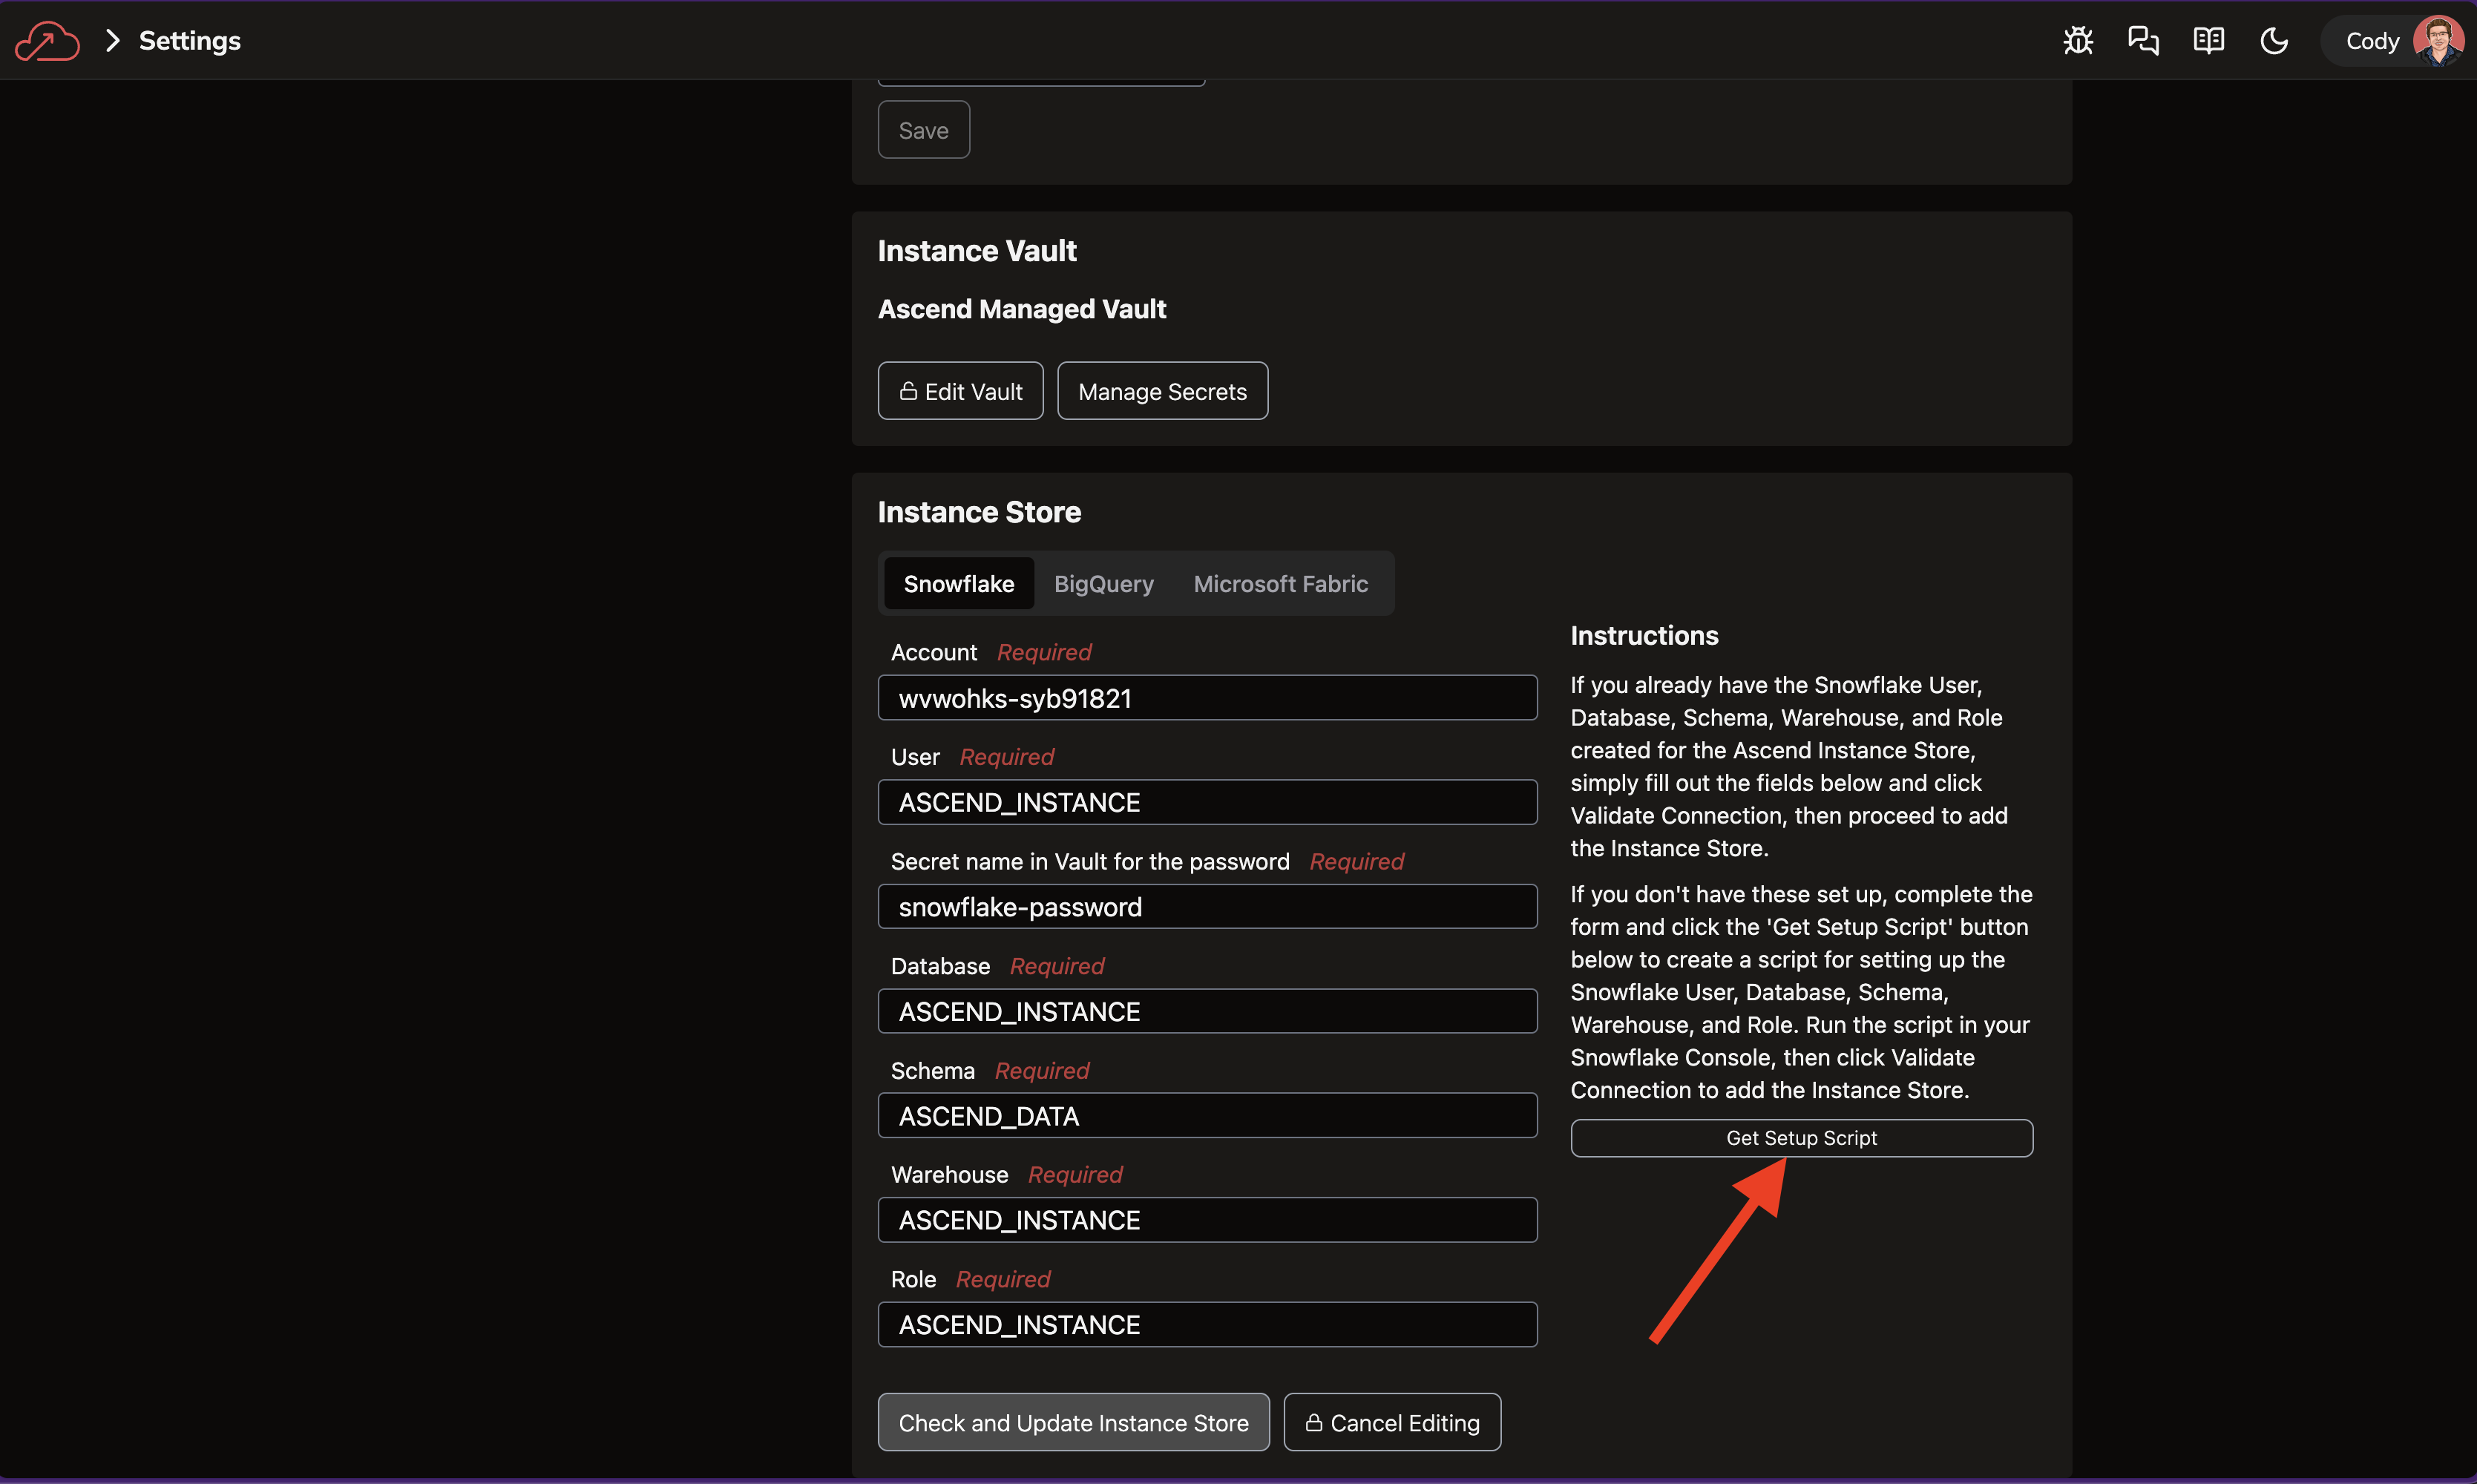
Head back to the Instance settings in the Ascend UI and scroll toward the bottom to Edit Instance Store. Select Snowflake and fill out the details. Then, click Get Setup Script. This will populate a SQL script using the values you entered.
Paste the script into the Snowflake SQL Worksheet, and make sure to update the password to match the value in your Instance Vault.
If you don't manage the creation of new users and roles, reach out to your database administrator and share this script with them to run.
Ensure that your administrator runs GRANT ALL on the Ascend-managed Instance Store database, ASCEND_INSTANCE.
The password is not filled in for you in the script. After copying it to the Snowflake UI, ensure you update the password with the secret value you used above.
You can run the entire script all at once or execute each line individually to better understand the purpose of each command.
Now that you have the necessary resources, return to the Ascend UI and click Check and Update Instance Store.

🎉 Congratulations! Your Ascend Instance is now connected to Snowflake.