Build custom DataOps agents
In this hands-on lab, you'll build custom agents in the Ascend platform using prompt engineering best practices to experience Agentic Data Engineering in action.
Join the Ascend community Slack to follow along with us in the #ade-lab-2025-10-29 channel.

Start your free trial
- Sign up for your free trial so you can start developing custom agents in Ascend
- Accept your email invite from Team Ascend

OpenAI API key
This guide explains how to set up your OpenAI API key in Ascend.
Prerequisites
Add OpenAI API key to your Ascend Instance
- In the top-right corner of your Ascend Instance, click on your profile picture and select Settings
- Navigate to the AI & models section
- Scroll down to the OpenAI section and click the
+button on the right to add a new API key - Name the key
OPENAI_API_KEYand paste your OpenAI API key value
- Click Verify to ensure your key is valid, then click Save to store it securely
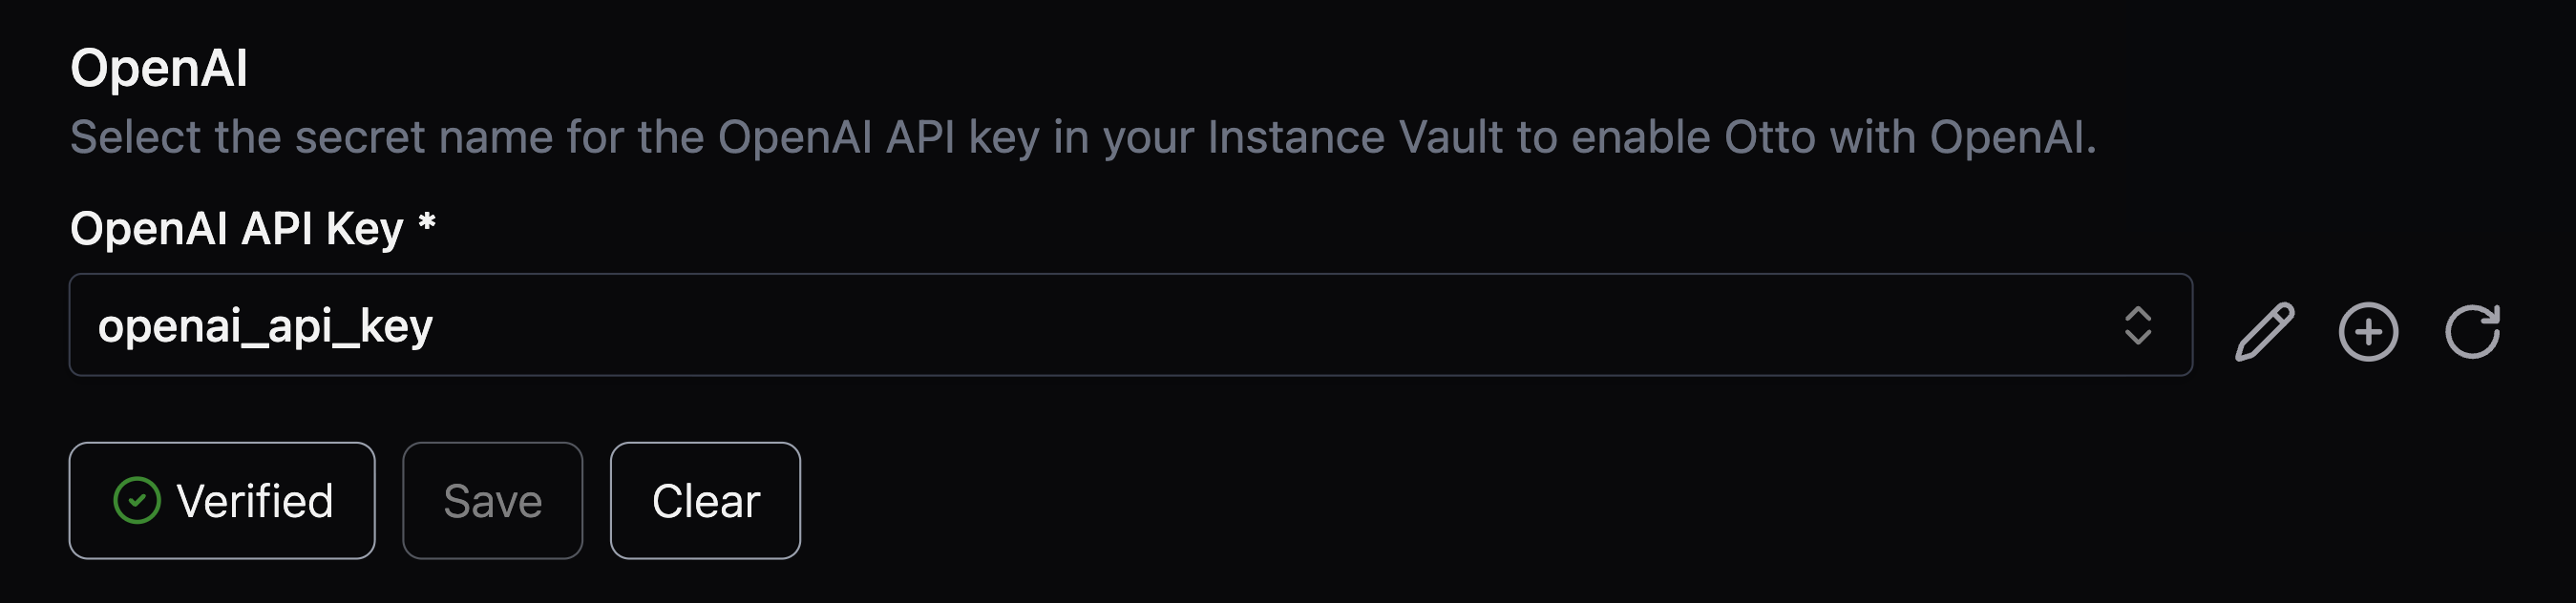
🎉 Congratulations! You've set up your OpenAI API key in Ascend. You're now ready to use agentic features in Ascend, including Otto!
Agentic setup
Time to start building! In this section, Otto will run a Flow (pipeline), create a Code Reviewer agent, and provide some less-than-ideal SQL code to test your agent.
-
From the Ascend homepage, select your Workspace
tipThe Workspace name matches your first name.
-
Exit the platform and Workspace tours when they appear
noteFeel free to return to the tour later; for now, you have building to do!
-
Click the sparkles ✨ icon in the top right to launch Otto's chat interface
-
Enable agent mode by toggling the infinity (∞) icon at the bottom of the Otto sidebar

-
Switch your LLM from Claude to GPT 4.1 using the model selector
-
Let Otto know why you're here by typing this prompt (or something along those lines) into the chat:
I'm here for the lab -
When Otto asks if you're ready to start, prompt it with the following (or something along those lines):
Go for it! -
As Otto completes each task, prompt it to continue with the next step (or something along those lines):
Next stepOtto will run the
salesFlow and create the necessary files.noteLLMs don't always do what we expect, and that's perfectly normal! These moments provide valuable opportunities to refine your prompt engineering skills and guide the model in the right direction.
-
When Otto finishes, you should see two new files:
otto/agents/code-reviewer.mdandflows/sales/components/lbtm_classify_customers.sql
Follow along with us for a deep dive into the Otto prompts concept guide.
Test your agent
Let's see if your code reviewer agent can clean up this SQL example!
-
Click
Ottoat the bottom of the chat panel and choose Code Reviewer to invoke your custom agent
-
Copy the following prompt and paste it into the chat:
Review the code in lbtm_classify_customers.sql -
If Otto simply describes the changes it would make (instead of actually making the changes), copy the following prompt and paste it into the chat:
Make those changes in lbtm_calculate_discount.py and lbtm_classify_customers.sql -
Click
Accept allto accept the changes Otto made to improve code style in this SQL Component -
Test the improved pipeline by clicking Run in the top right of the code editor
If your Flow runs successfully, you're ready to move to the next section! If not, use the Otto error explainer to understand what's wrong and prompt Otto to fix it.
Deploy your agent and improved code
Now that you've tested your agents and improved your code, it's time to deploy to Production.
-
Navigate to the Source control panel on the left side

-
Click Open Git log & actions
-
Click Merge to Deployment near the top right of the window
-
Select the Production Deployment
noteIn a typical DataOps lifecycle, you would promote through Development and Staging before pushing to Production. However, because Developer Plan Instances have only one Deployment, we'll use a simplified process.
🎉 Congratulations! You just built, tested, and deployed a custom agent in Ascend using DataOps best practices.